Overview
The cxconnect.ai App for Zendesk provides real-time translation capabilities for customer support conversations, enabling seamless communication between agents and customers who speak different languages. The app operates through three distinct interfaces within Zendesk, each serving specific translation needs.Application Interfaces
The cxconnect.ai app provides three different interfaces for translation:Sidebar - Conversation Translation Display
 Purpose: View translated conversation history and manage language settings
Location: Right sidebar of the ticket interface
Features:
Purpose: View translated conversation history and manage language settings
Location: Right sidebar of the ticket interface
Features:
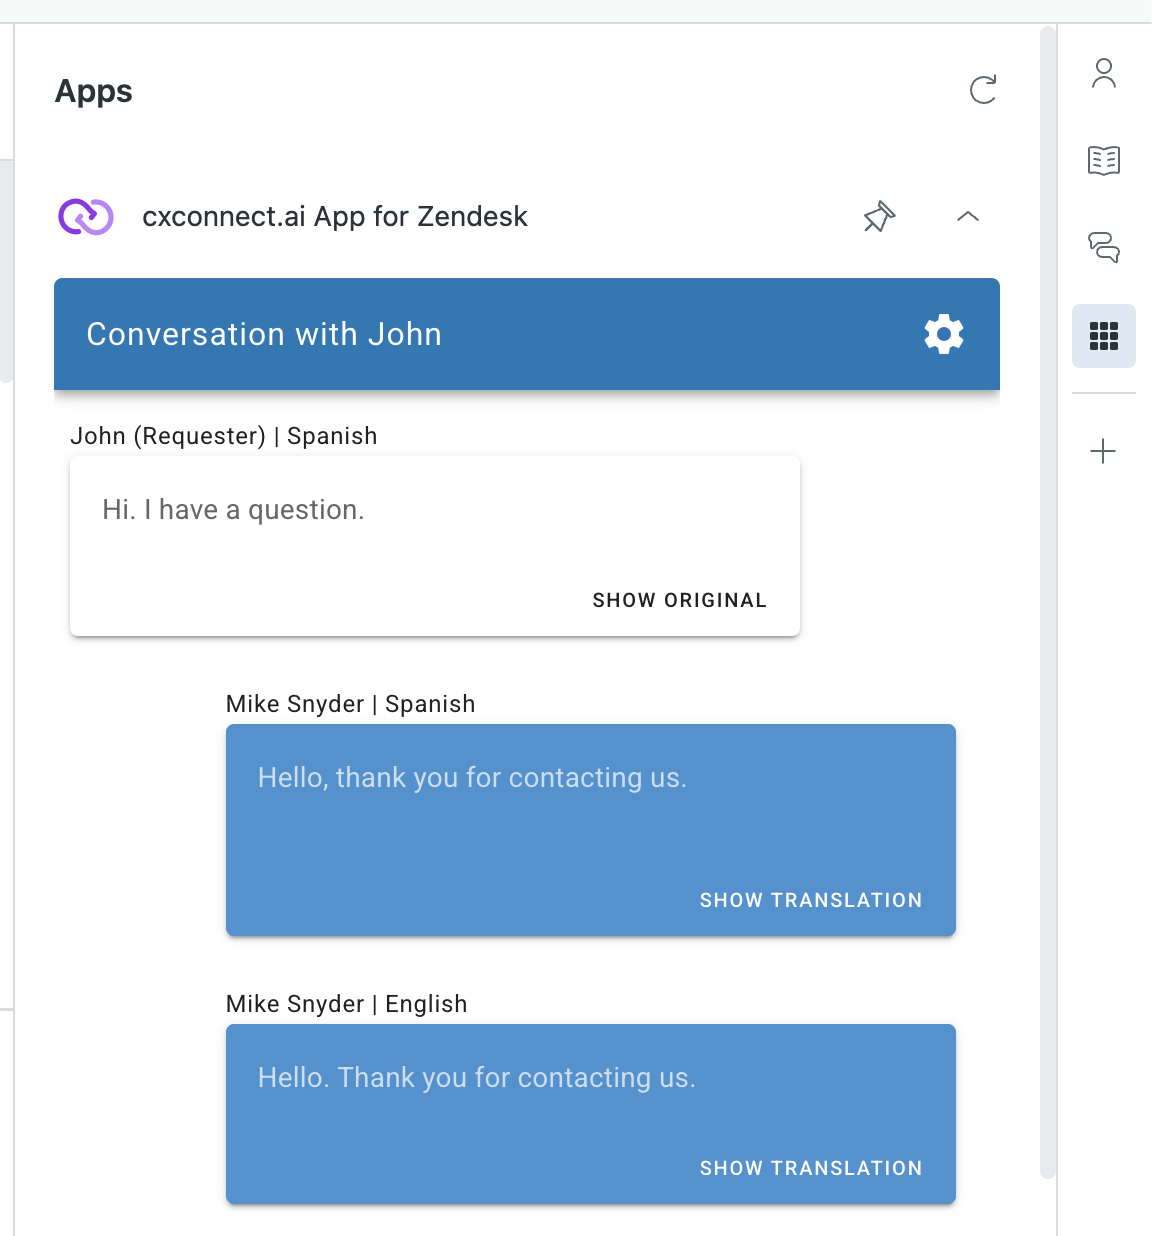
- Displays the ongoing translated conversation
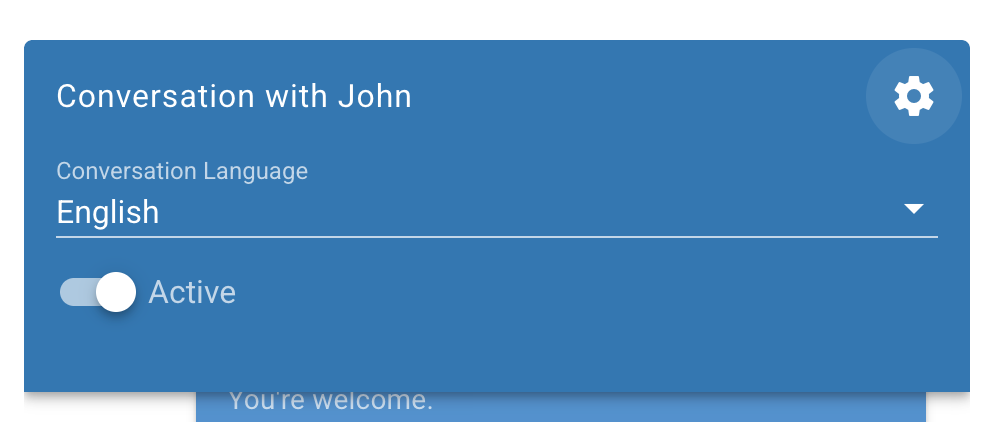
- Shows language detection and selection options
- Provides conversation language override when auto-detection fails
- Toggle between original and translated message views
- Open a ticket/conversation
- Open the cxconnect.ai application panel in the sidebar
- Change the Conversation Language dropdown to the customer’s language
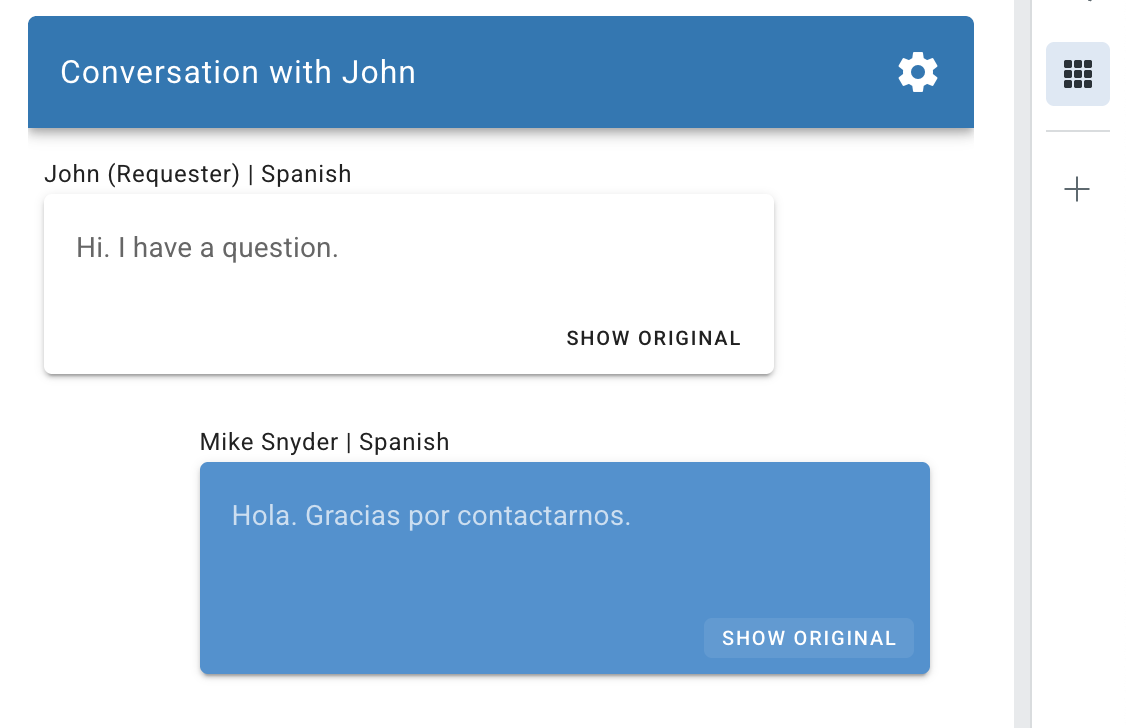
- View translated messages with language indicators (e.g., “John (Requester) | Spanish”)
- Use SHOW ORIGINAL / SHOW TRANSLATION buttons to toggle between versions
Editor - Outgoing Message Translation
Purpose: Translate agent responses before sending Location: Below the text input area (look for the cxconnect icon)- Translates text that agents are about to send
- Behavior depends on administrative “Auto Translate” configuration setting
- Integrates directly with the ticket response workflow
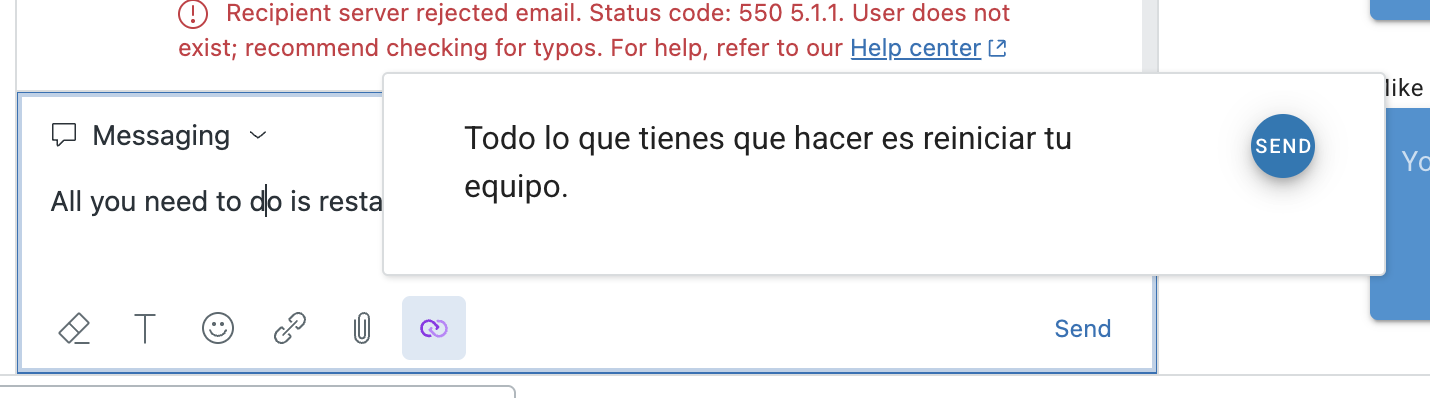
- Type your response in the ticket editor
- Click the cxconnect icon below the text input area
- If Auto Translate is enabled:
- Text is automatically translated and sent to the customer
- If Auto Translate is disabled:
- Text is translated and shown as a preview
- Review the translation before deciding to send
Top Bar - Interpreter (One-off Translations)
 Purpose: Standalone translation tool for any text between any languages
Location: Top navigation bar of Zendesk
Features:
Purpose: Standalone translation tool for any text between any languages
Location: Top navigation bar of Zendesk
Features:
- Independent translation tool not tied to specific conversations
- Translate between any supported language pairs
- Copy translated text for use anywhere
- Quick access for ad-hoc translation needs
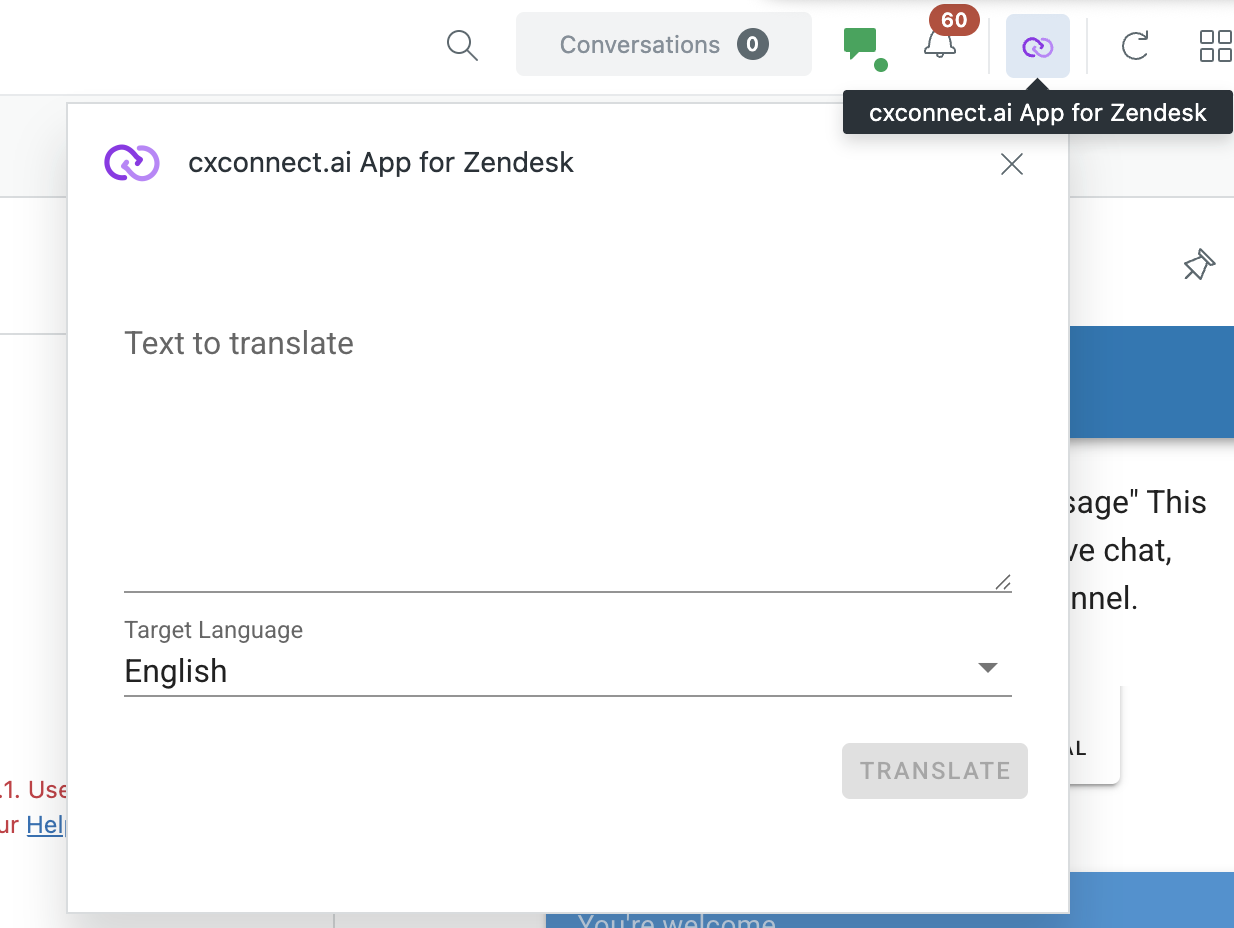
- Click the cxconnect.ai App for Zendesk icon in the top bar
- In the interpreter dialog:
- Enter or paste text in the Text to translate field
- Select your Target Language from the dropdown
- Click TRANSLATE
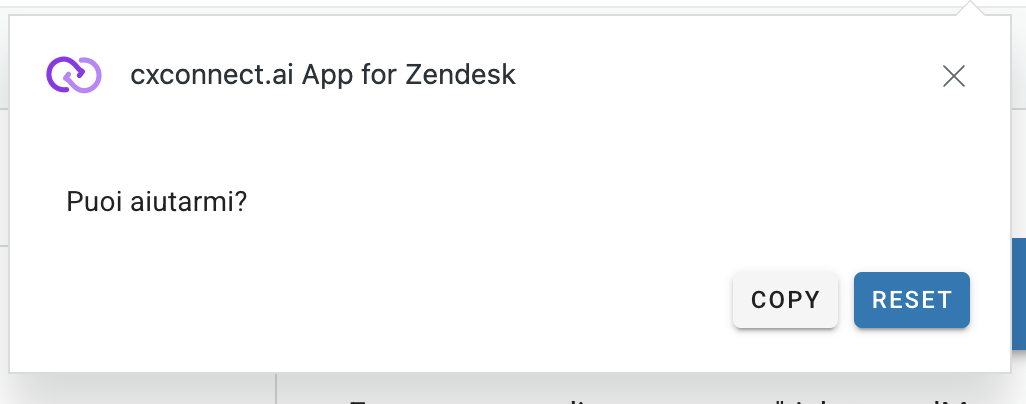
- Use COPY to copy the translated text for use elsewhere
- Use RESET to clear the fields and start over
Workflow Examples
Handling a New Multilingual Ticket
-
Initial Setup (Sidebar):
- Open the ticket
- If customer language was not identified, set the conversation language in the sidebar
-
Reading Customer Messages (Sidebar):
- View automatically translated customer messages
- Use “SHOW ORIGINAL” if you need to see the exact wording
-
Responding to Customer (Ticket Editor):
- Type your response in English (or your preferred language)
- Click the cxconnect.ai icon to translate your response
- Response is sent in the customer’s language
-
Ad-hoc Translations (Top Bar):
- Use the interpreter for translating reference materials
- Translate snippets from other sources
- Quick translations not related to the current ticket
Quick Translation Lookup
Use the Top Bar Interpreter when you need to:- Translate text from external sources
- Convert phrases for training or reference
- Translate content not directly related to a ticket
- Get quick translations without opening a specific conversation
Features and Benefits
Real-time Conversation Translation (Sidebar)
- Instant translation of incoming customer messages
- Maintains conversation context and history
- Clear language labeling for all participants
Contextual Response Translation (Ticket Editor)
- Seamlessly integrates with your normal response workflow
- Respects your Auto Translate preference settings
- Ensures responses are in the customer’s language
Flexible Interpretation Tool (Top Bar)
- Independent translation capability
- Supports any-to-any language translation
- Perfect for research and reference translations
Troubleshooting
Common Issues
“Please set the conversation language in the sidebar to begin translation”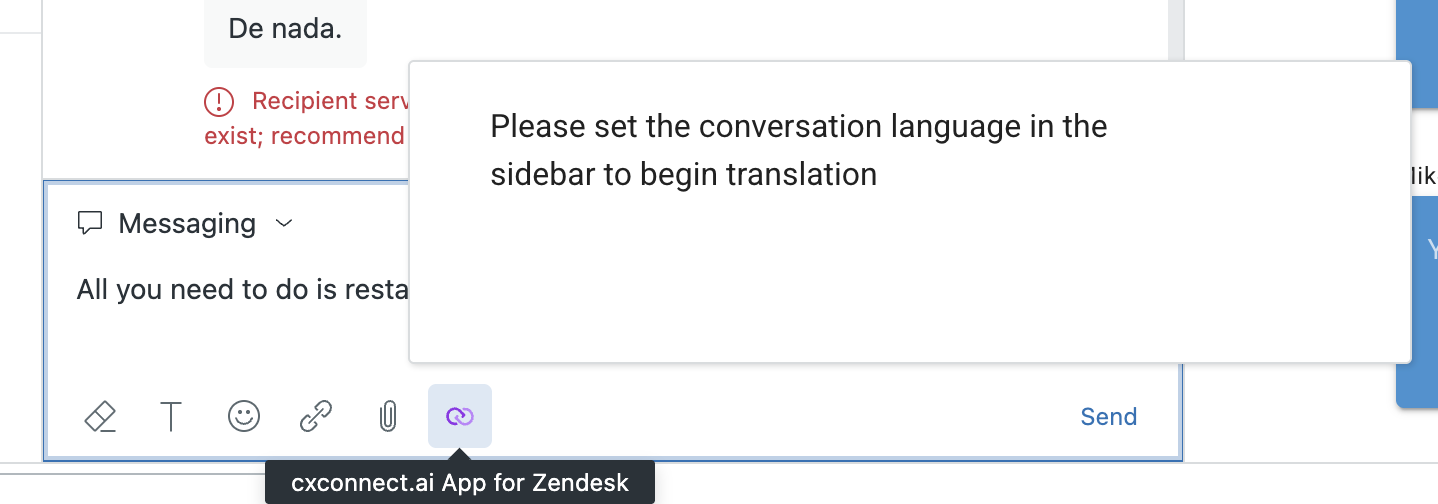
- Solution: Go to the sidebar and select the appropriate language from the dropdown
- Check with your Zendesk administrator to make sure you have appropriate permissions
- Check that the cxconnect.ai App for Zendesk dropdown is expanded
- Verify the agent is online and accepting messages
- Ensure the customer has sent messages
- Verify the cxconnect.ai icon is visible below the text input
- Ensure you have text selected or entered in the editor
- Have your Zendesk administrator check your API configuration
- Have your Zendesk administrator verify cxconnect.ai API key configuration
- Try refreshing the browser
Support
For technical support, feature requests, or questions about the cxconnect.ai App for Zendesk:- Contact your Zendesk administrator
- Reach out to cxconnect.ai support through the official channels
This guide covers the three main interfaces of the cxconnect.ai translation app. Features and interface elements may vary based on your app version and Zendesk configuration.