Overview
The Salesforce Connector automatically syncs your service cases and conversation data from Salesforce Service Cloud to cxconnect.ai.What Data is Synced
The connector will sync the following information from your Salesforce account:- Cases: Service cases including subject, description, status, and priority
- Conversations: Messaging conversation details from Salesforce Messaging
- Messages: Individual messages within each conversation
Prerequisites
Before you begin, make sure you have:- Administrator access to your Salesforce account
This connector requires some technical setup in Salesforce. If you need assistance, please reach out to our support team.
Required Information
You’ll need to provide the following when setting up the connector:Setup Instructions
Step 1: Create Connected App in Salesforce
First, you’ll create a Connected App in Salesforce to generate the Client ID. We’ll use this Client ID to generate your certificate.1. Log in to Salesforce as an administrator
2. Go to Setup > External Client App Manager
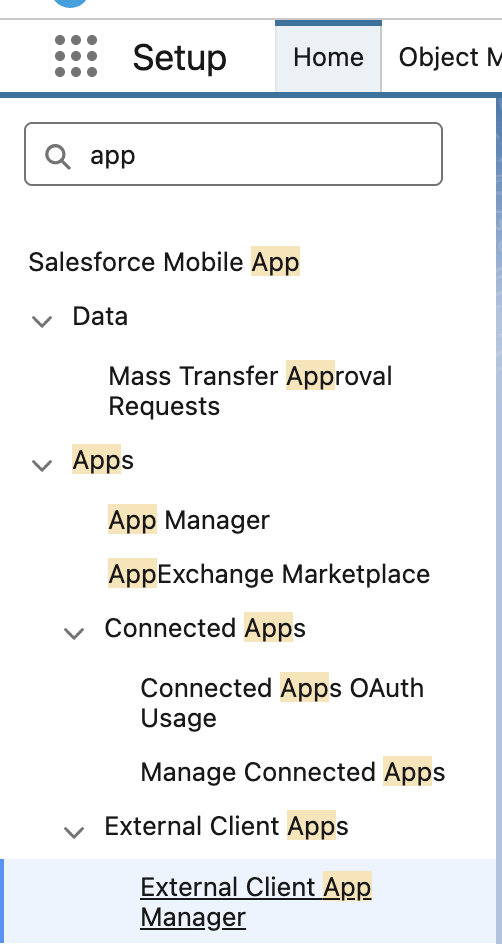
3. Click New External Client App

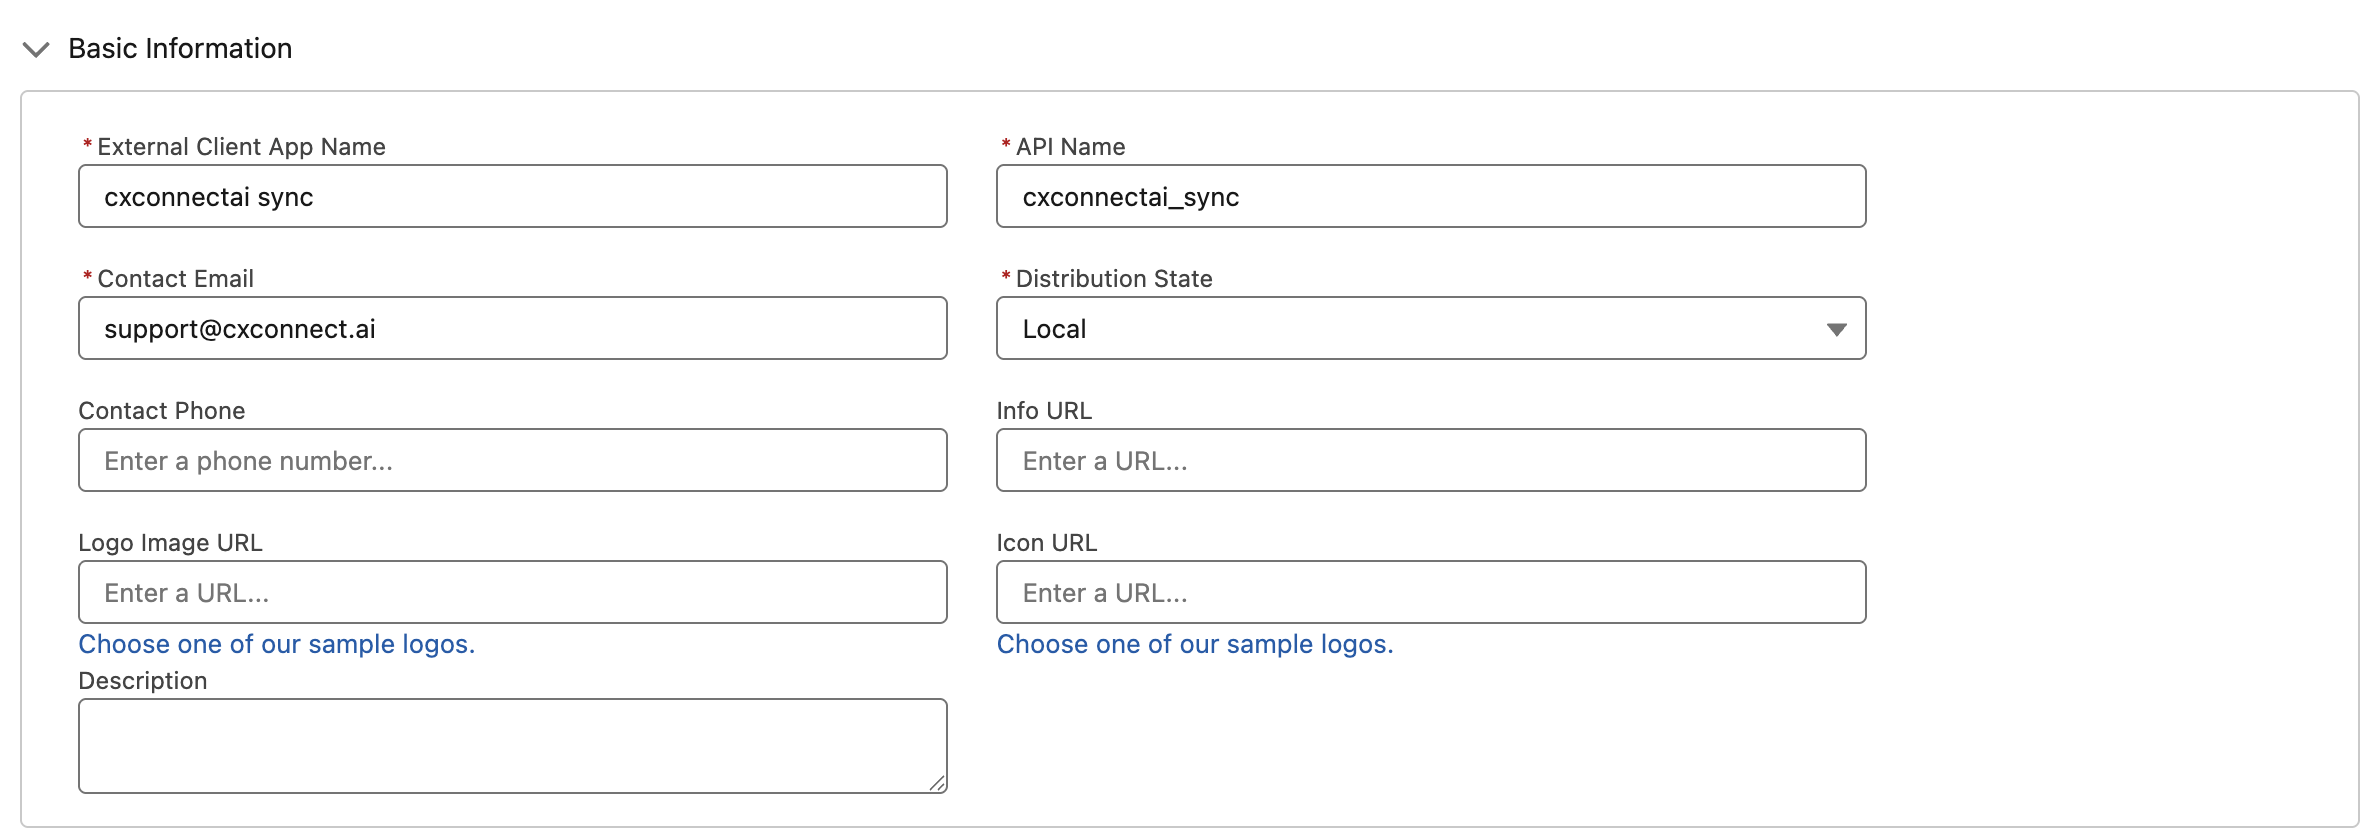
4. Fill in the details under Basic Information:
- App Name:
cxconnectai Sync - Contact Email: Your email address
- Distribution State: Local
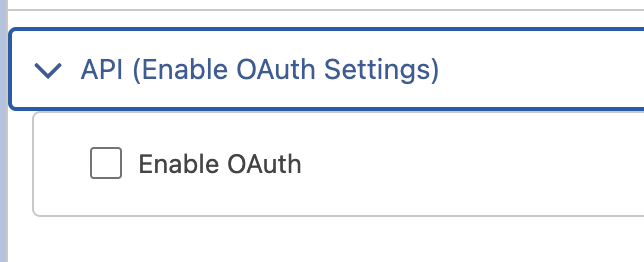
5. Under API (Enable OAuth Settings):
- Check Enable OAuth
- Callback URL:
- For Production Enter:
https://api.cxconnect.ai/cortex - For Sandbox Enter:
https://test.api.cxconnect.ai/cortex
- For Production Enter:
- Select these OAuth scopes:
- Full access (full)
- Perform requests at any time (refresh_token, offline_access)
- Access the Salesforce API Platform (sfap_api)
- Access Interaction API resources (interaction_api)
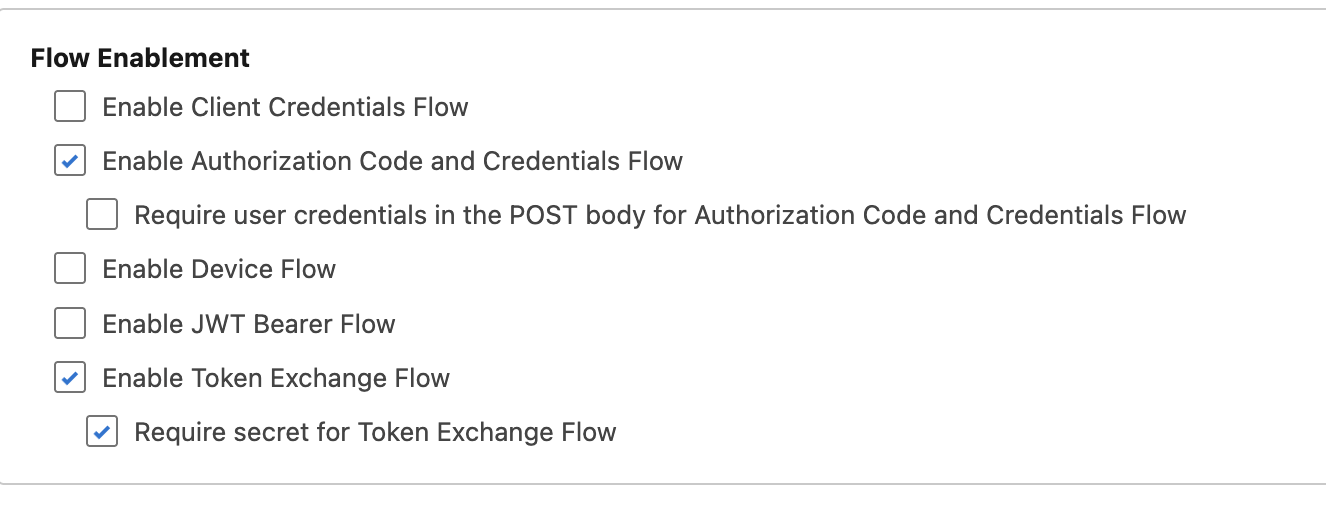
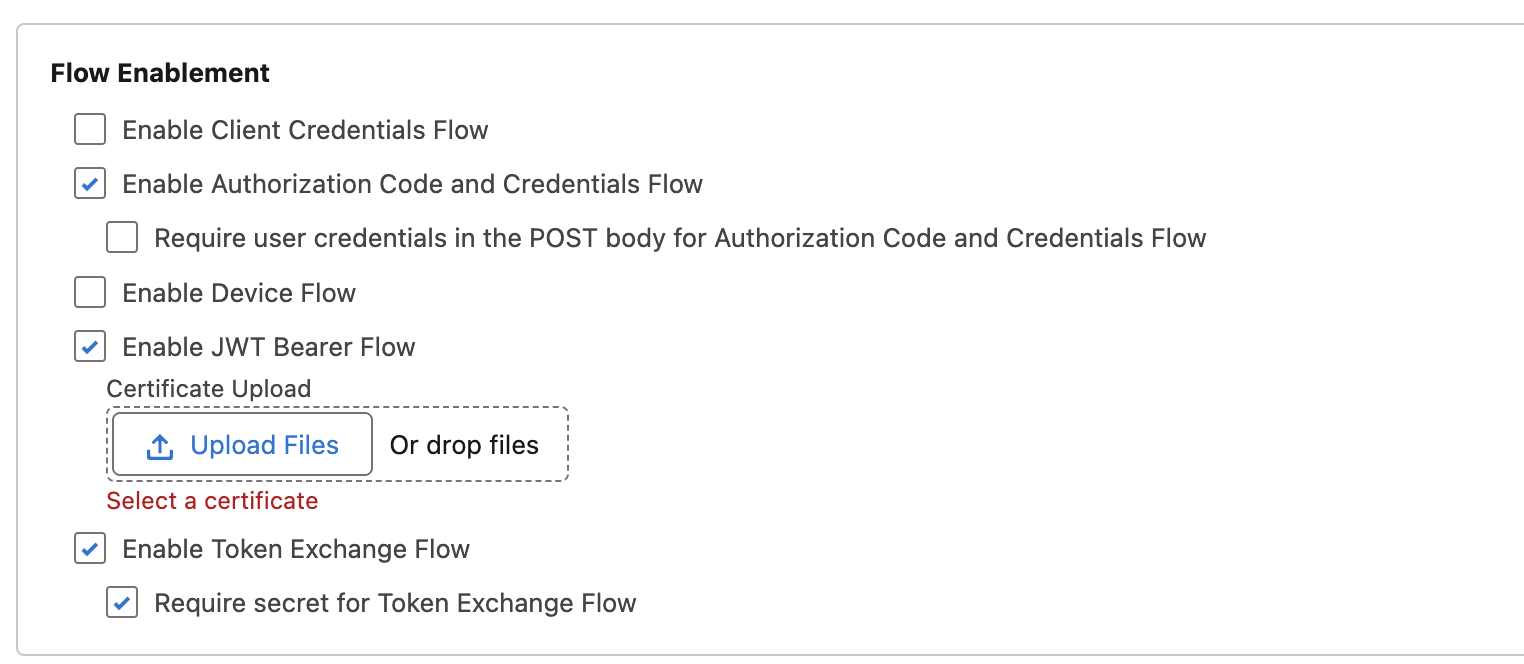
6. Under Flow Enablement:
- Select the following:
7. Under Security:
- Assure the following are selected:

8. Click Create
9. Back under Settings > OAuth Settings:
- Click Consumer Key and Secret
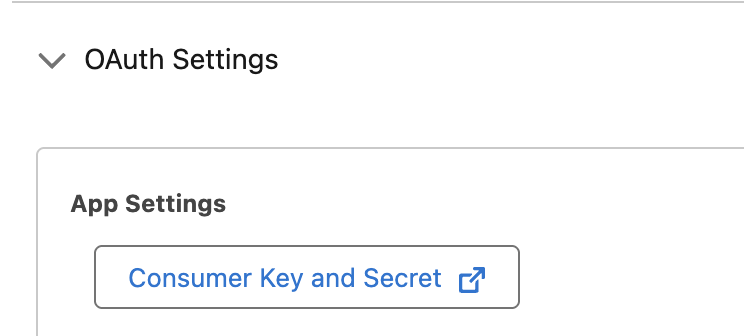
- Copy Consumer Key
Keep your Client Key handy - you’ll need to provide it to cxconnect.ai in the next steps.
Step 2: Set Up or Create Integration User
Make sure your integration user has these permissions through profile or permission set:- API Enabled
- View All Data (or specific read access to Cases, Conversations, Email Messages)
- Access to Bulk API
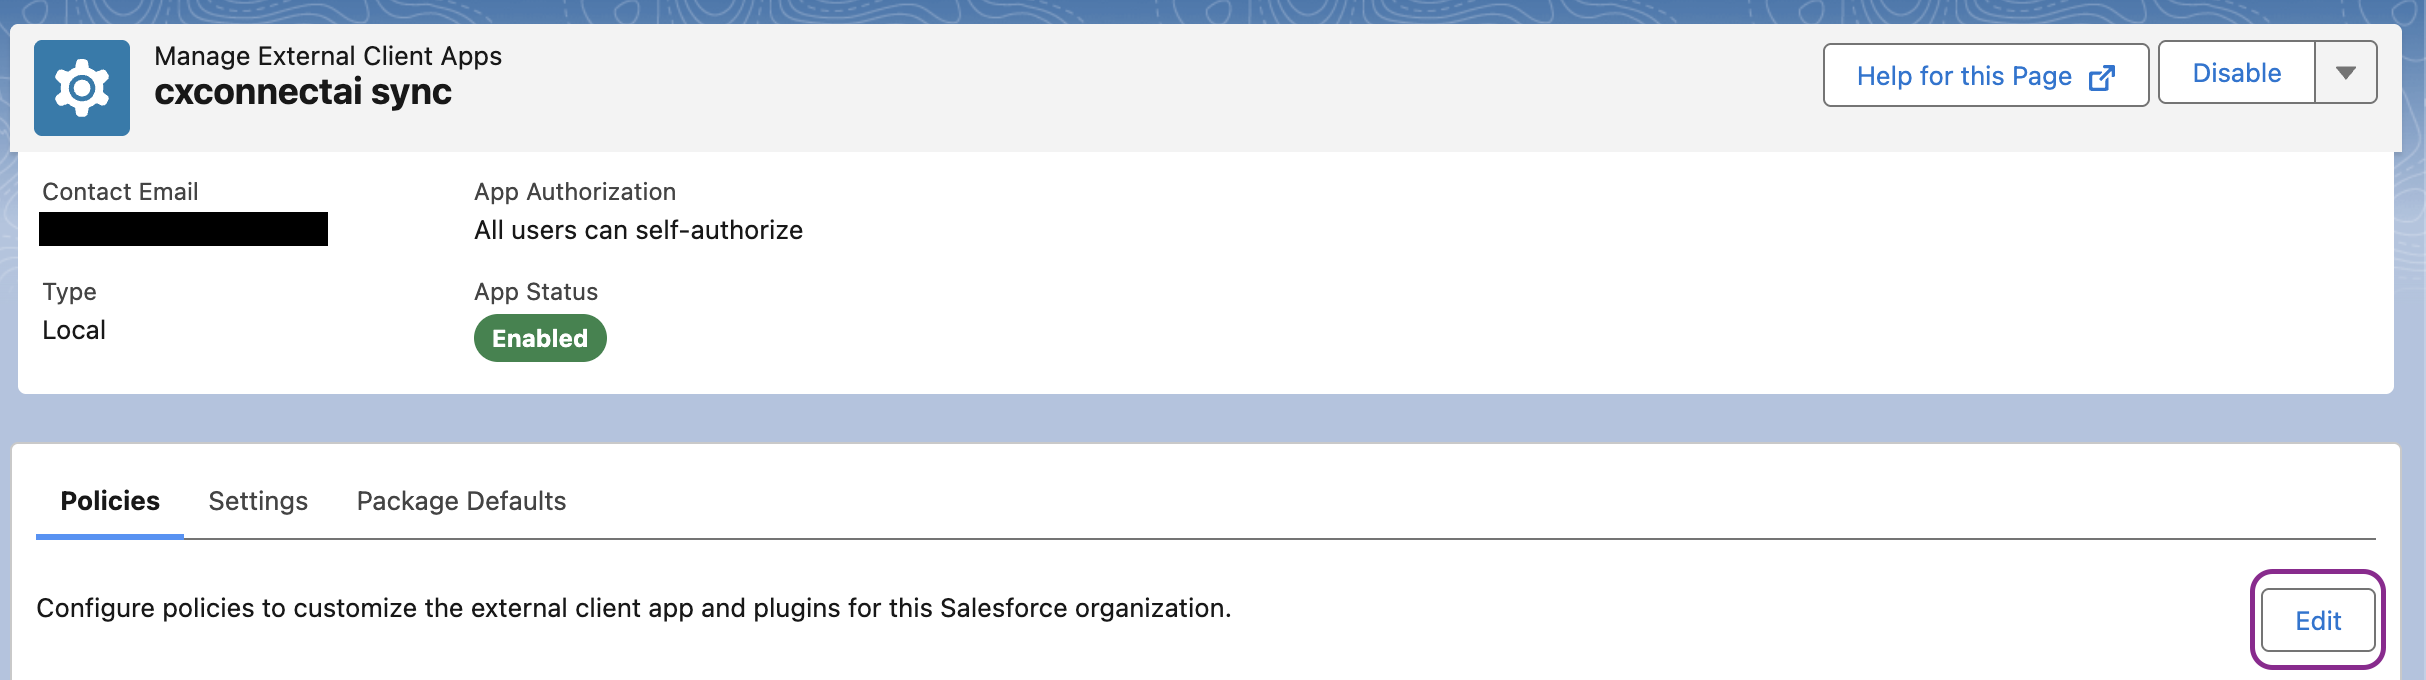
Step 3: Configure App Policies
Return to External Client App created:- Click Edit under Policies
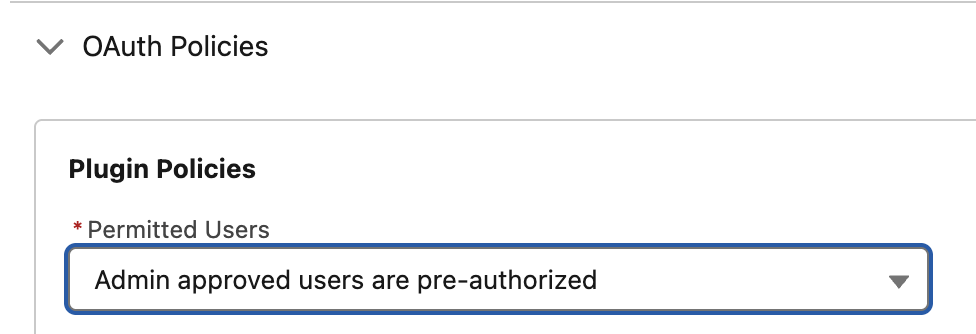
- Under OAuth Policies:
- Under Permitted Users select the option “Admin approved users are pre-authorized”
- Confirm the selection
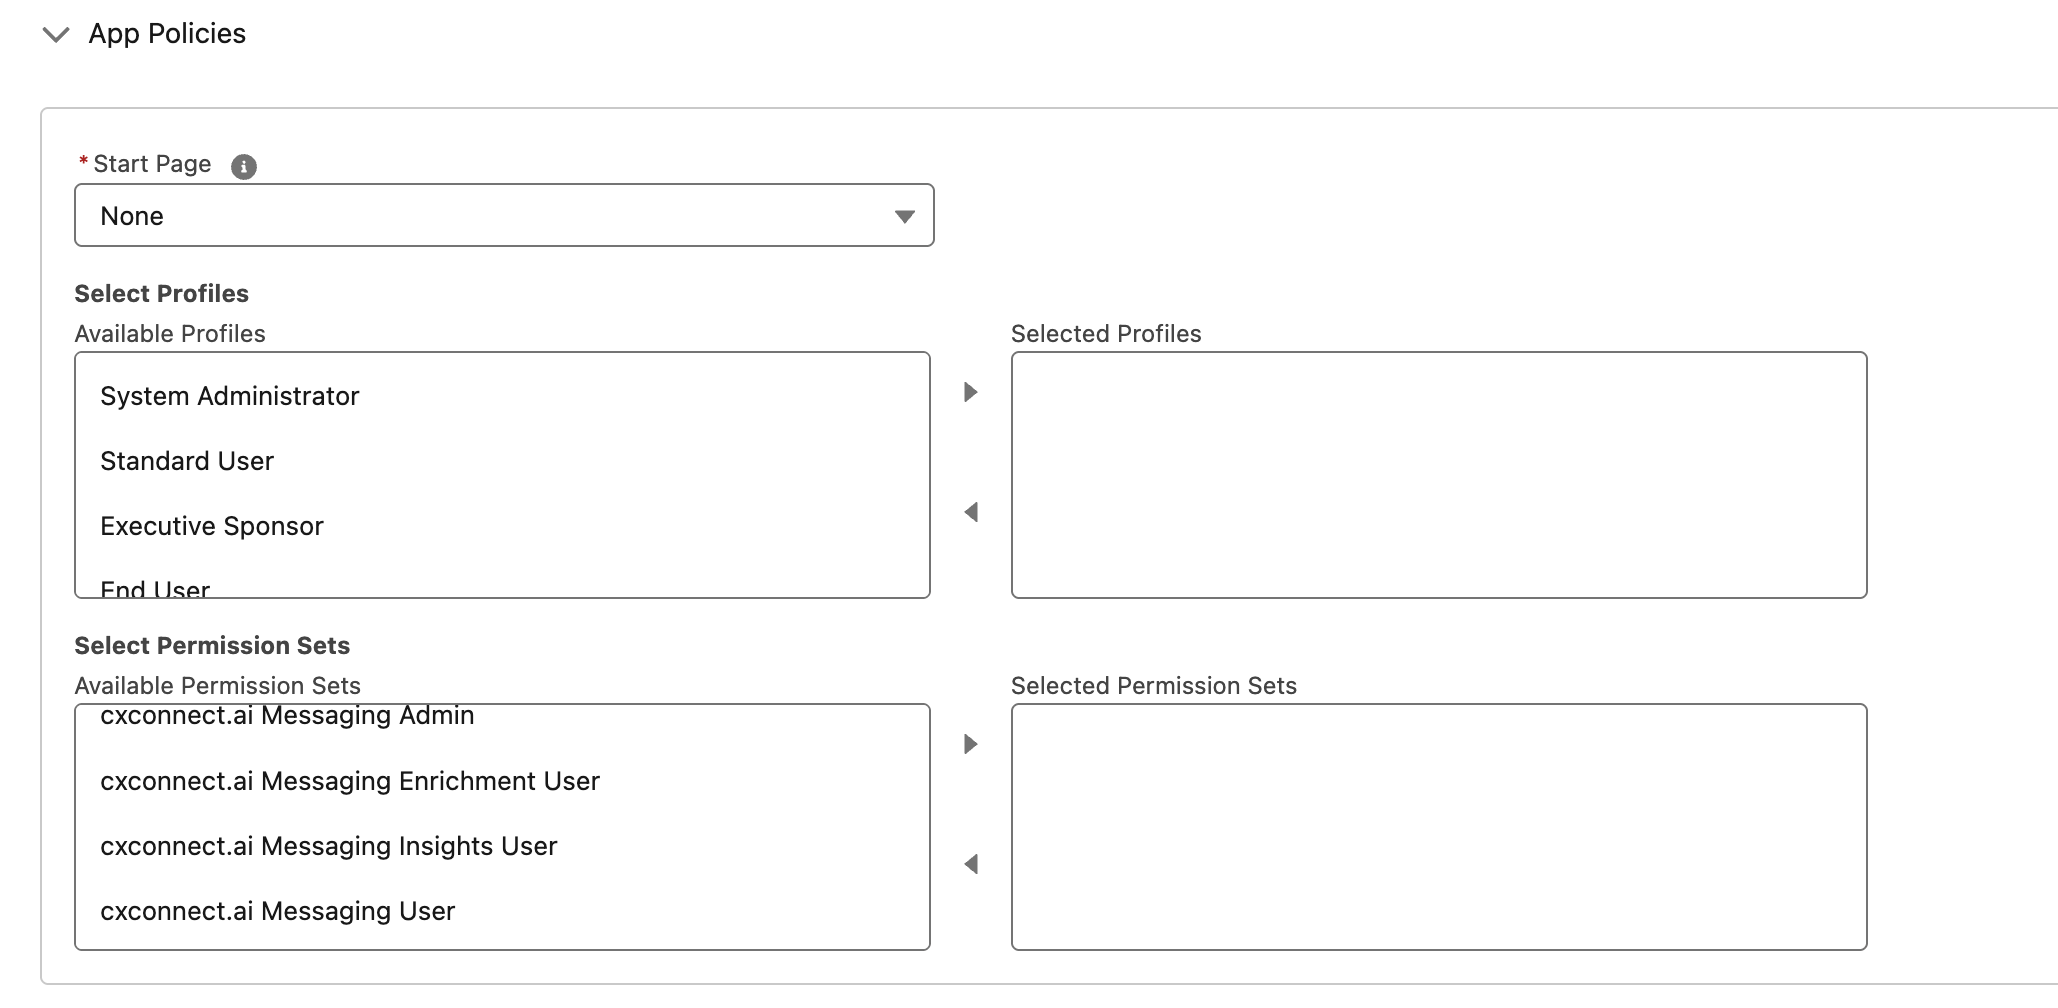
- Under App Policies there should now be profile and permission set options for pre-authorized users.
- Select a profile or permission set that has read access to the data being synced (Case, Email, Messaging, etc)
- Select a profile or permission set that has read access to the data being synced (Case, Email, Messaging, etc)
- Under OAuth Flows and External Client App Enhancements
- Check Enable Token Exchange Flow
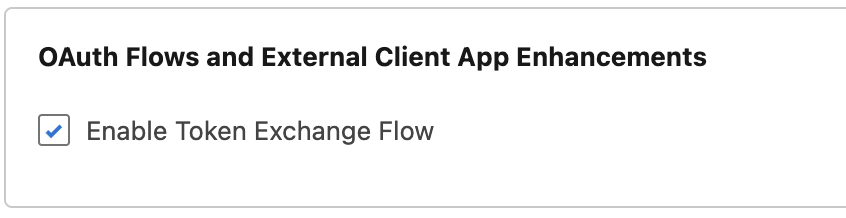
- Check Enable Token Exchange Flow
- Under App Authorization:
- Under IP Relaxation select: Relax IP restrictions
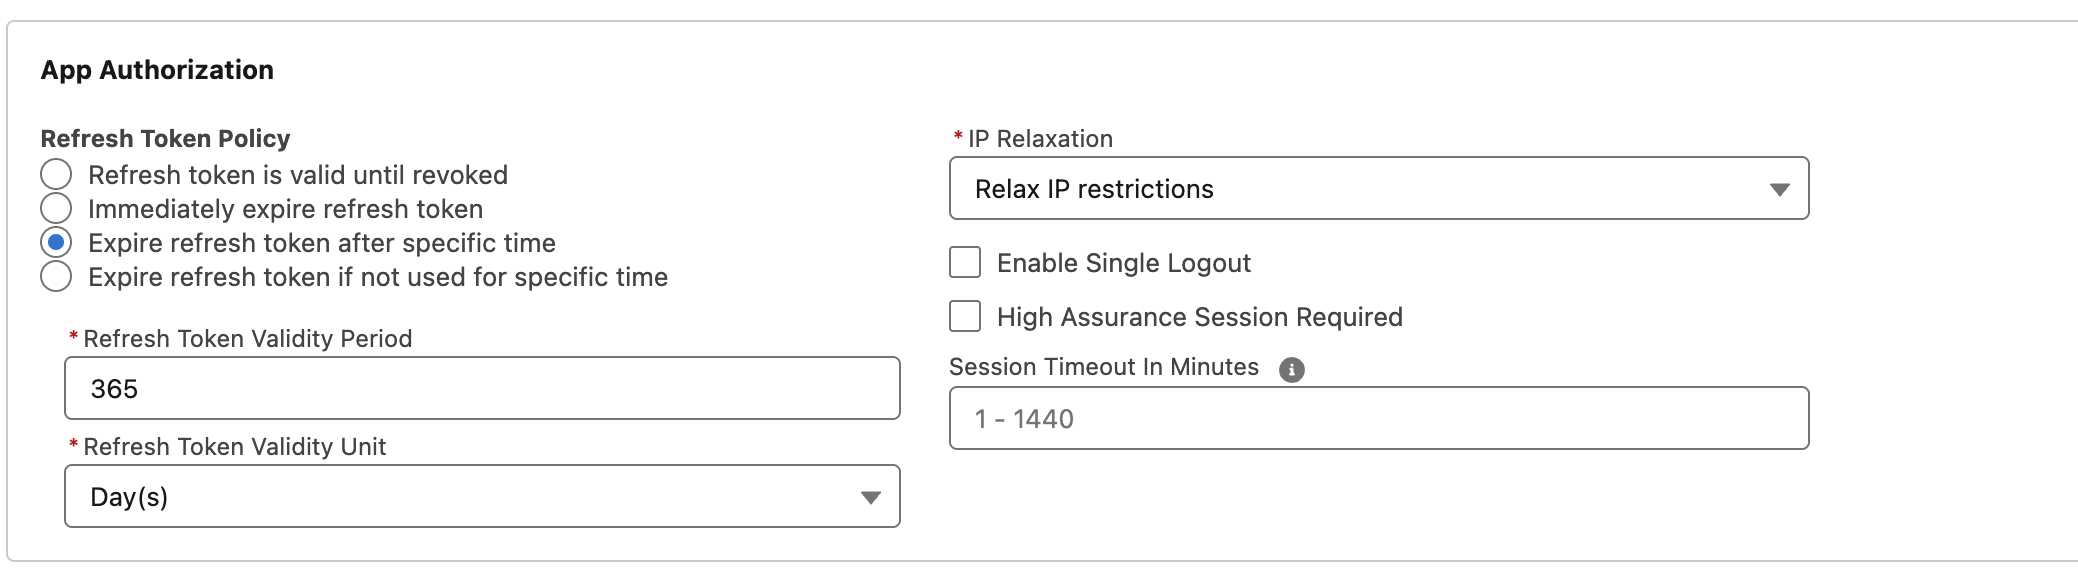
- Under IP Relaxation select: Relax IP restrictions
- Click Save
Step 4: Obtain Certificate from cxconnect.ai
Contact the cxconnect.ai support team with the following information. We will generate a certificate specifically for your Salesforce integration and send it to you.- Email Support: help@cxconnect.ai
- What to include:
- Your Client ID (Consumer Key) from Step 1
- Your Username (integration user email)
- Whether you’re using a Sandbox environment (
truefor sandbox,falsefor production)
Step 5: Upload Certificate to Salesforce
Once you receive the certificate file from cxconnect.ai:- Return to your External App.
- Find your cxconnectai Sync Connected App
- Under Settings select Edit
- Scroll to OAuth Settings > Flow Enablement
- Check the Enable JWT Bearer Flow
- Click Upload Files
- Select the certificate obtained from support in Step 4.
- Click Save
Step 6: Connect in cxconnect.ai Admin Portal
The Sync Engine and Admin Portal are currently in development and not yet deployed. Steps 6 and 7 will be available once the feature is released.
Step 7: Monitor Your Sync
Once activated, the connector will automatically sync your data:- Initial sync may take some time depending on data volume
- Monitor progress in the Admin Portal dashboard
- Check sync logs for any issues
Troubleshooting
Connection Issues
Problem: Unable to connect or authenticate What to check:- Verify the certificate file uploaded to Salesforce matches the one provided by cxconnect.ai
- Make sure the username exactly matches your Salesforce user (case-sensitive)
- Check that the user is pre-authorized in the Connected App
- Confirm the “Is Sandbox” setting matches your Salesforce environment
- Verify the Consumer Key (Client ID) is correct
Permission Errors
Problem: Connection works but can’t access data What to check:- Ensure the integration user has “API Enabled” permission
- Verify the user has read access to Cases and Conversations
- Check that the Connected App is assigned to the user
- Make sure the user has Bulk API access
Missing Data
Problem: Some cases or conversations aren’t syncing What to check:- Verify Salesforce Messaging is enabled if syncing conversations
- Check that the integration user has access to the records
- Ensure records exist in the date range being synced
- Contact support if data consistently appears to be missing
Certificate Issues
Problem: Authentication fails with certificate errors What to check:- Confirm you uploaded the certificate provided by cxconnect.ai to Salesforce
- Make sure the certificate hasn’t expired
- Verify you used the correct Client ID when requesting the certificate
- Contact cxconnect.ai support if certificate issues persist
Need Help?
This connector requires technical setup. If you need assistance:- Email Support: help@cxconnect.ai (we can help walk you through the setup)
- Salesforce Documentation: Salesforce Developer Docs