> ## Documentation Index
> Fetch the complete documentation index at: https://docs.cxconnect.ai/llms.txt
> Use this file to discover all available pages before exploring further.
# Zendesk Installation Guide
> The installation guide for the cxconnect.ai app for Zendesk
## Installation and Setup
### Installing the App
1. Navigate to your Zendesk Admin Center
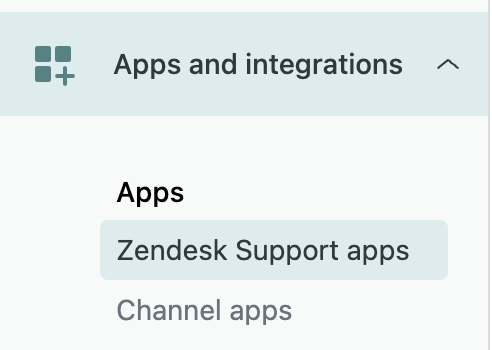 2. Go to **Apps and integrations** > **Zendesk Support apps** > **Upload private app**
 3. Fill in the App Name "cxconnect.ai"
4. Choose the cxconnect.ai provided zip folder
3. Fill in the App Name "cxconnect.ai"
4. Choose the cxconnect.ai provided zip folder
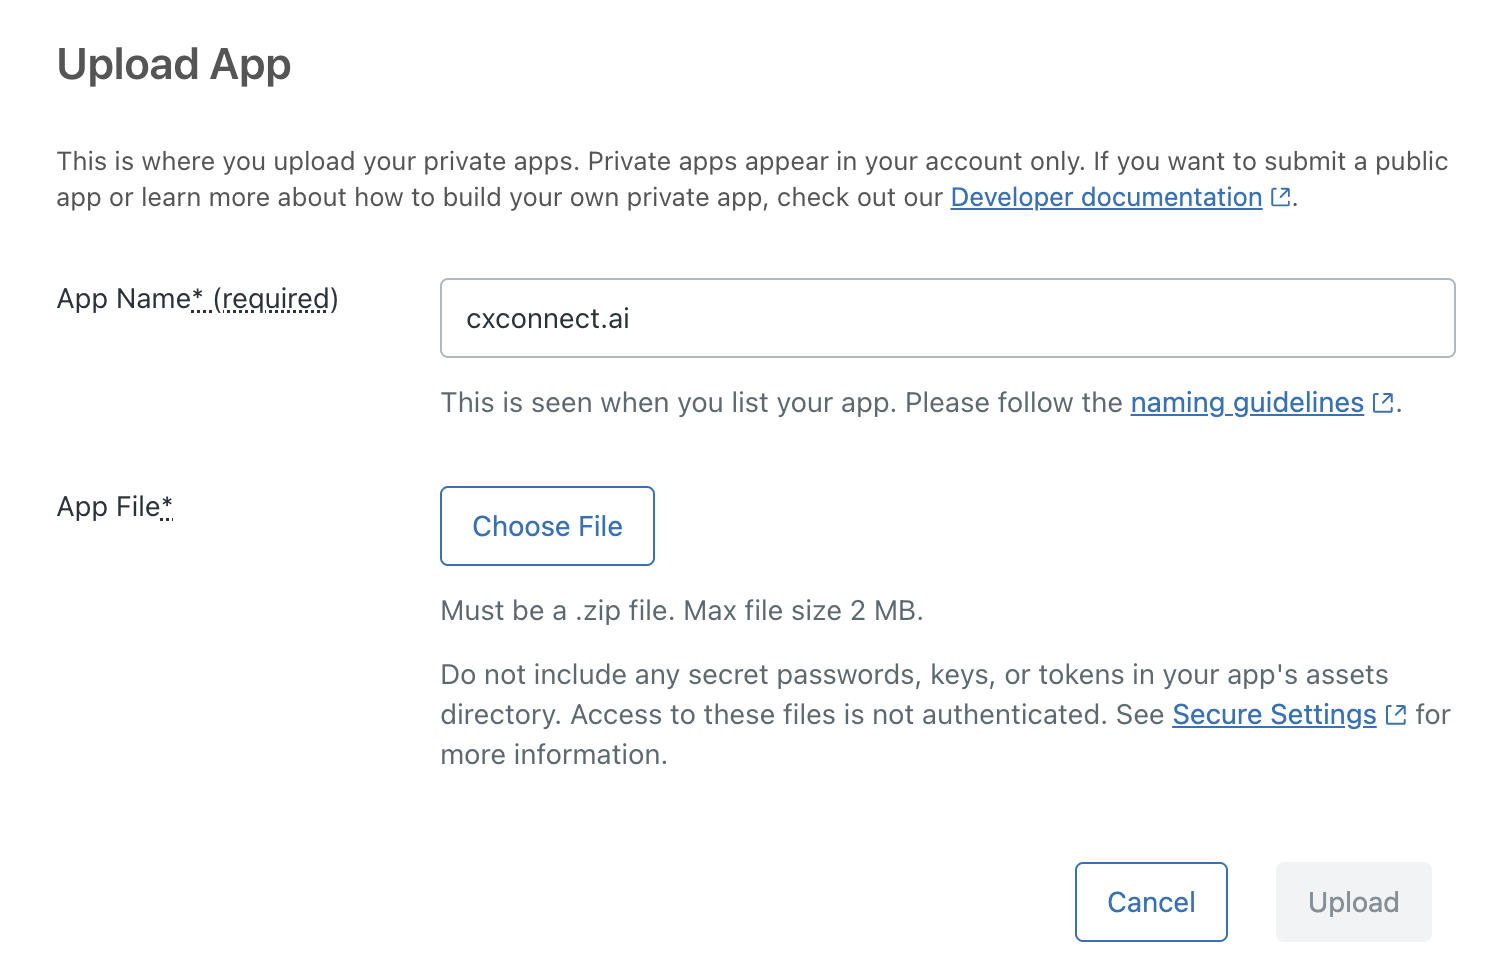 5. Click **Upload**
### Configuration
After installation, you'll need to configure the app with the following settings:
5. Click **Upload**
### Configuration
After installation, you'll need to configure the app with the following settings:
 #### Required Settings
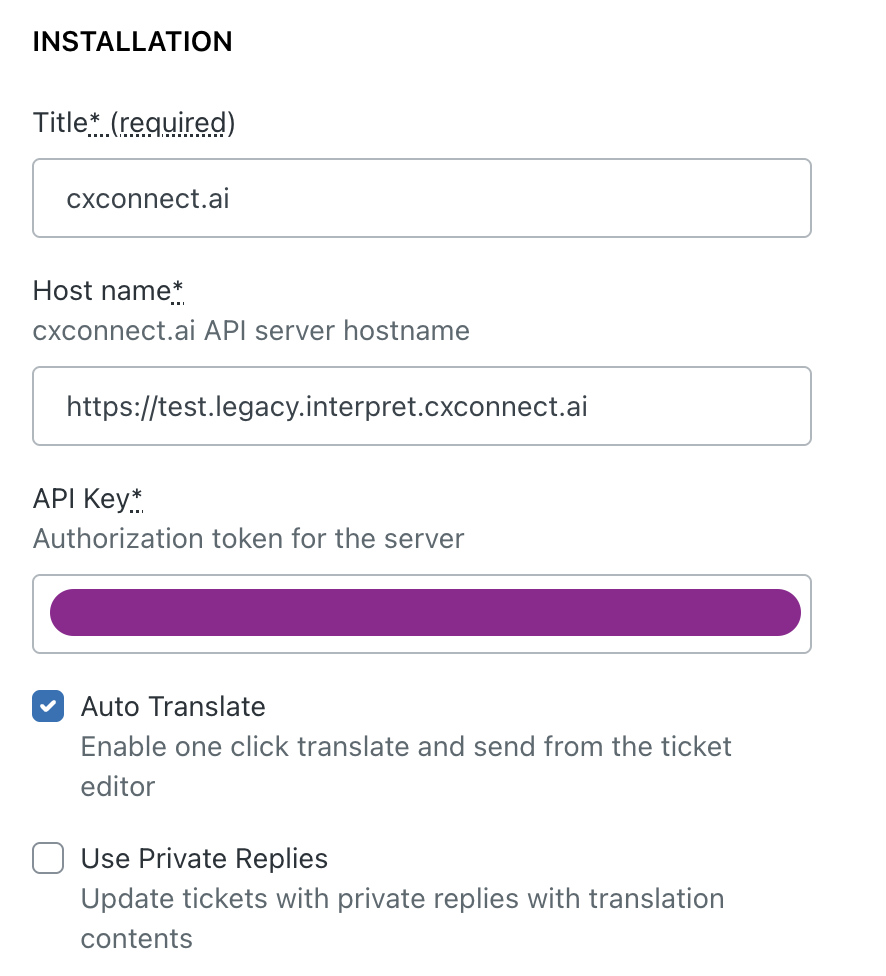 * **Title**: Enter a descriptive name for the integration (default: "cxconnect.ai")
* **Host name**: Enter the cxconnect.ai API server hostname
`https://test.legacy.interpret.cxconnect.ai`
* **API Key**: Enter your authorization token
#### Optional Settings
* **Auto Translate**:
* When enabled: Agent text is automatically translated and sent
* When disabled: Agent text is translated and shown as a preview before sending
* This setting affects the ticket editor functionality
* **Use Private Replies**:
* When enabled, updates tickets with private replies containing translation contents
* Useful for keeping translation records in ticket history
* **Title**: Enter a descriptive name for the integration (default: "cxconnect.ai")
* **Host name**: Enter the cxconnect.ai API server hostname
`https://test.legacy.interpret.cxconnect.ai`
* **API Key**: Enter your authorization token
#### Optional Settings
* **Auto Translate**:
* When enabled: Agent text is automatically translated and sent
* When disabled: Agent text is translated and shown as a preview before sending
* This setting affects the ticket editor functionality
* **Use Private Replies**:
* When enabled, updates tickets with private replies containing translation contents
* Useful for keeping translation records in ticket history