> ## Documentation Index
> Fetch the complete documentation index at: https://docs.cxconnect.ai/llms.txt
> Use this file to discover all available pages before exploring further.
# Messaging Application
> The installation guide for the cxconnect.ai messaging app for Salesforce
# Enhanced Messaging Installation and Setup
## *Latest Release*
The [cxconnect.ai Messaging App](../../../../changelog/salesforce/releases/messaging-app)
## *Basic Setup*
### Step 1: Create your Channel
* The cxconnect.ai app does not build a messaging channel for you, this is a task that must be completed by an Administrator.
* The cxconnect.ai works with any standard or enhanced message channel (like [Facebook](https://help.salesforce.com/s/articleView?id=sf.livemessage_setup_facebook_messenger_channels.htm\&type=5)).
### Step 2: Add Translation Router Utility
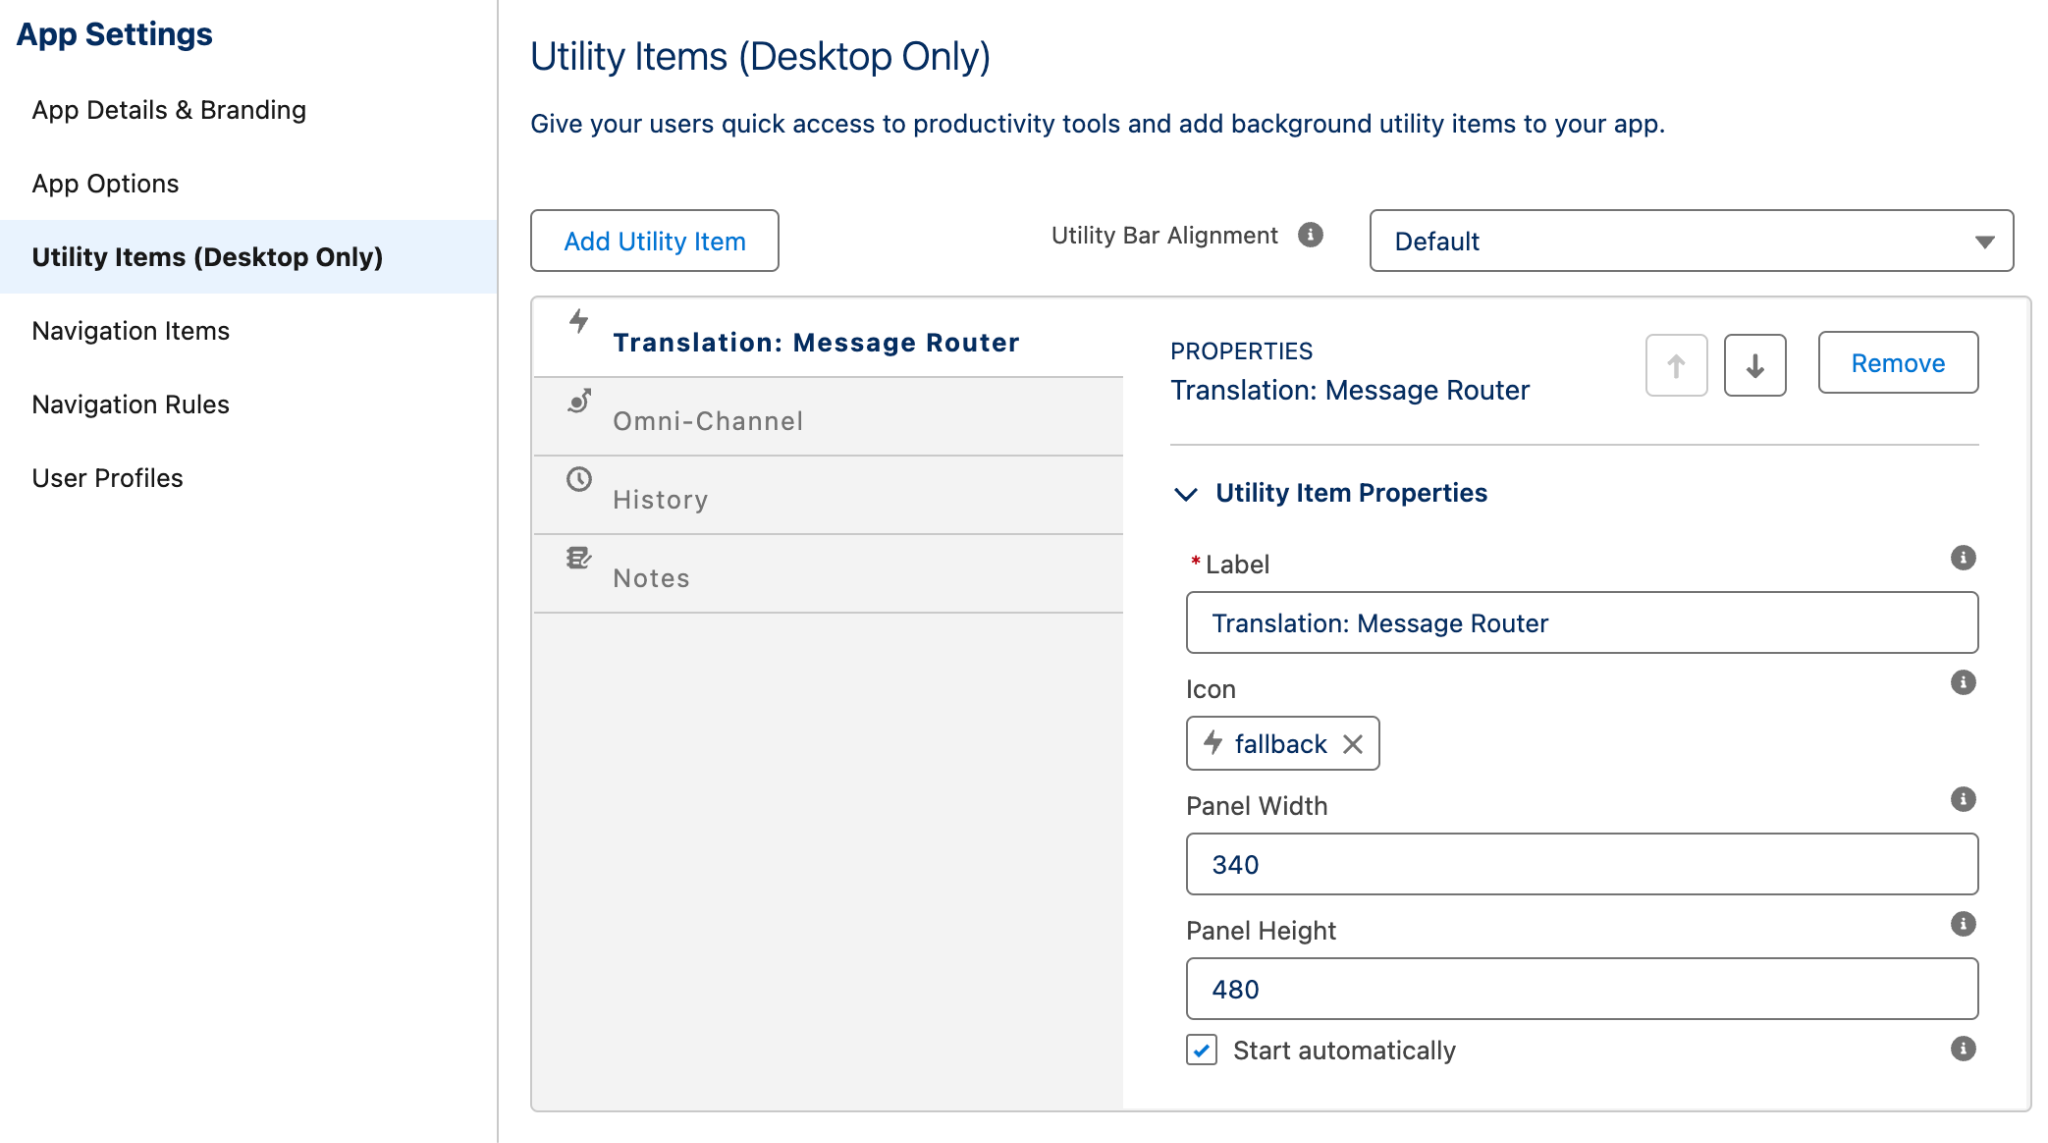
* Add **Translation: Message Router** to the Utility Bar of the Service Console.
* From Setup in Salesforce enter **App Manager** in the Quick Find Box
* Click App Manager
* In the App Manager, scroll down to the Service Console you want to add translated live chat to and click the arrow on the right side of the page and choose edit. This will open the App Builder
* Select **Utility Items (Desktop Only)**
* Click Add Utility Item button
* In the App Builder, choose the **Utility Items** tab
* Click the **Add Utility Item** button
* In the menu that opens, click on the “Translation: Message Router”
* Check the “**Start automatically**” checkbox
* Save
 ### Step 3: Add to Lightning Record Page
* Add **Translation: Message Client** to the Message Session Lightning Page.
* Open a Messaging Session or Enhanced Messaging Session page in the Service Console.
* Click on the gear icon in the top right corner of the screen and select Edit Page.
* Create a new custom tab, name it **cxconnect.ai**
* Add the **Translation: Message Client** custom managed component to the page of the new tab.
* On the right side panel you can select **Enable language override?** which allows agents to change the language mid-conversation (this is recommended).
### Step 3: Add to Lightning Record Page
* Add **Translation: Message Client** to the Message Session Lightning Page.
* Open a Messaging Session or Enhanced Messaging Session page in the Service Console.
* Click on the gear icon in the top right corner of the screen and select Edit Page.
* Create a new custom tab, name it **cxconnect.ai**
* Add the **Translation: Message Client** custom managed component to the page of the new tab.
* On the right side panel you can select **Enable language override?** which allows agents to change the language mid-conversation (this is recommended).
 ### Step 4: Add Translation History
* Add **Translation History** to the Message Session Lightning Page.
* Create a new custom tab, name it **Translation History**
* Add a “Related List - Single” component to the page of the new tab.
* On the side panel set the parent record to “Messaging User”
* Set the related list to “Messaging Translation History”.
* Set the related list type to “Enhanced List”.
### Step 4: Add Translation History
* Add **Translation History** to the Message Session Lightning Page.
* Create a new custom tab, name it **Translation History**
* Add a “Related List - Single” component to the page of the new tab.
* On the side panel set the parent record to “Messaging User”
* Set the related list to “Messaging Translation History”.
* Set the related list type to “Enhanced List”.
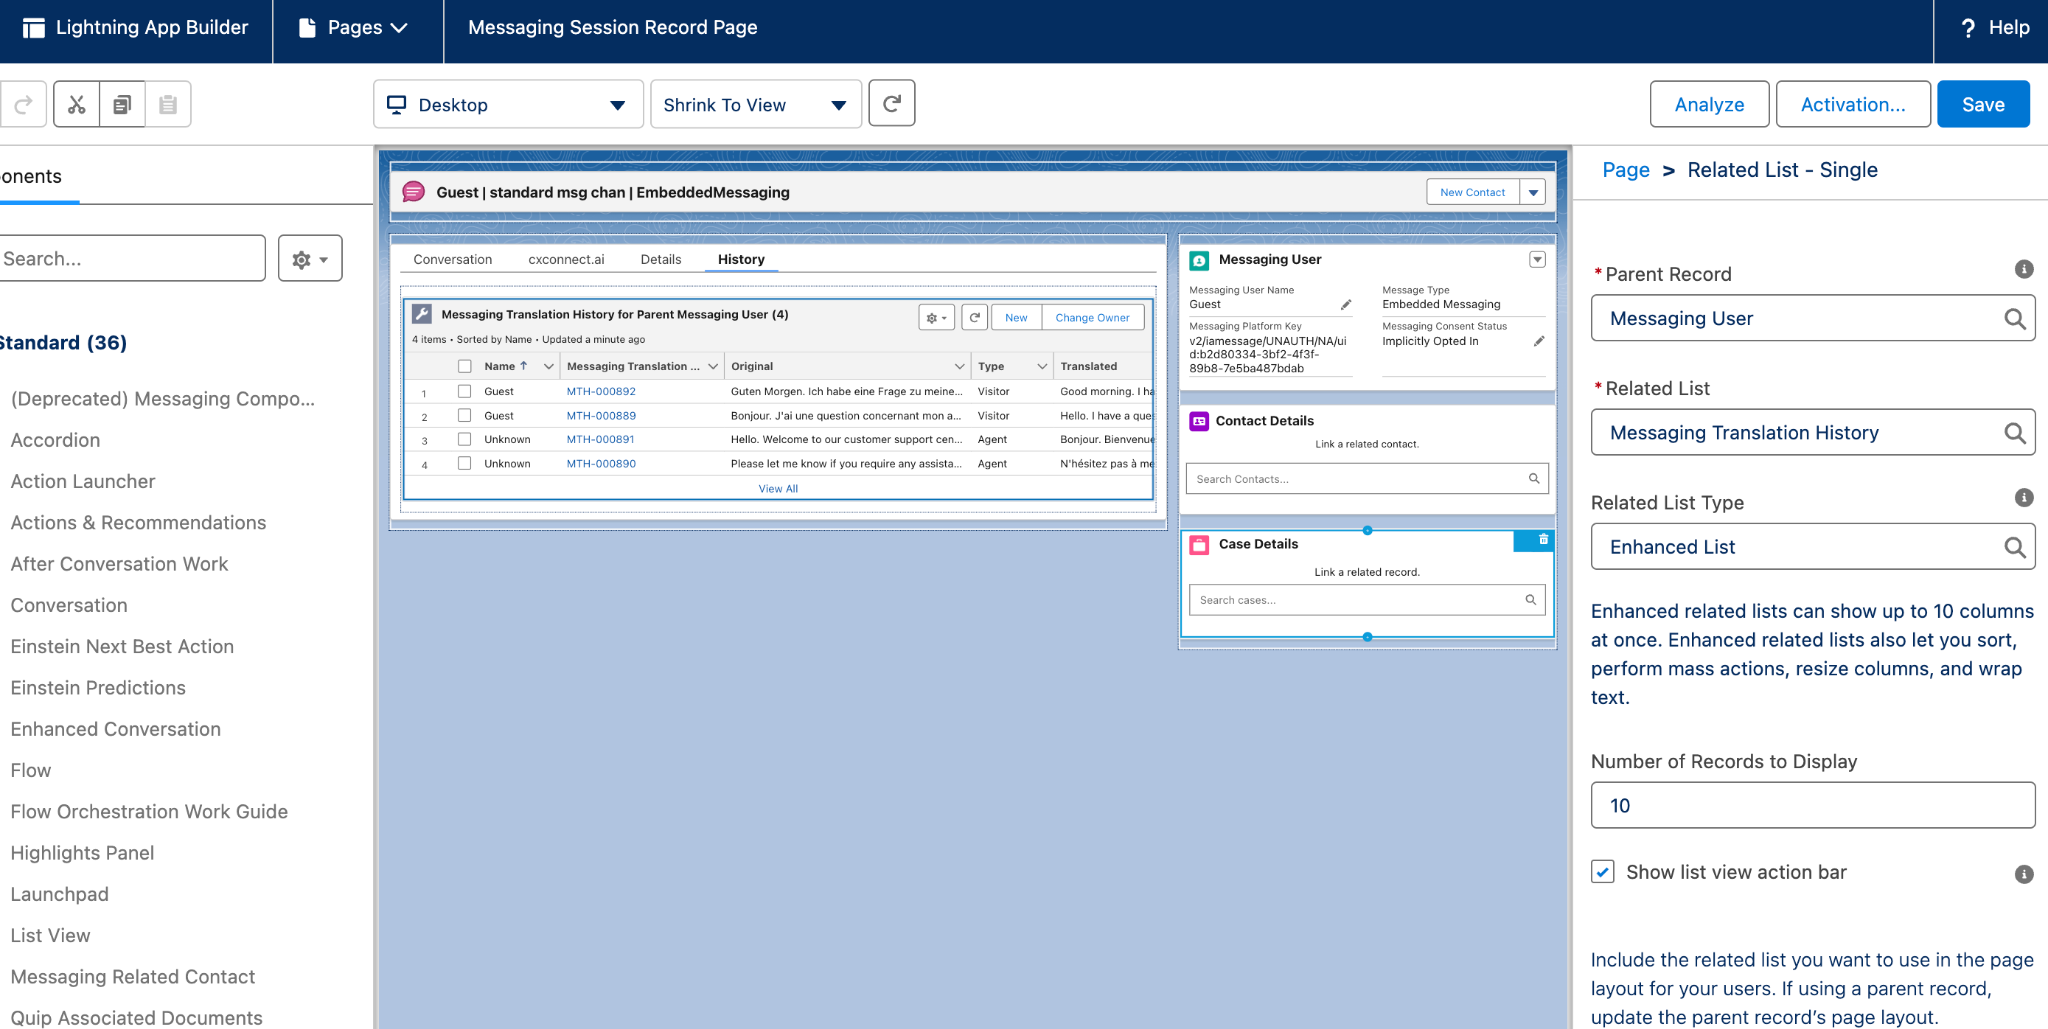 * You can modify the **Messaging User** layout to display the information you’d like to see. See the sample below.
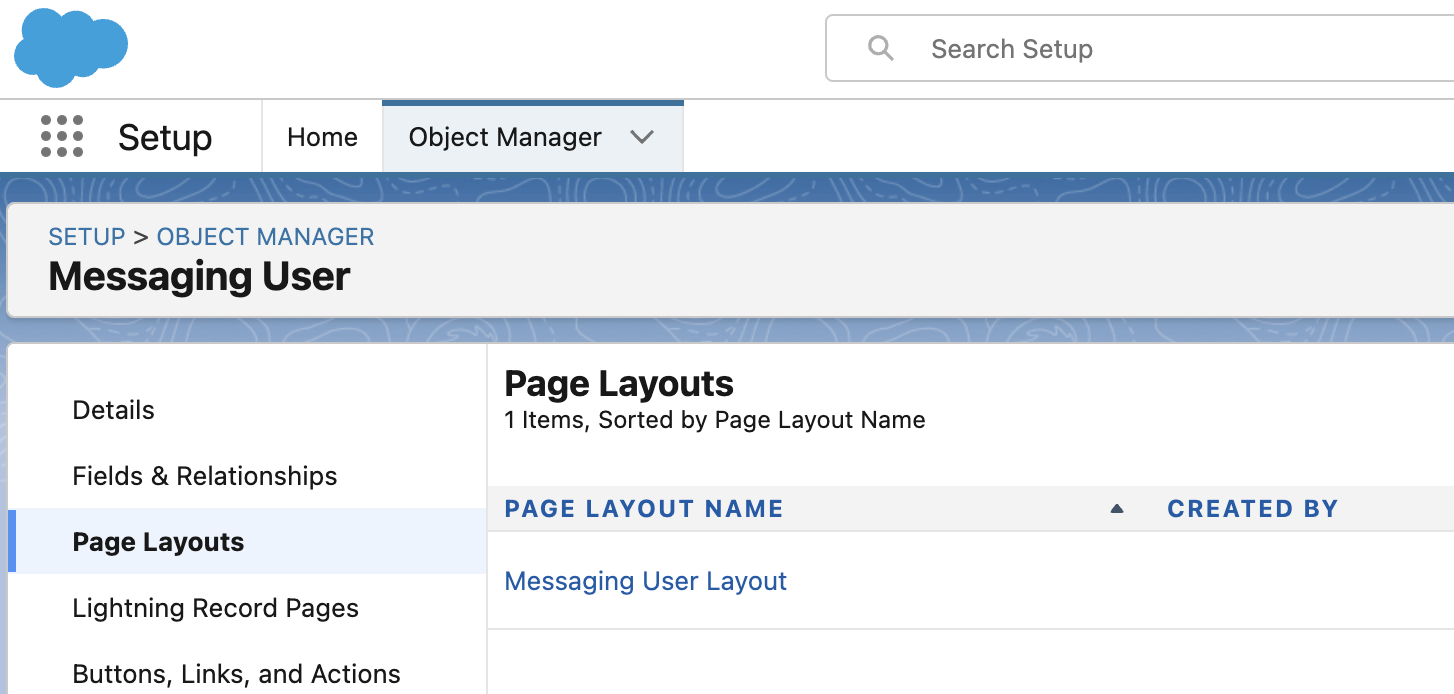 * Select "Page Layout" and then "Related Lists", drag and drop "Messaging Translation History" to the Related Lists section.
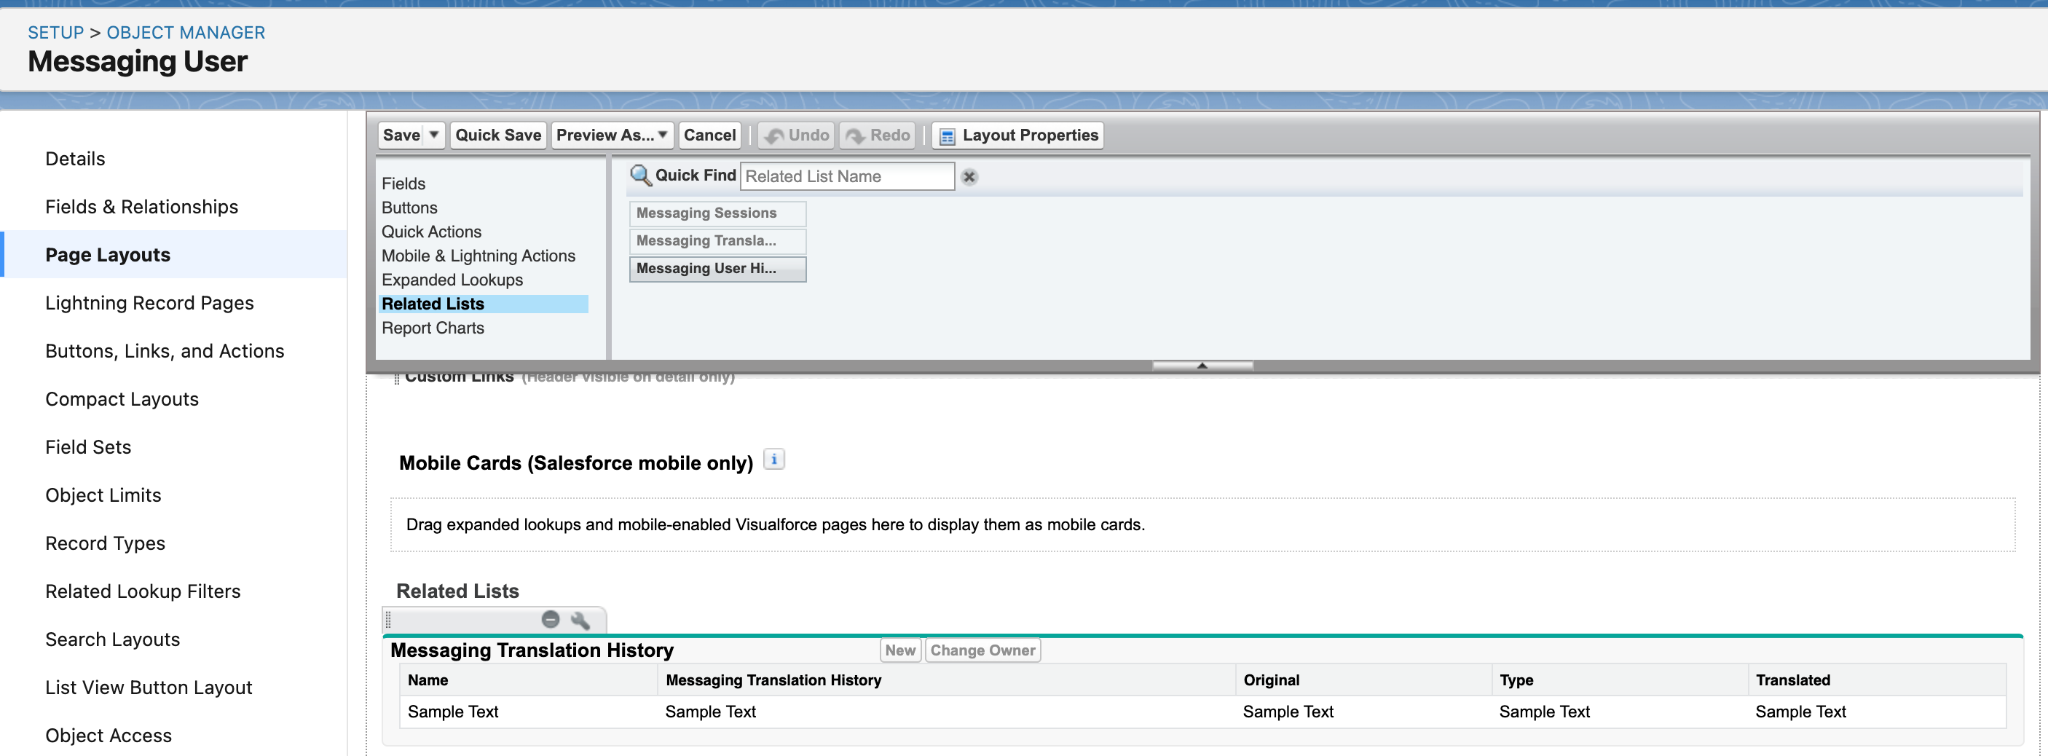 * Click the Wrench icon on the "Messaging Translation History" related list. Add the fields you want to display.
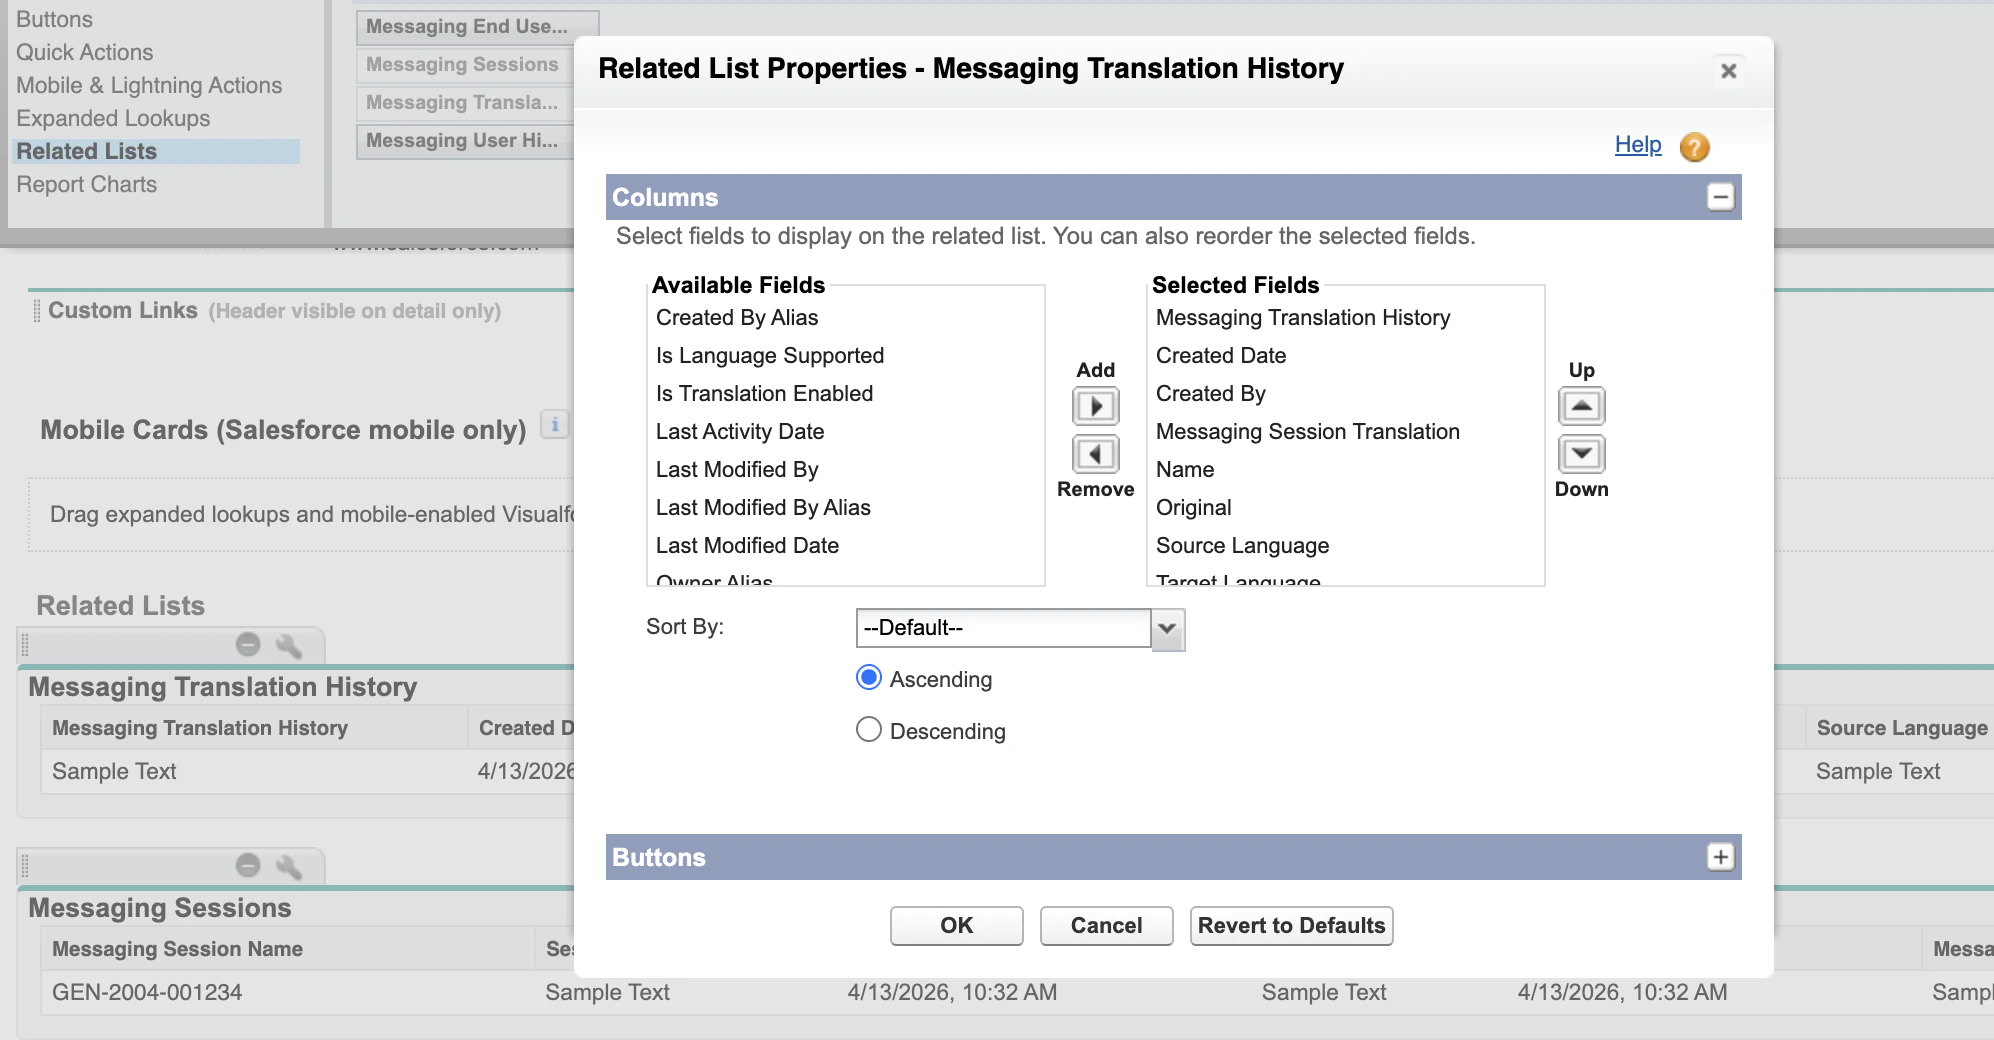 * Save and activate the page.
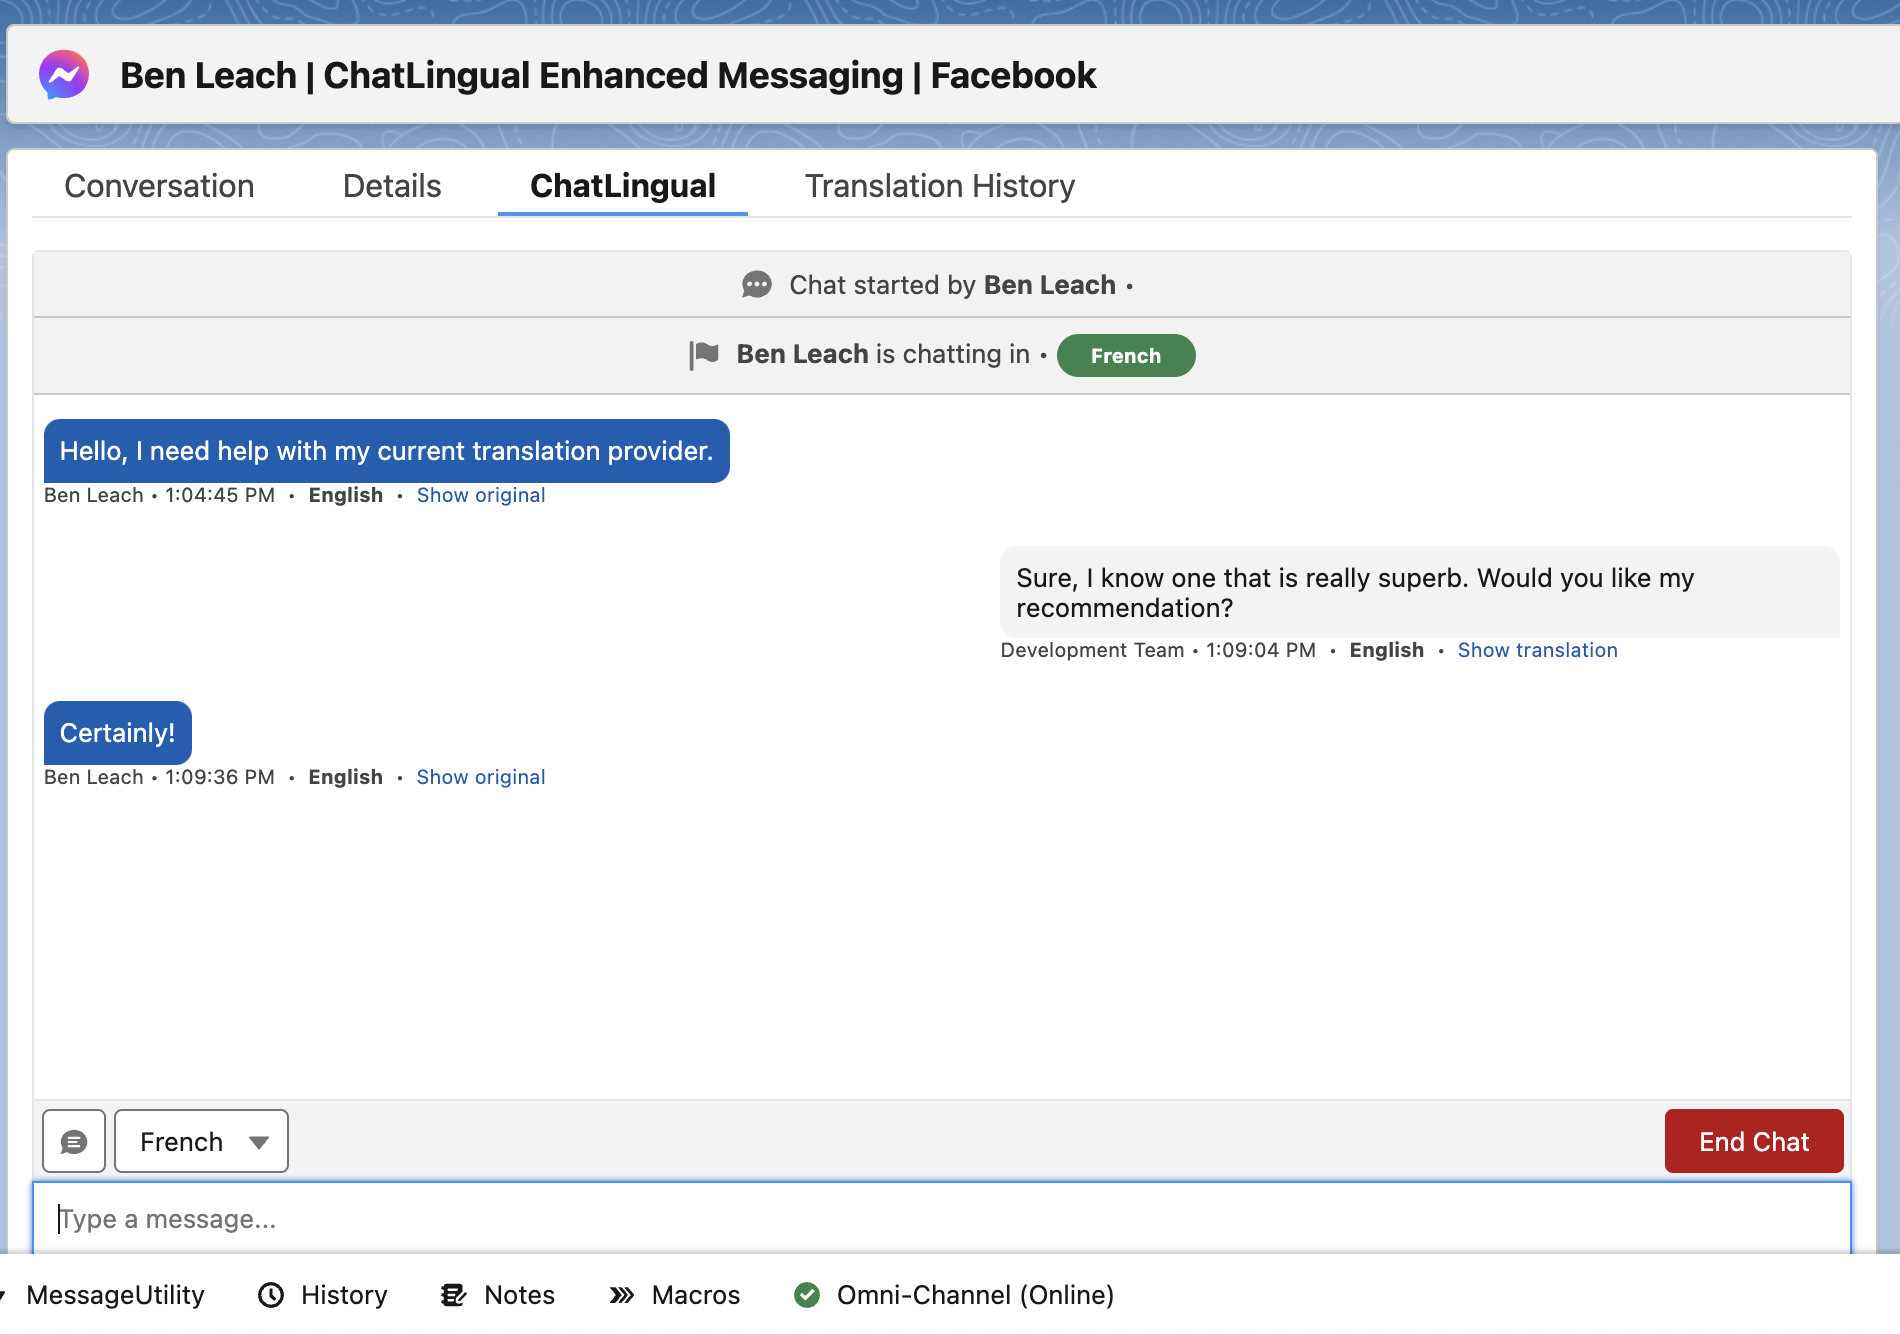 Messaging translation is up and running! Use the cxconnect.ai tab to send and receive messages with customers. The customer language is identified as soon as the first message is received through the omni-channel from the support portal.
## *Quality Enrichments*
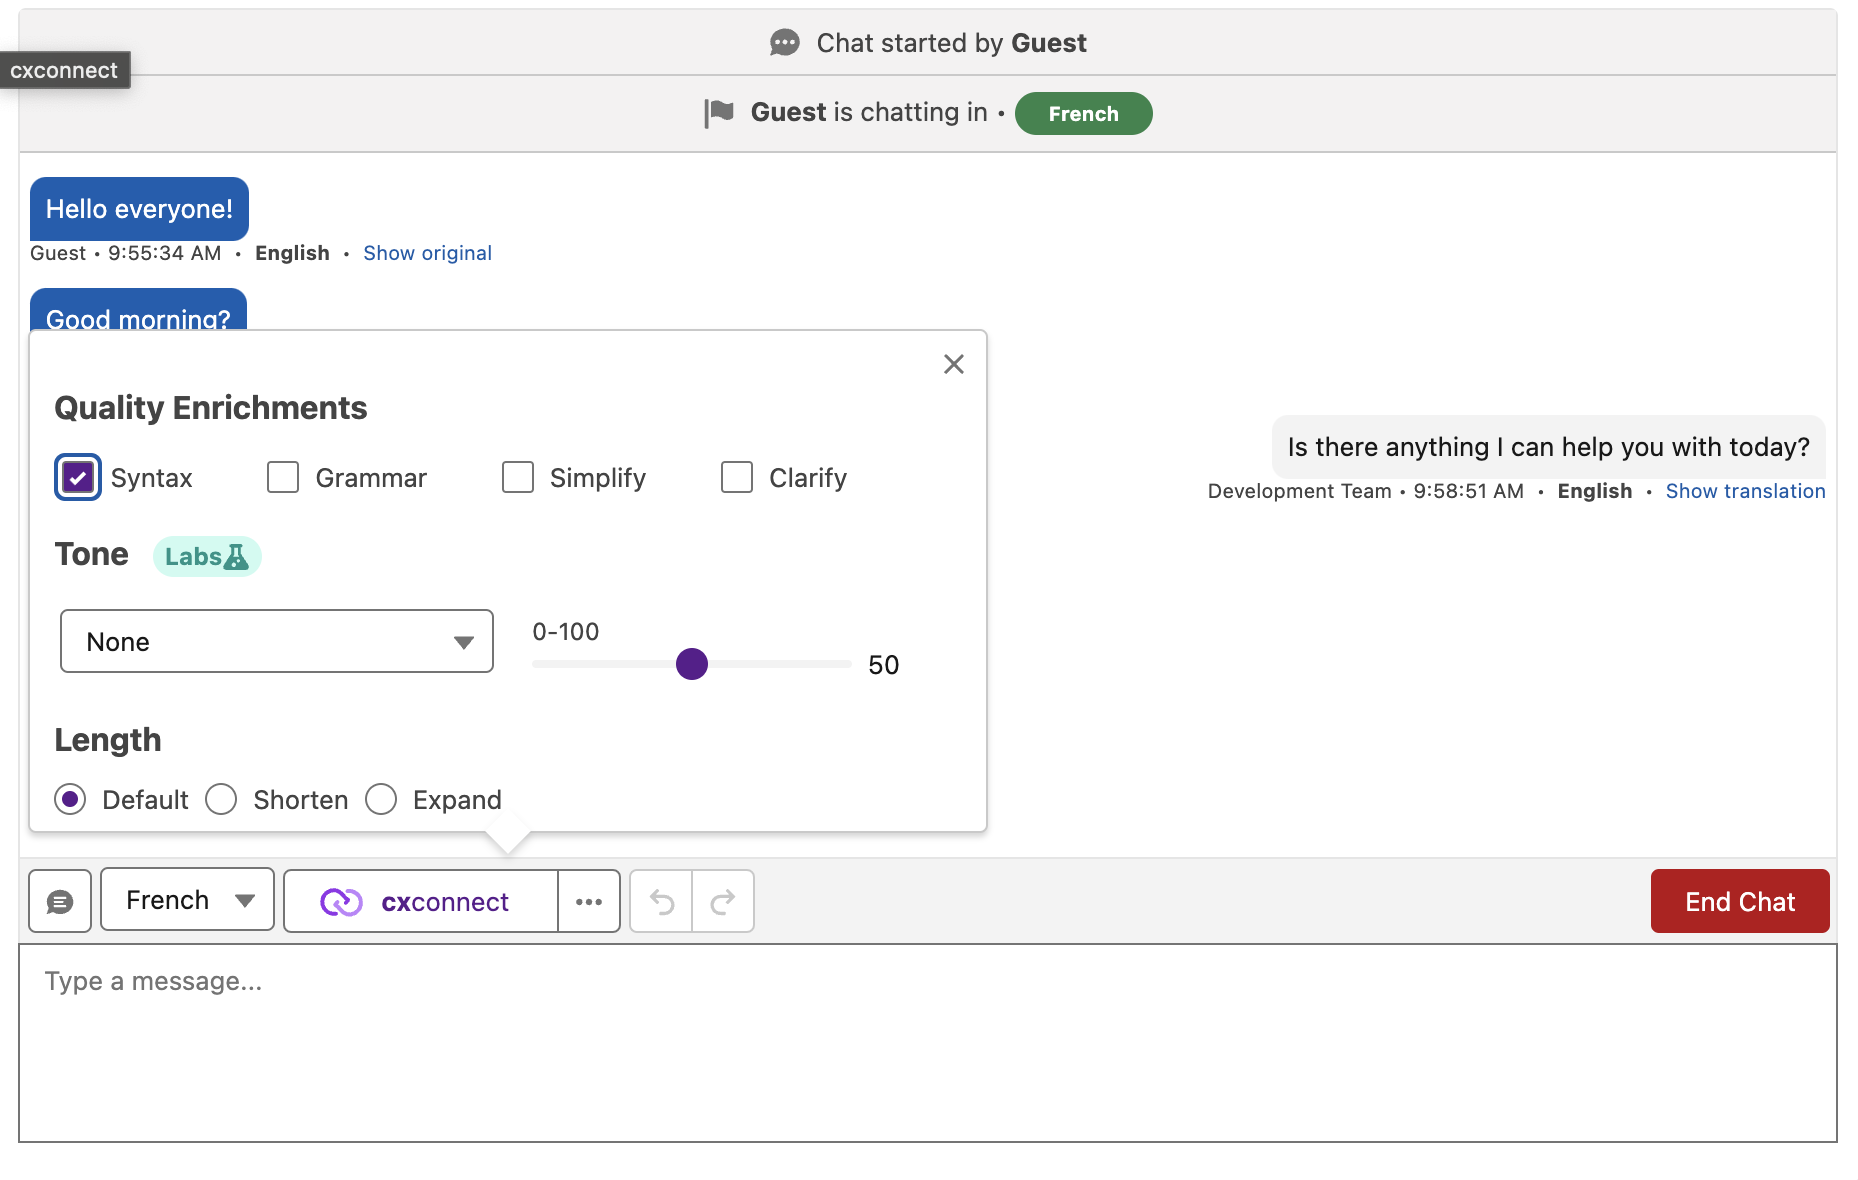
If your organization has Quality Enrichments enabled, this is now supported within Enhanced Messaging.
Applying the CxconnectMessagingEnrichmentUser permission set allows an agent to utilize a wide variety of Quality Enrichments.
Messaging translation is up and running! Use the cxconnect.ai tab to send and receive messages with customers. The customer language is identified as soon as the first message is received through the omni-channel from the support portal.
## *Quality Enrichments*
If your organization has Quality Enrichments enabled, this is now supported within Enhanced Messaging.
Applying the CxconnectMessagingEnrichmentUser permission set allows an agent to utilize a wide variety of Quality Enrichments.
 ## *Messaging Insights (Beta)*
If your organization has opted into the *Messaging Insights* beta program, this is now configurable in your Salesforce environment (starting with v3.7).
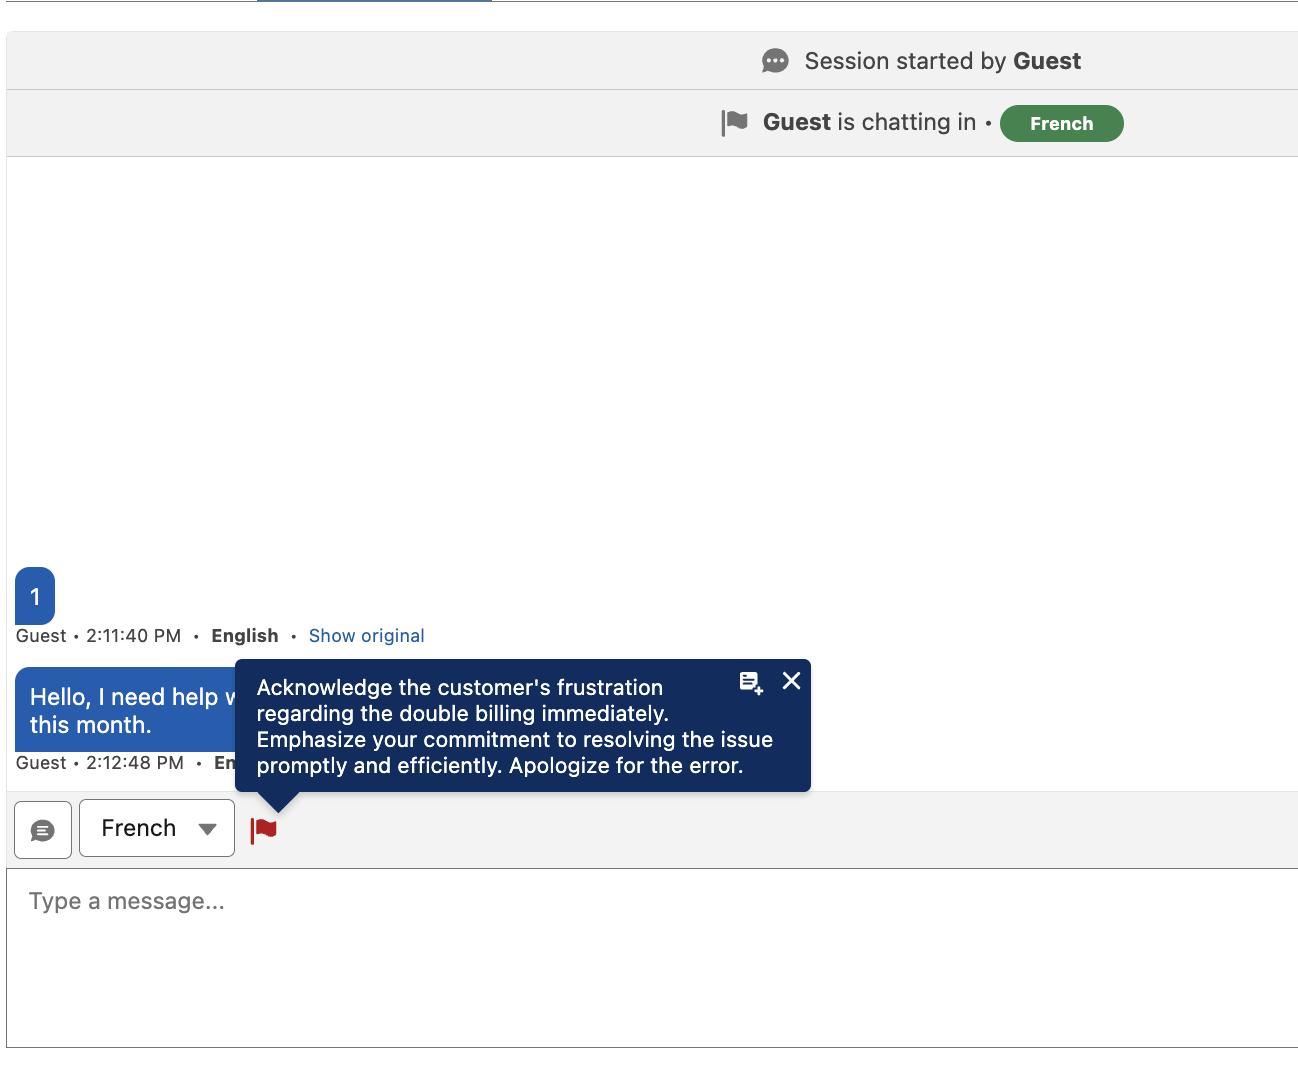
Applying the `CxconnectMessagingInsightsUser` permission set allows agents to receive "Detractor notifications" during messaging sessions.
## *Messaging Insights (Beta)*
If your organization has opted into the *Messaging Insights* beta program, this is now configurable in your Salesforce environment (starting with v3.7).
Applying the `CxconnectMessagingInsightsUser` permission set allows agents to receive "Detractor notifications" during messaging sessions.