> ## Documentation Index
> Fetch the complete documentation index at: https://docs.cxconnect.ai/llms.txt
> Use this file to discover all available pages before exploring further.
# Knowledge Application
> The installation guide for the cxconnect.ai knowledge app for Salesforce
# Knowledge App Installation and Setup
## *Latest Release*
The [cxconnect.ai Knowledge App](../../../../changelog/salesforce/releases/knowledge-app)
## *Knowledge Article Translation*
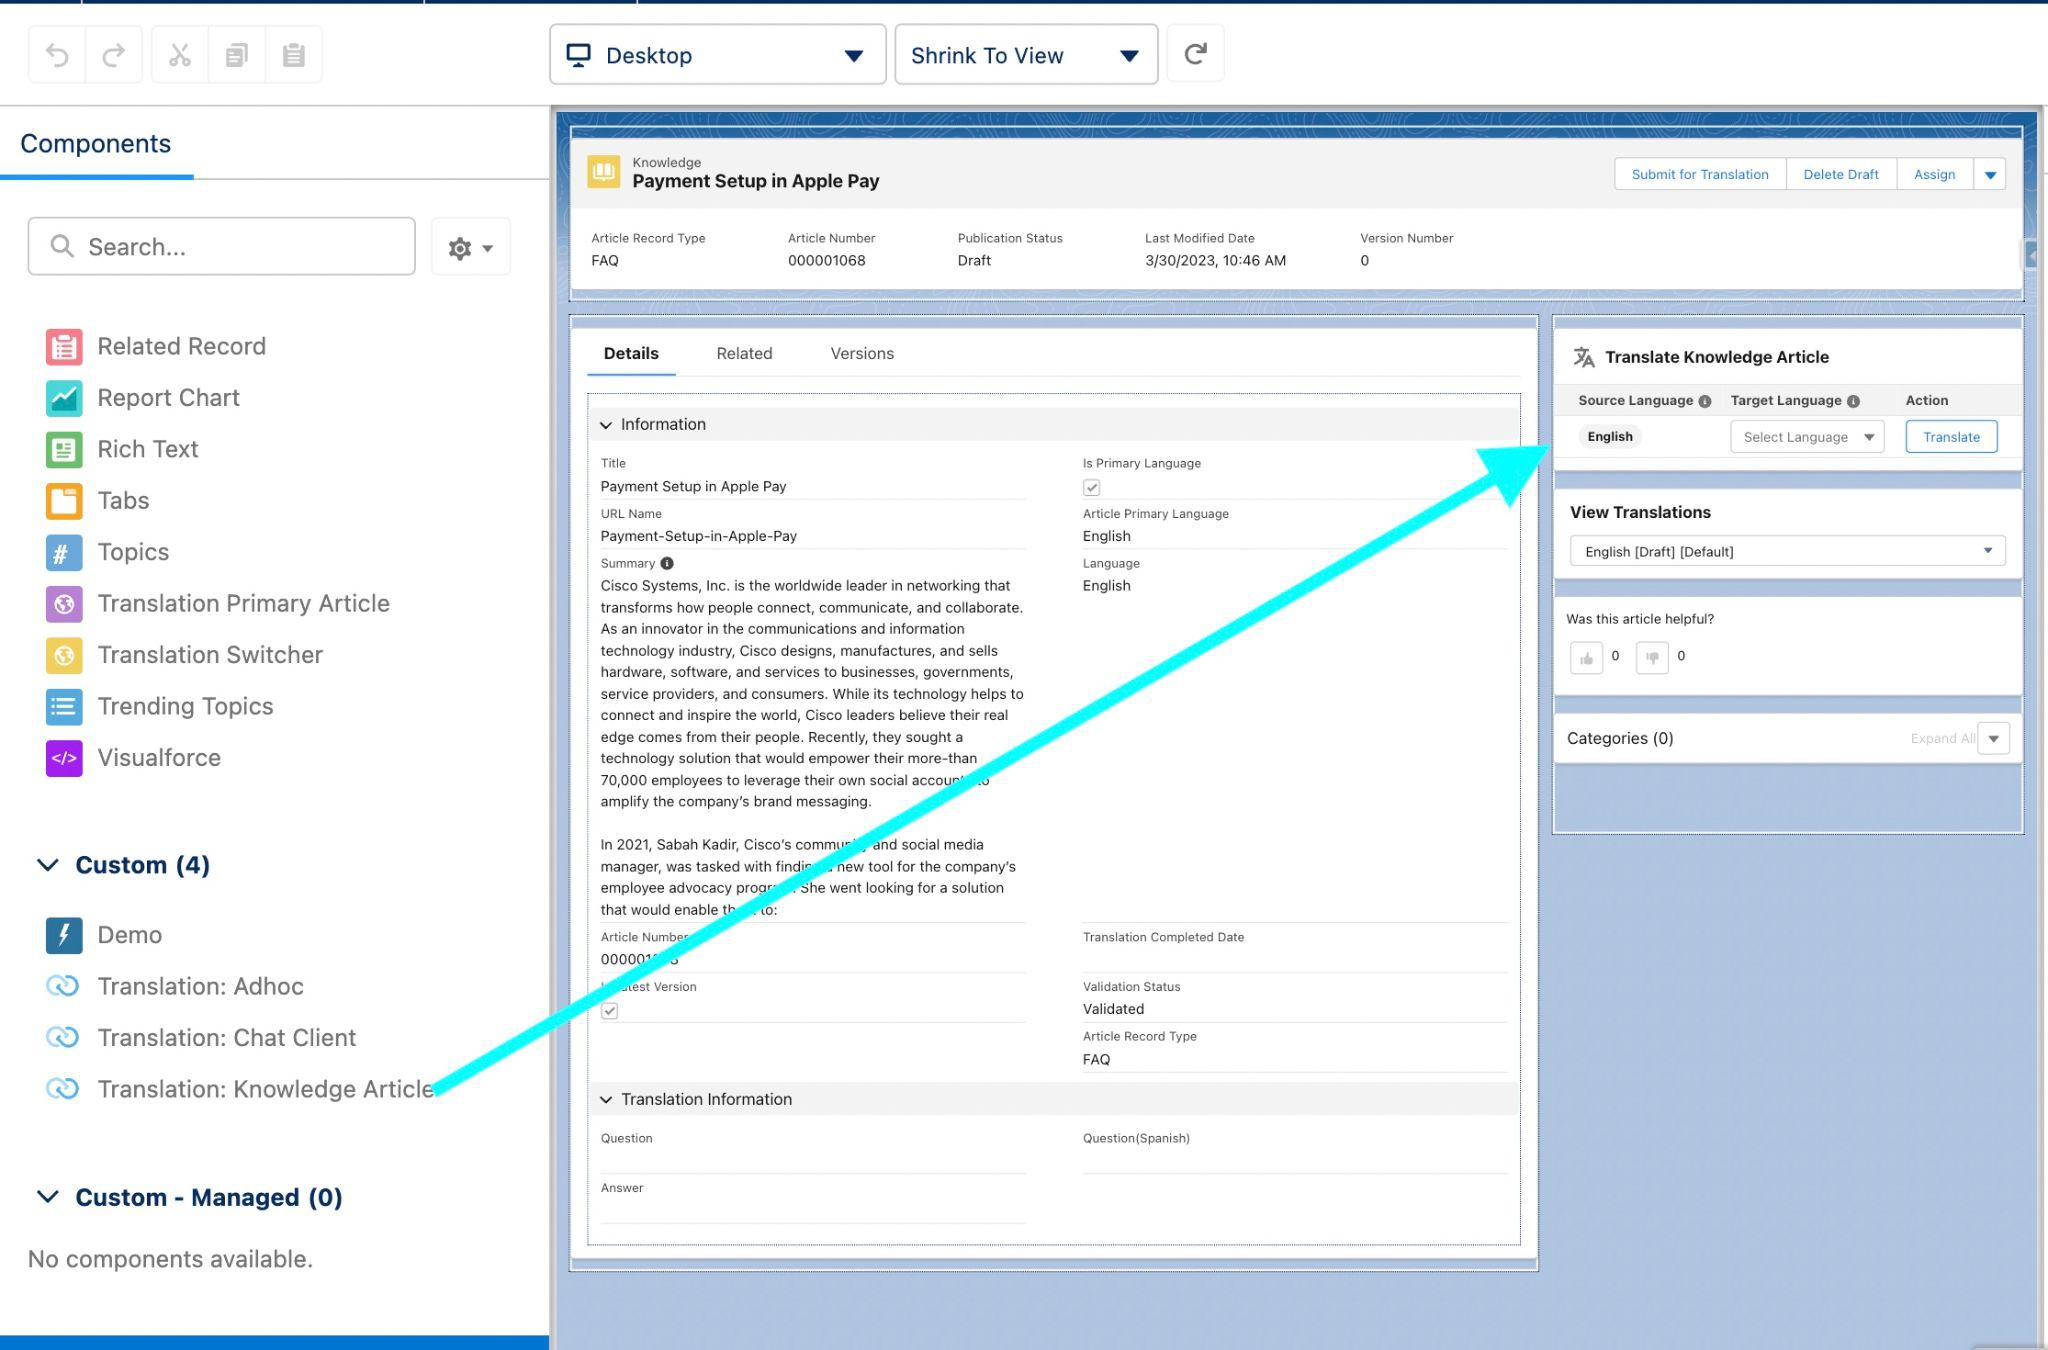
Knowledge article translation enables users to translate knowledge articles using the “Translation: Knowledge Article” widget. Make sure multilingual articles are enabled in Knowledge article settings along with each desired language.
Use cases making this feature valuable include the ad hoc need to localize knowledge articles, for example when agents repeatedly rewrite the same information because a knowledge article may not exist yet. They may not only create, but also localize the knowledge article for an improved customer experience.
To add Knowledge Article Translation follow the below steps.
1. Open a Knowledge record page in Lightning.
2. Click on the gear icon in the top right corner of the screen and select Edit Page.
3. From the App builder, drag and drop the “Translation : Knowledge Article” component to the flexi page layout.
4. Save.
5. Once the widget is added, users can select the target language which is already enabled in the multilingual knowledge article setting and click “Translate”.
 ### Known Restrictions
* While cxconnect.ai supports many more language, in terms of Salesforce Knowledge, the following are the only supported languages for Knowledge: [Click here for list](https://help.salesforce.com/s/articleView?id=sf.faq_getstart_what_languages_does.htm\&type=5)
## *Permission Sets*
The cxconnect.ai Knowledge package comes with two additional permission sets
* CxconnectKnowledgeAdminPermissions
* CxconnectKnowledgeUserPermissions
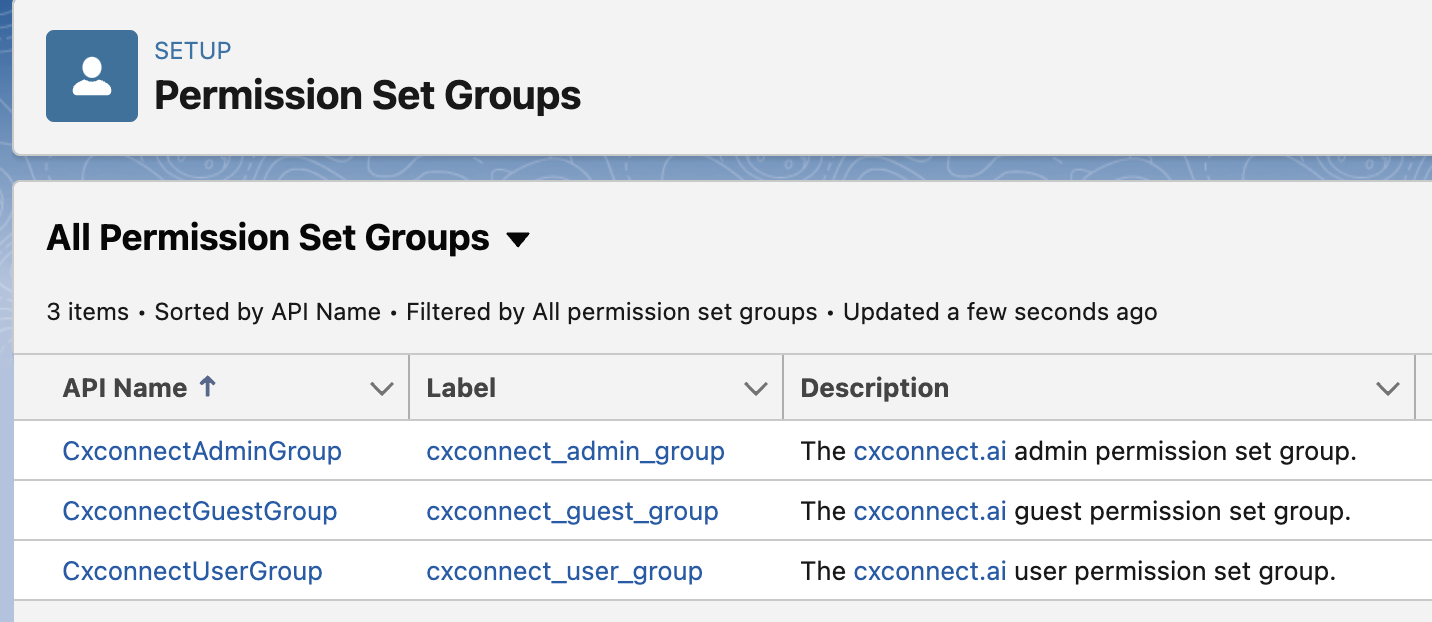
Unless there is a need for more granular permission management it is recommended to simply add these permission sets to the provided **CxconnectAdminGroup** and **CxconnectUserGroup** permission set groups.
### Known Restrictions
* While cxconnect.ai supports many more language, in terms of Salesforce Knowledge, the following are the only supported languages for Knowledge: [Click here for list](https://help.salesforce.com/s/articleView?id=sf.faq_getstart_what_languages_does.htm\&type=5)
## *Permission Sets*
The cxconnect.ai Knowledge package comes with two additional permission sets
* CxconnectKnowledgeAdminPermissions
* CxconnectKnowledgeUserPermissions
Unless there is a need for more granular permission management it is recommended to simply add these permission sets to the provided **CxconnectAdminGroup** and **CxconnectUserGroup** permission set groups.
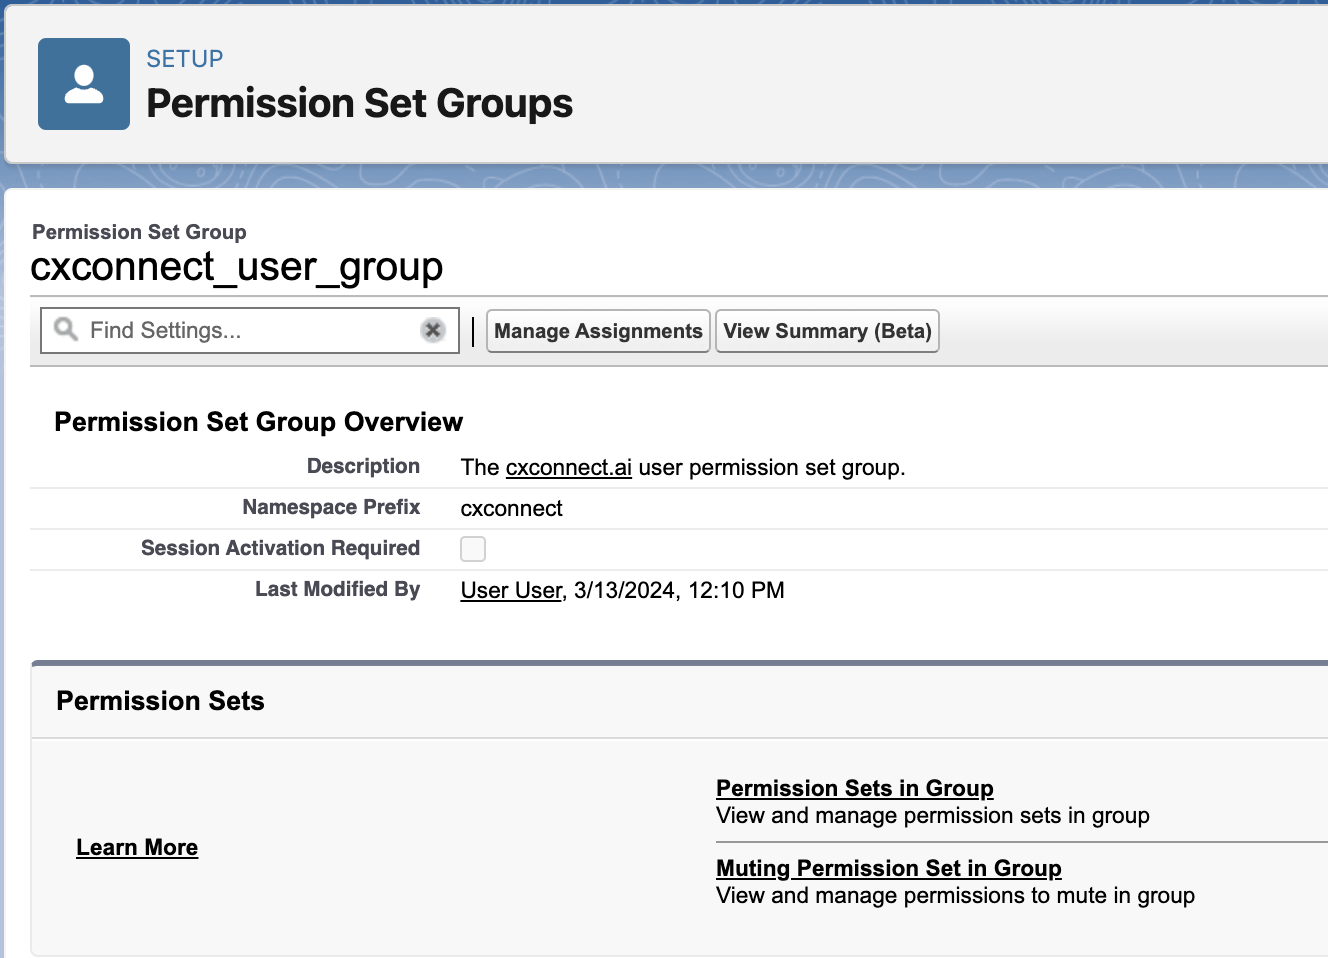
 From a selected permission set group (in this case *cxconnect\_user\_group*), select **Permission Sets in Group**.
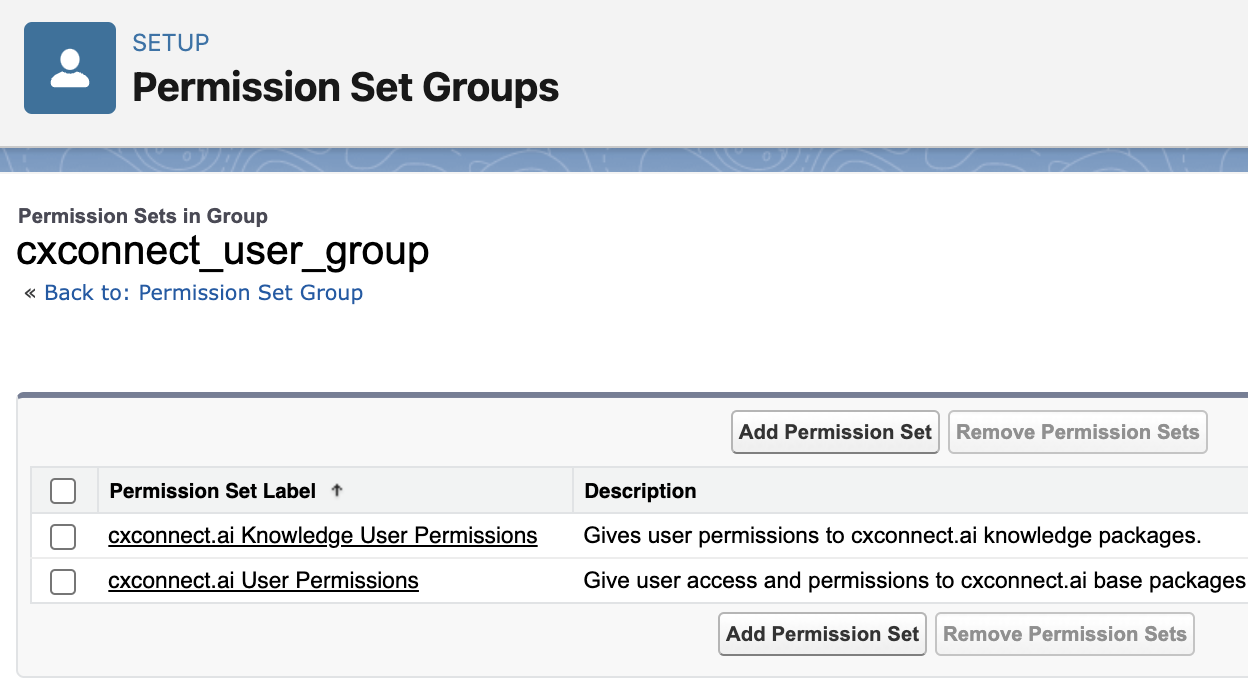
 Click “Add Permission Set” and select the “***cxconnect.ai Knowledge User Permissions***”.
 ## *Knowledge Article Custom Field Translation*
To enable the new feature in Knowledge Translation for custom fields and create a Field Set for the API name "**CXC\_Custom\_Field\_Translation**" on the "knowledge\_\_kav" object, you can follow these steps:
### Step 1: Go to Setup
* Login to Salesforce and navigate to the Setup page.
### Step 2: Select Object Manager
* In the Setup menu, search for "Object Manager" in the quick find box, and then select "Object Manager" from the options.
### Step 3: Find and Select the "knowledge\_\_kav" Object
* In the Object Manager, locate and select the "knowledge\_\_kav" object from the list of objects. This is the object associated with Salesforce Knowledge articles.
### Step 4: Create a Field Set
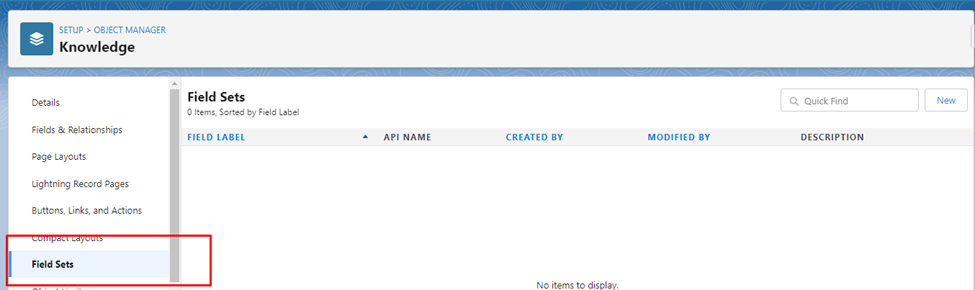
* Within the "knowledge\_\_kav" object, you'll see various tabs and options. Look for "Field Sets" and select it.
## *Knowledge Article Custom Field Translation*
To enable the new feature in Knowledge Translation for custom fields and create a Field Set for the API name "**CXC\_Custom\_Field\_Translation**" on the "knowledge\_\_kav" object, you can follow these steps:
### Step 1: Go to Setup
* Login to Salesforce and navigate to the Setup page.
### Step 2: Select Object Manager
* In the Setup menu, search for "Object Manager" in the quick find box, and then select "Object Manager" from the options.
### Step 3: Find and Select the "knowledge\_\_kav" Object
* In the Object Manager, locate and select the "knowledge\_\_kav" object from the list of objects. This is the object associated with Salesforce Knowledge articles.
### Step 4: Create a Field Set
* Within the "knowledge\_\_kav" object, you'll see various tabs and options. Look for "Field Sets" and select it.
 ### Step 5: Create a New Field Set
* Click on the "New" button to create a new Field Set.
### Step 6: Name the Field Set
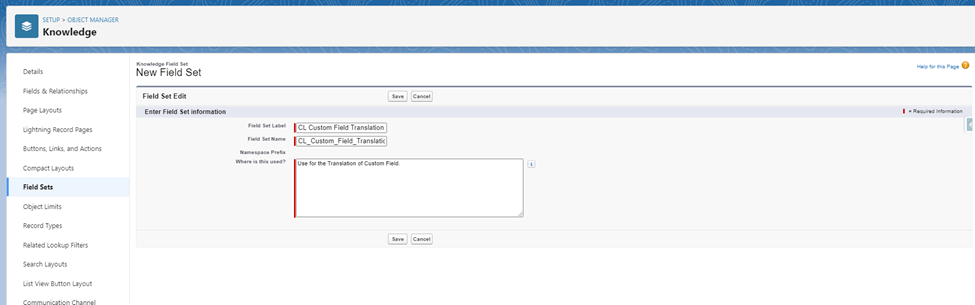
* Provide a name for the Field Set “CXC Custom Field Translation" so enter that name (API name: CXC\_Custom\_Field\_Translation).
### Step 5: Create a New Field Set
* Click on the "New" button to create a new Field Set.
### Step 6: Name the Field Set
* Provide a name for the Field Set “CXC Custom Field Translation" so enter that name (API name: CXC\_Custom\_Field\_Translation).
 ### Step 7: Add Custom Fields for Translation
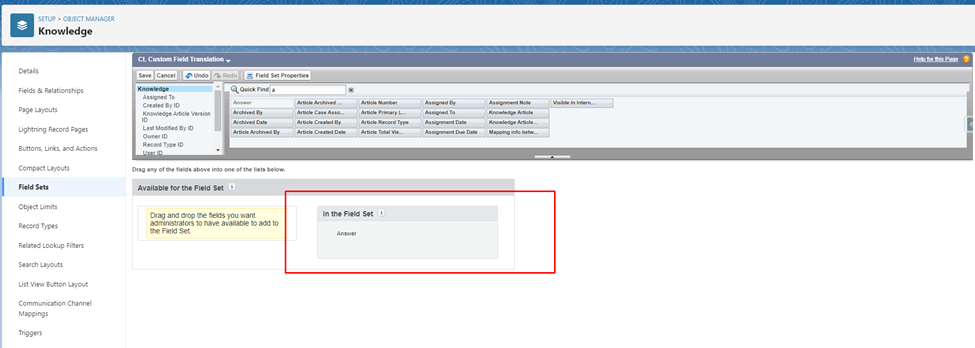
* To add custom fields that you want to translate, you'll need to add them to this Field Set. Locate the "Fields" section within the Field Set, and use the "Add Field" or similar option to select and add the custom fields you want to include in the translation.
### Step 7: Add Custom Fields for Translation
* To add custom fields that you want to translate, you'll need to add them to this Field Set. Locate the "Fields" section within the Field Set, and use the "Add Field" or similar option to select and add the custom fields you want to include in the translation.
 ### Step 8: Save the Field Set
* After adding all the necessary custom fields to the Field Set, save the Field Set configuration
### Step 8: Save the Field Set
* After adding all the necessary custom fields to the Field Set, save the Field Set configuration