> ## Documentation Index
> Fetch the complete documentation index at: https://docs.cxconnect.ai/llms.txt
> Use this file to discover all available pages before exploring further.
# Chat Application
> The installation guide for the cxconnect.ai chat app for Salesforce
# Chat Installation and Setup
## *Deprecation Notice*
Salesforce has [officially deprecated](https://help.salesforce.com/s/articleView?language=en_US\&id=001790618\&type=1) LiveAgentChat and is no longer adding to/updating this feature. They recommend using the new [Enhanced Messaging](#enhanced-messaging-installation-and-setup) features.
## *Latest Release*
The [cxconnect.ai Chat App](../../../../changelog/salesforce/releases/chat-app)
## *Omni-Chat*
1. Make sure you have already set up regular live chat in Salesforce. Then, follow the standard [help](https://help.salesforce.com/s/articleView?language=en_US\&type=5\&id=sf.live_agent_intro_lightning.htm) for setting up agent chat in the Lightning Experience.
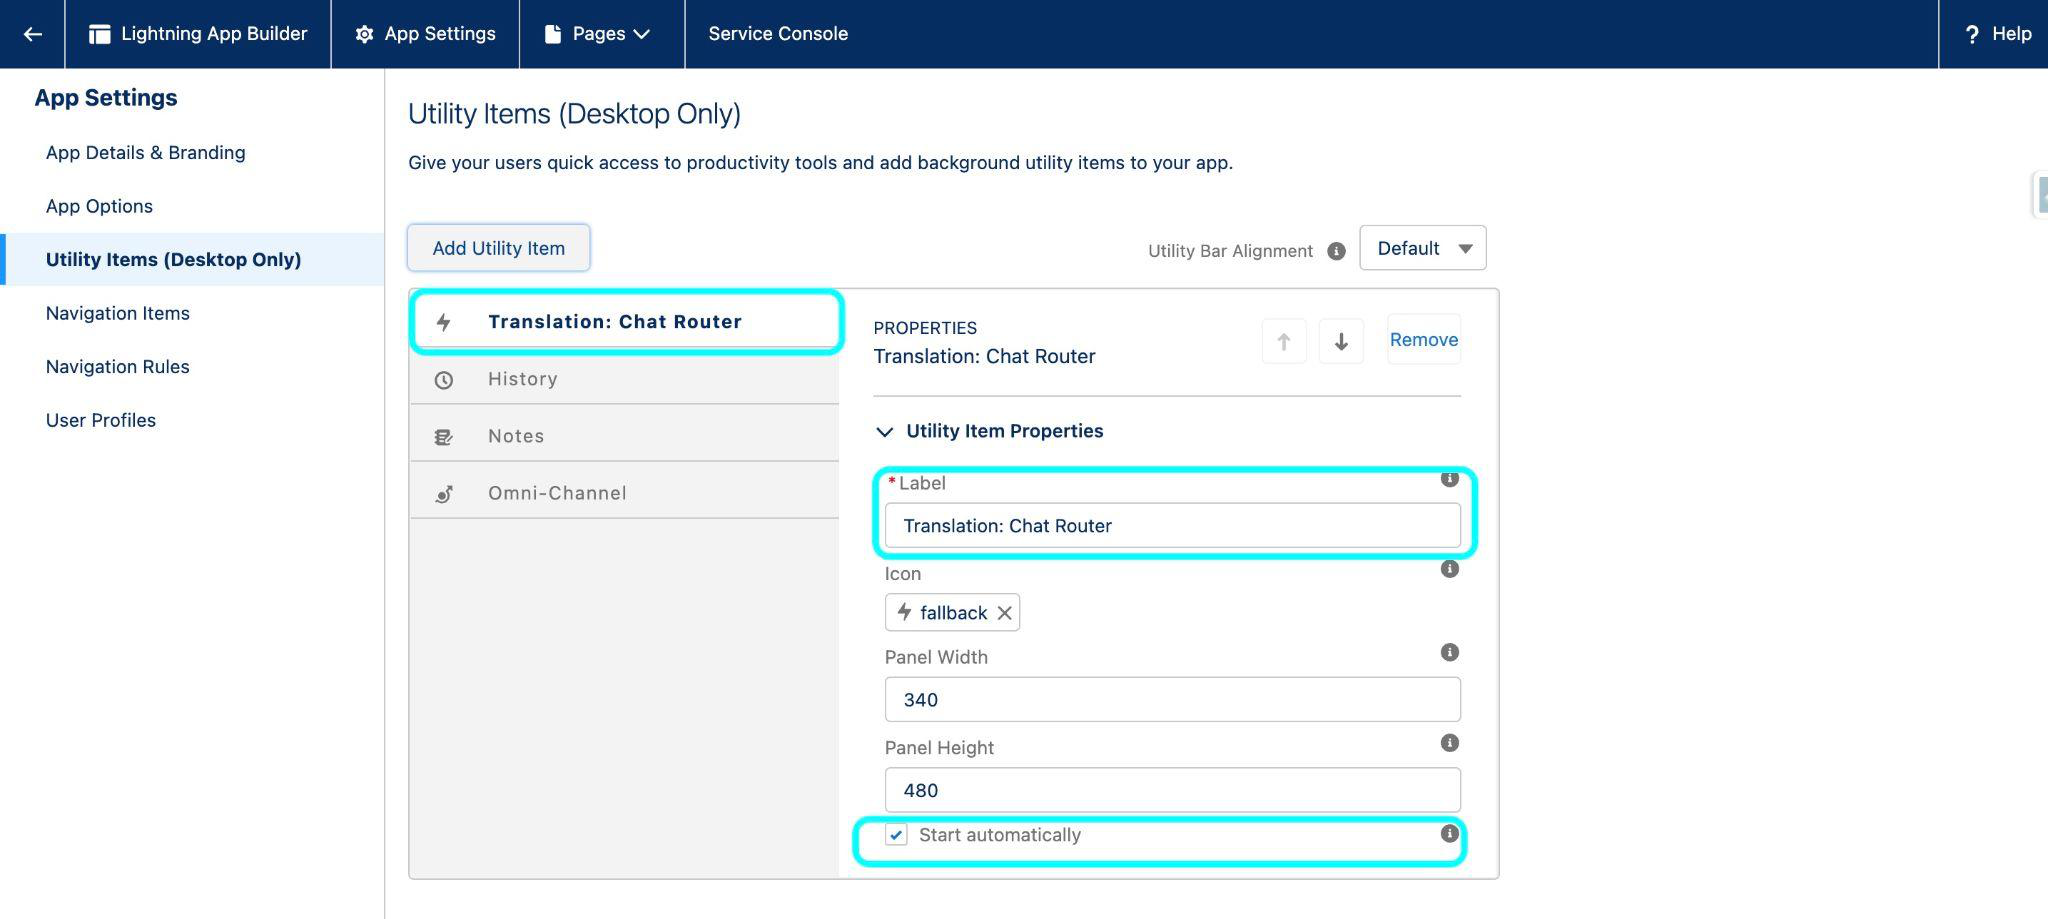
2. Add **Translation: Chat Router** to the Utility Bar of the Service Console.
1. From Setup in Salesforce enter **App Manager** in the Quick Find Box
2. Click App Manager
3. In the App Manager, scroll down to the Service Console you want to add translated live chat to and click the arrow on the right side of the page and choose edit. This will open the App Builder
4. Select **Utility Items (Desktop Only)**
5. Click Add Utility Item button
6. In the App Builder, choose the **Utility Items** tab
7. Click the **Add Utility Item** button
8. In the menu that opens, click on the “Translation: Chat Router”
9. Check the “**Start automatically**” checkbox
10. Save
 3. Add **Translation: Chat Client** to the Live Chat Transcript Lightning Page.
1. Open a chat transcript page in the Service Console.
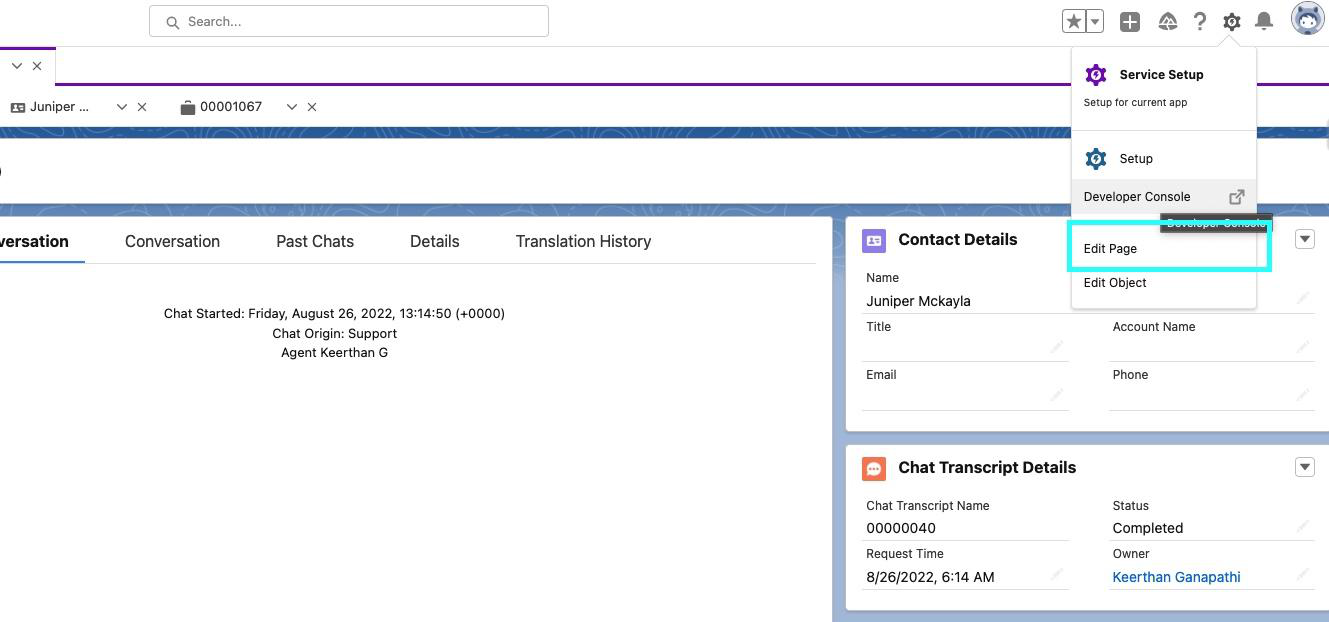
2. Click on the gear icon in the top right corner of the screen and select Edit Page.
3. Add **Translation: Chat Client** to the Live Chat Transcript Lightning Page.
1. Open a chat transcript page in the Service Console.
2. Click on the gear icon in the top right corner of the screen and select Edit Page.
 4. From the App builder, drag and drop “Translation : Chat Client” to the new default custom tab created.
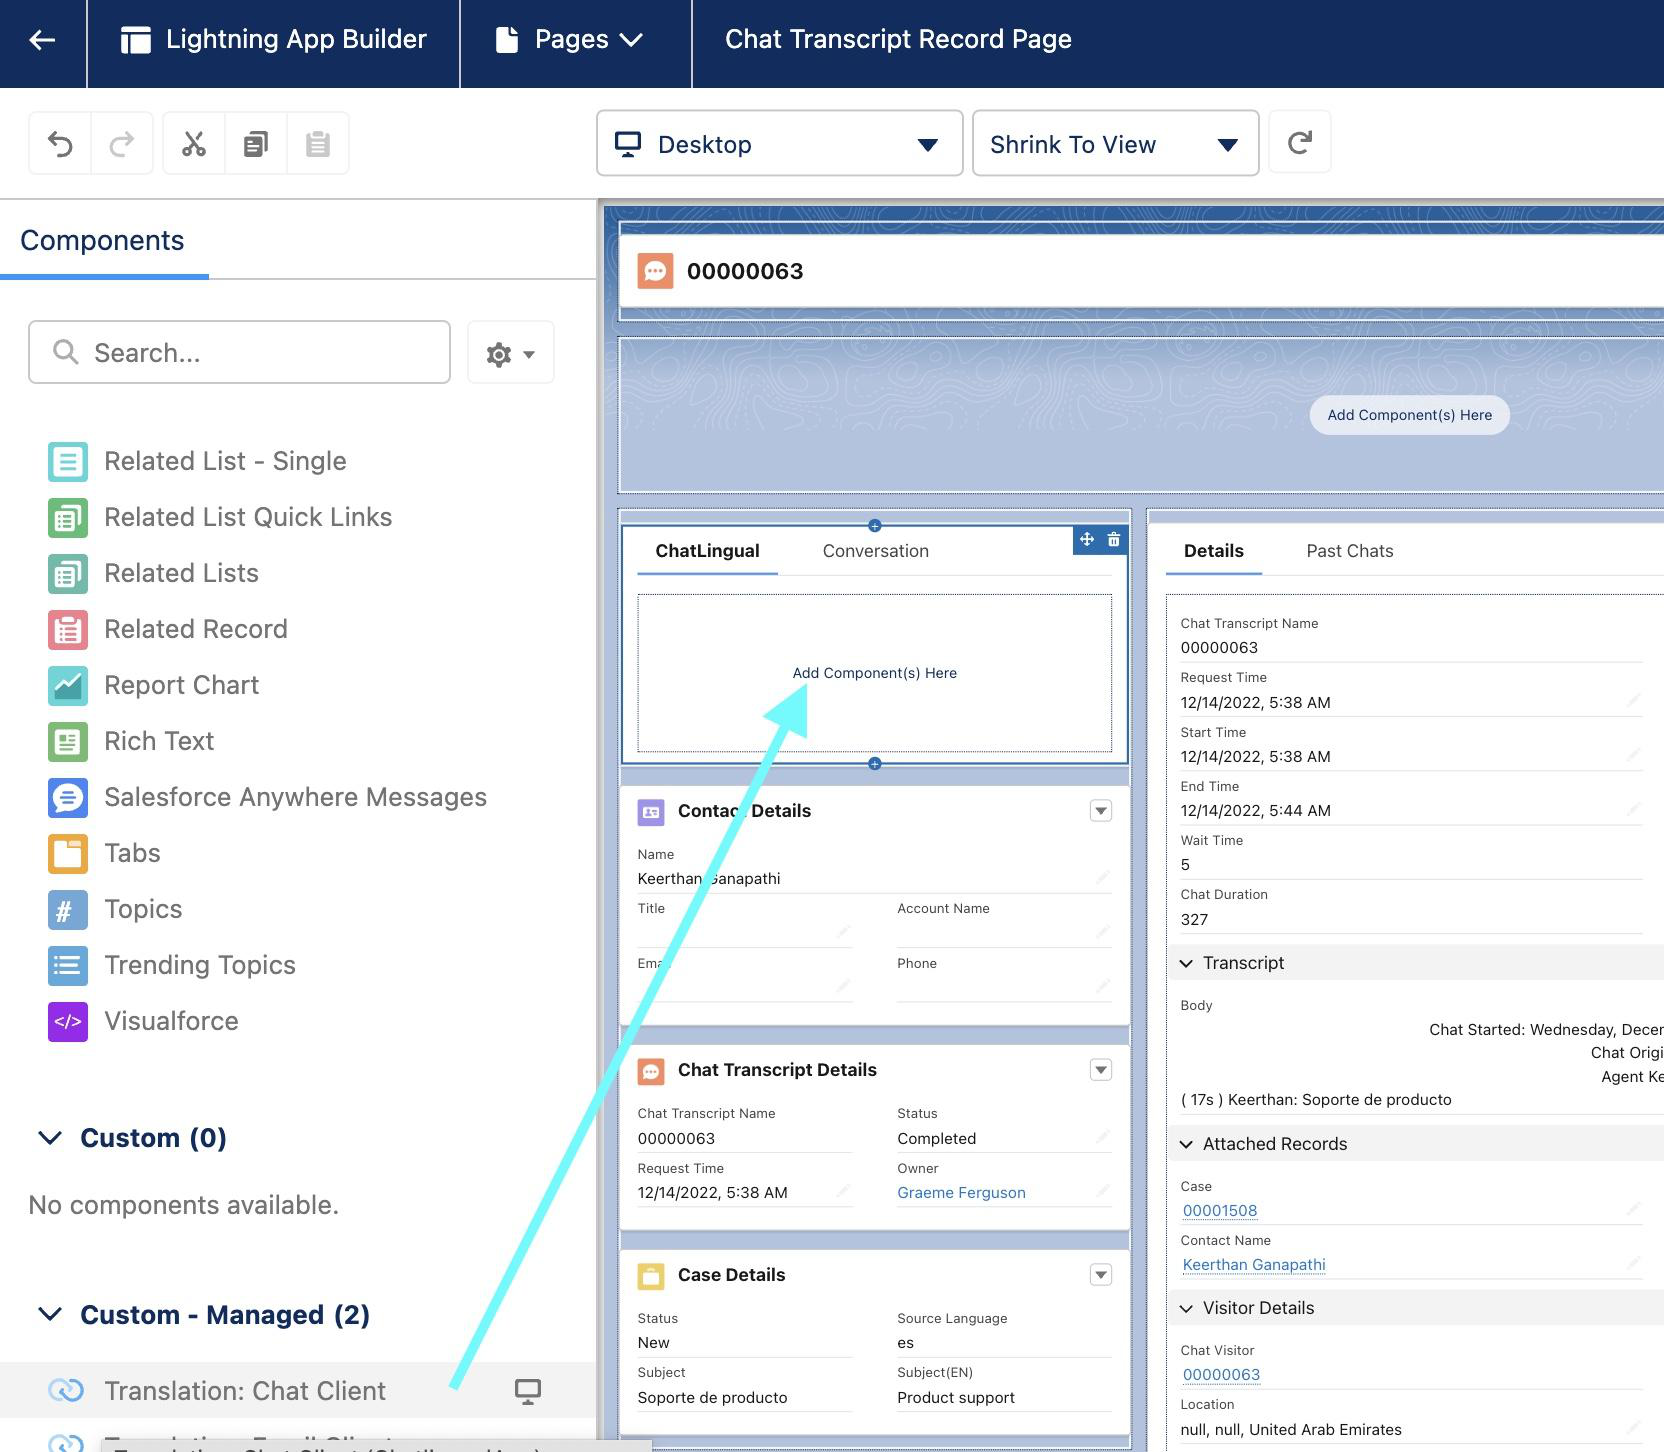 5. Follow steps 3 and 4 again to add another tab “**Translation History**”.
1. Navigate to the “Live Chat Transcript” object.
2. Update page layout to add “Translation History” in the “Related List” section.
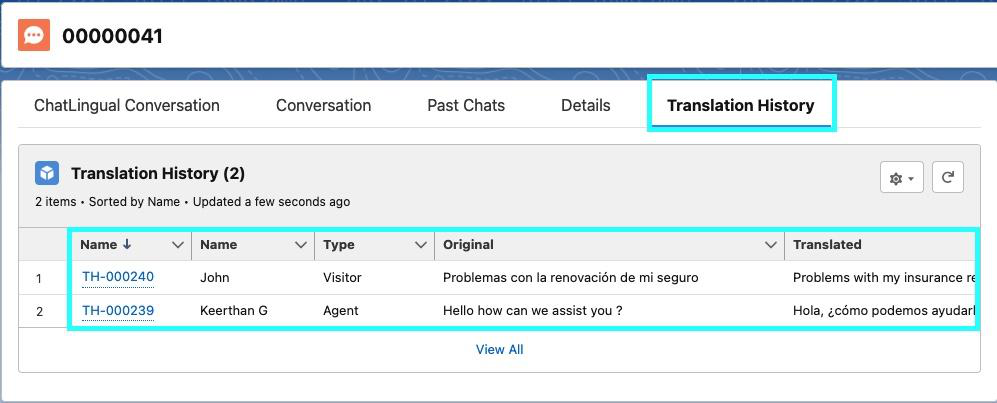
3. This tab will enable the user to view the history of translation for each chat once the chat is ended.
4. In the side panel of the “Live Chat Transcript” lightning page, select “Related List - Single” and then select Translation History as a related object.
5. Follow steps 3 and 4 again to add another tab “**Translation History**”.
1. Navigate to the “Live Chat Transcript” object.
2. Update page layout to add “Translation History” in the “Related List” section.
3. This tab will enable the user to view the history of translation for each chat once the chat is ended.
4. In the side panel of the “Live Chat Transcript” lightning page, select “Related List - Single” and then select Translation History as a related object.
 6. Save and activate the page
Live chat translation should be up and running now! Use cxconnect.ai Translation to send and receive messages with the customer. The customer language is identified as soon as the first message is received by omni-chat from the support portal.
## *Language Override*
The cxconnect.ai App supports a language override capability when language detection fails. This feature empowers system administrators to configure whether agents can override the automatically detected language. By enabling this feature, a picklist containing a list of enabled languages will be displayed, enabling agents to effortlessly switch between languages.
**Note:** The translation engine will automatically detect the language of the visitor's message based on the latest message from the visitor in the chat transcript.
**Steps:**
1. Navigate to the Live Chat Transcript Lightning Page.
2. Drop the "Translation: Chat Client" component onto the flexi page.
3. In the settings area of the flexi page, locate the checkbox in the top right corner.
6. Save and activate the page
Live chat translation should be up and running now! Use cxconnect.ai Translation to send and receive messages with the customer. The customer language is identified as soon as the first message is received by omni-chat from the support portal.
## *Language Override*
The cxconnect.ai App supports a language override capability when language detection fails. This feature empowers system administrators to configure whether agents can override the automatically detected language. By enabling this feature, a picklist containing a list of enabled languages will be displayed, enabling agents to effortlessly switch between languages.
**Note:** The translation engine will automatically detect the language of the visitor's message based on the latest message from the visitor in the chat transcript.
**Steps:**
1. Navigate to the Live Chat Transcript Lightning Page.
2. Drop the "Translation: Chat Client" component onto the flexi page.
3. In the settings area of the flexi page, locate the checkbox in the top right corner.
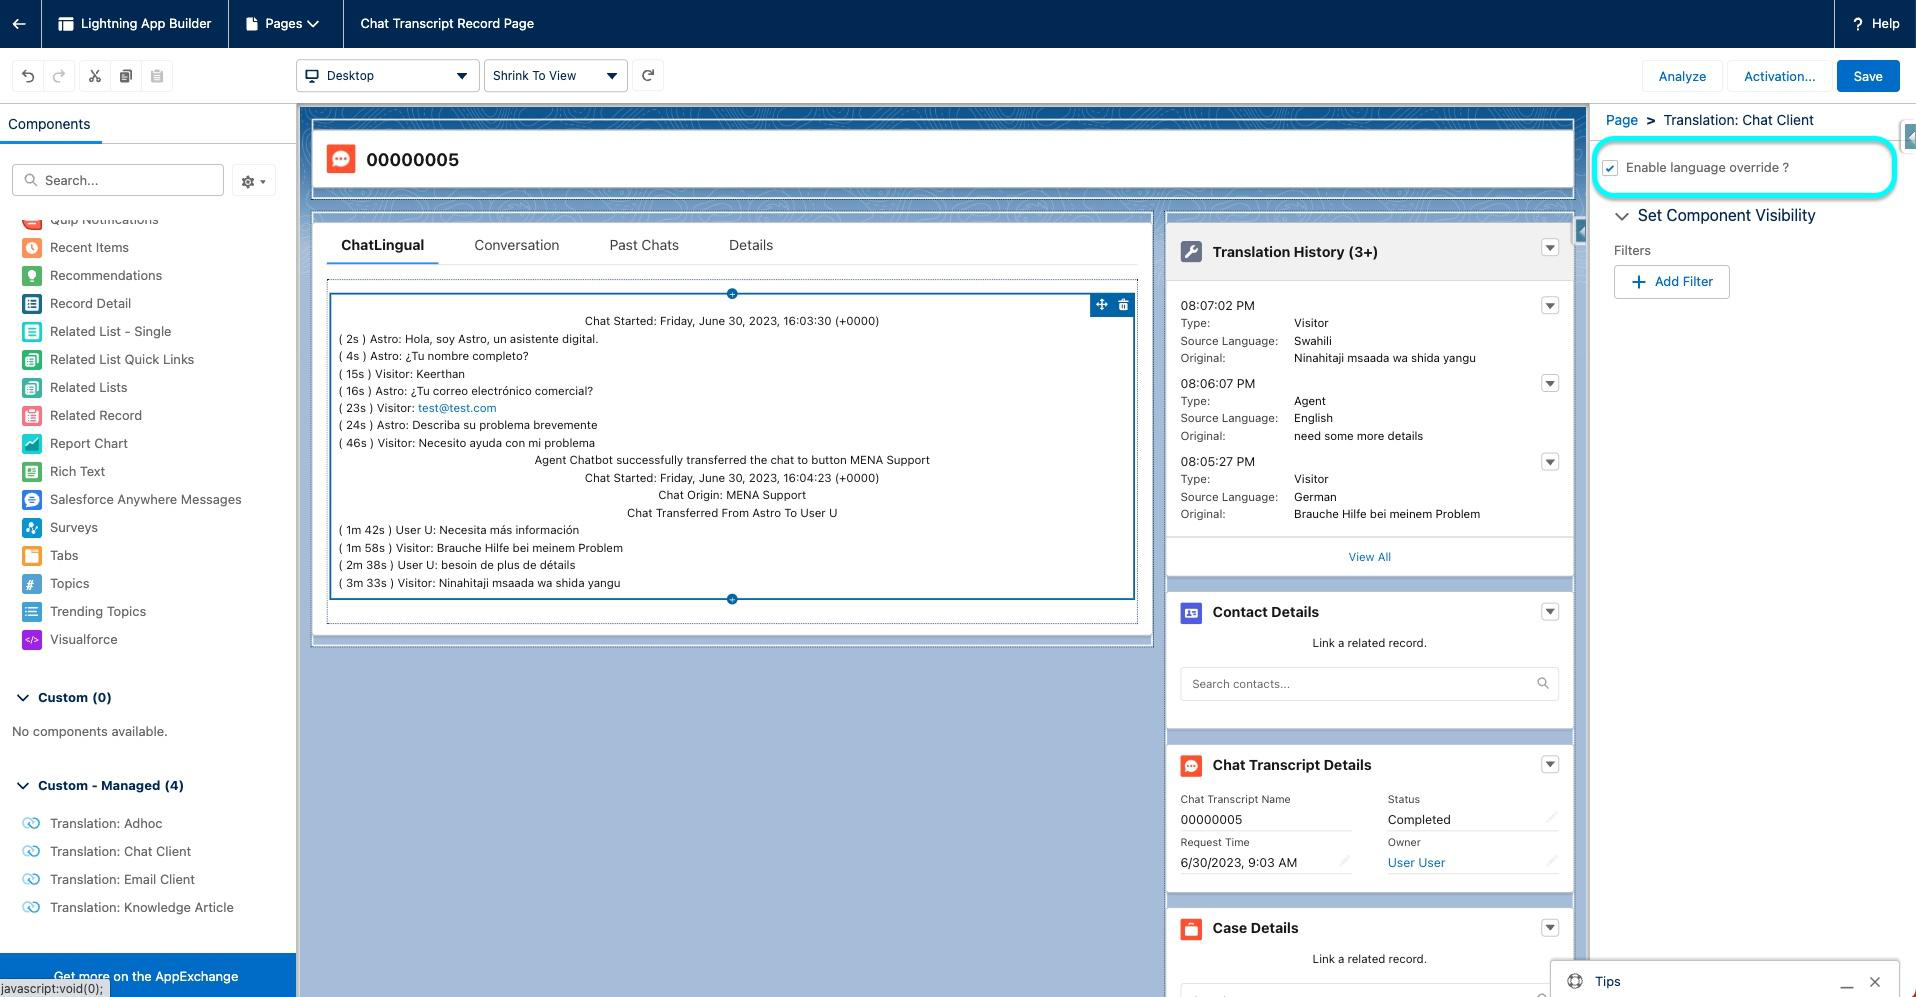 3. Check the checkbox to enable the language override feature.
4. Uncheck the checkbox to disable the language override feature.
5. Save and activate the page
3. Check the checkbox to enable the language override feature.
4. Uncheck the checkbox to disable the language override feature.
5. Save and activate the page
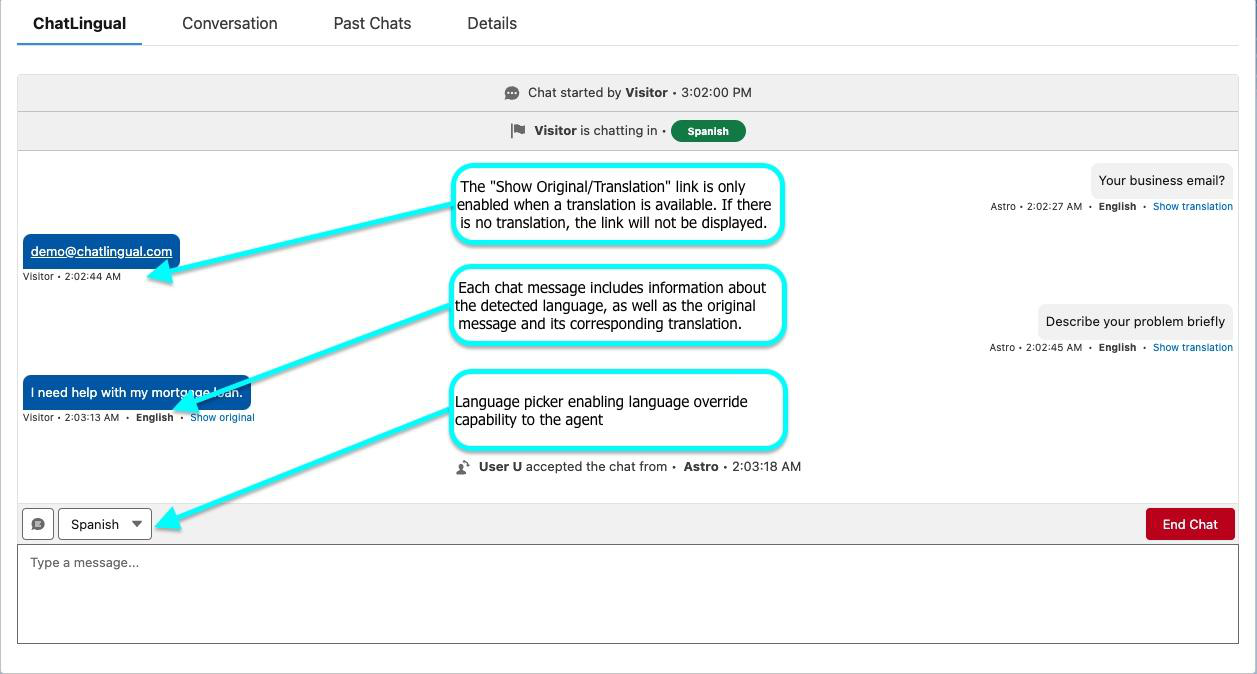
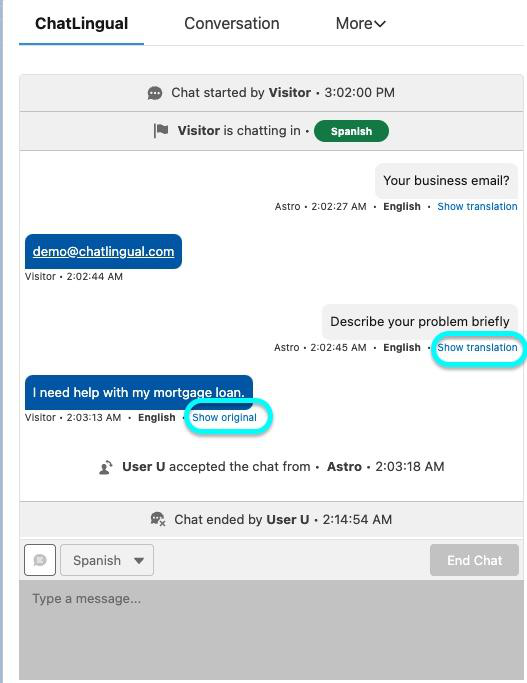 6. ***Show original*** and ***Show translation*** hyperlinks are enabled for agents if there was a conversation with translation enabled.
1. When clicked, the content of the message is displayed in either the translation or original message
7. Quick text can also be translated.
8. File sharing and agent transfer is not currently supported from the **cxconnect.ai Translation** window. Use a standard translation window to perform this action.
6. ***Show original*** and ***Show translation*** hyperlinks are enabled for agents if there was a conversation with translation enabled.
1. When clicked, the content of the message is displayed in either the translation or original message
7. Quick text can also be translated.
8. File sharing and agent transfer is not currently supported from the **cxconnect.ai Translation** window. Use a standard translation window to perform this action.