> ## Documentation Index
> Fetch the complete documentation index at: https://docs.cxconnect.ai/llms.txt
> Use this file to discover all available pages before exploring further.
# Off Market Installation Guide
> The installation guide for the cxconnect.ai Genesys App
# **Install Steps**
Reach out to [help@cxconnect.ai](mailto:help@cxconnect.ai) if you need any assistance during the process.
# Create an OAuth Code Authorization / PKCE client
* The Code Authorization / PKCE client will allow frontend communication between Genesys and the cxconnect.ai application
* Log in to your Genesys Cloud organization and create a new OAuth client that uses the Code Authorization / PKCE type. For more information, see [Create an OAuth client](https://help.mypurecloud.com/articles/create-an-oauth-client/) in the Genesys Cloud Resource Center.
* Add the following to **Authorized redirect URI**:
* If installing into a Production environment use: `https://genesys.cxconnect.ai/genesys/`
* If installing into a Test environment use: `https://test.genesys.cxconnect.ai/genesys/`
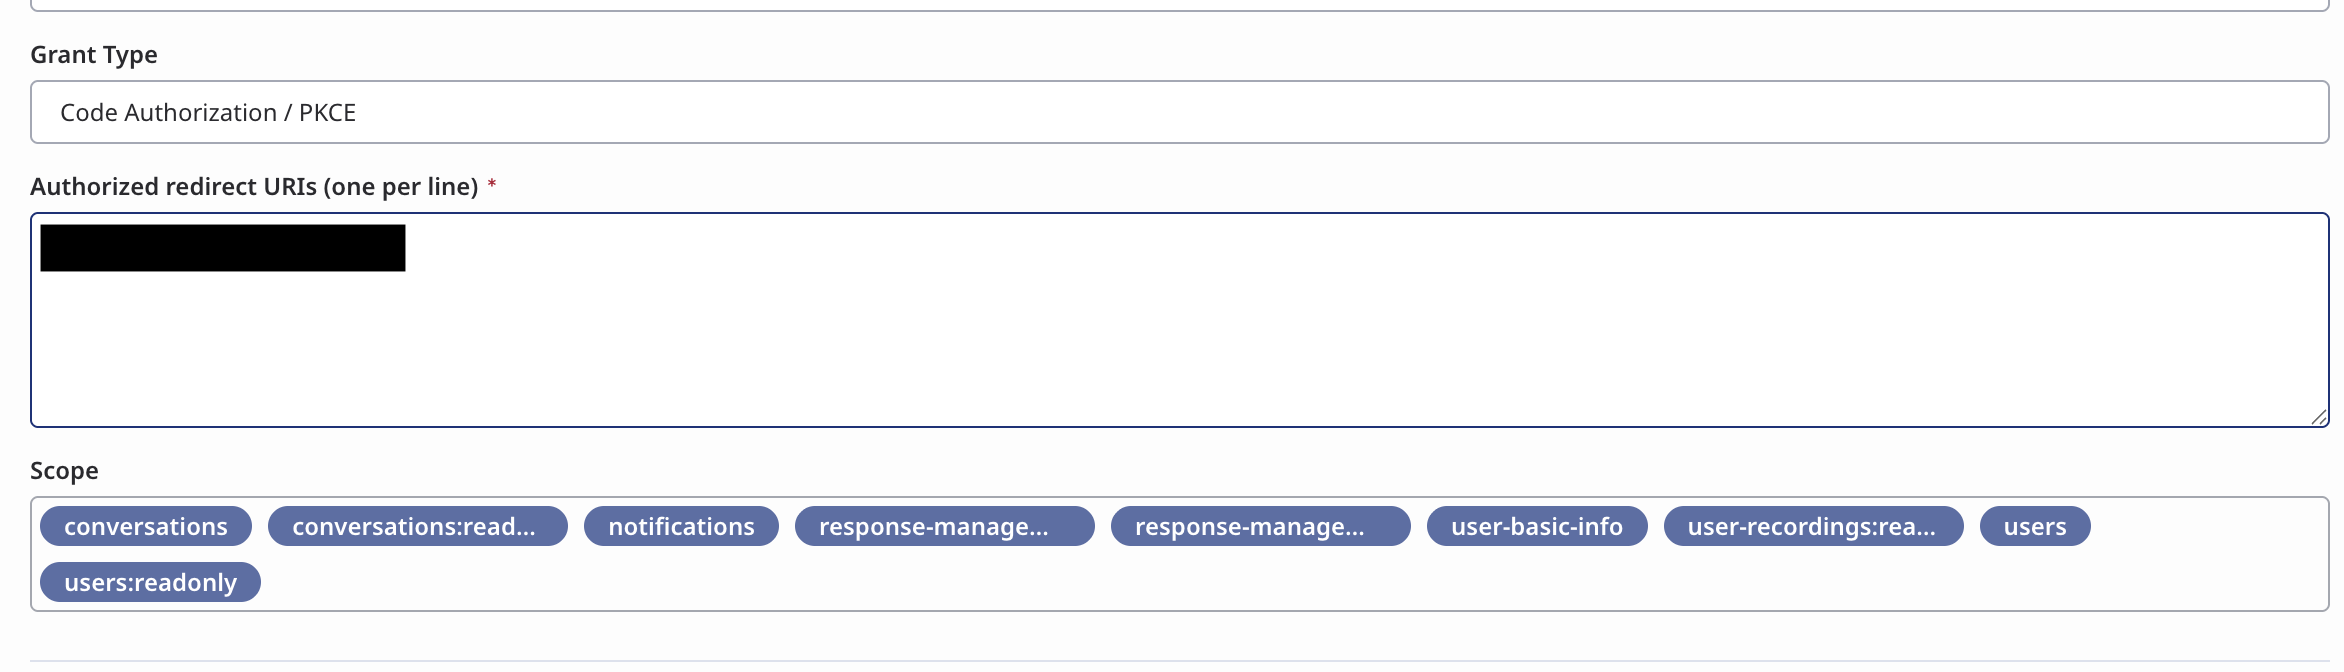 * Add the following **Scopes**:\
`conversations, conversations:readonly, notifications, response-management, response-management:readonly, user-basic-info,users:readonly`
* Provide the generated client ID and client secret from your OAuth client and specify the region where your Genesys Cloud organization is located to cxconnect.ai.
# Create an OAuth Client Credentials client
* Add the following **Scopes**:\
`conversations, conversations:readonly, notifications, response-management, response-management:readonly, user-basic-info,users:readonly`
* Provide the generated client ID and client secret from your OAuth client and specify the region where your Genesys Cloud organization is located to cxconnect.ai.
# Create an OAuth Client Credentials client
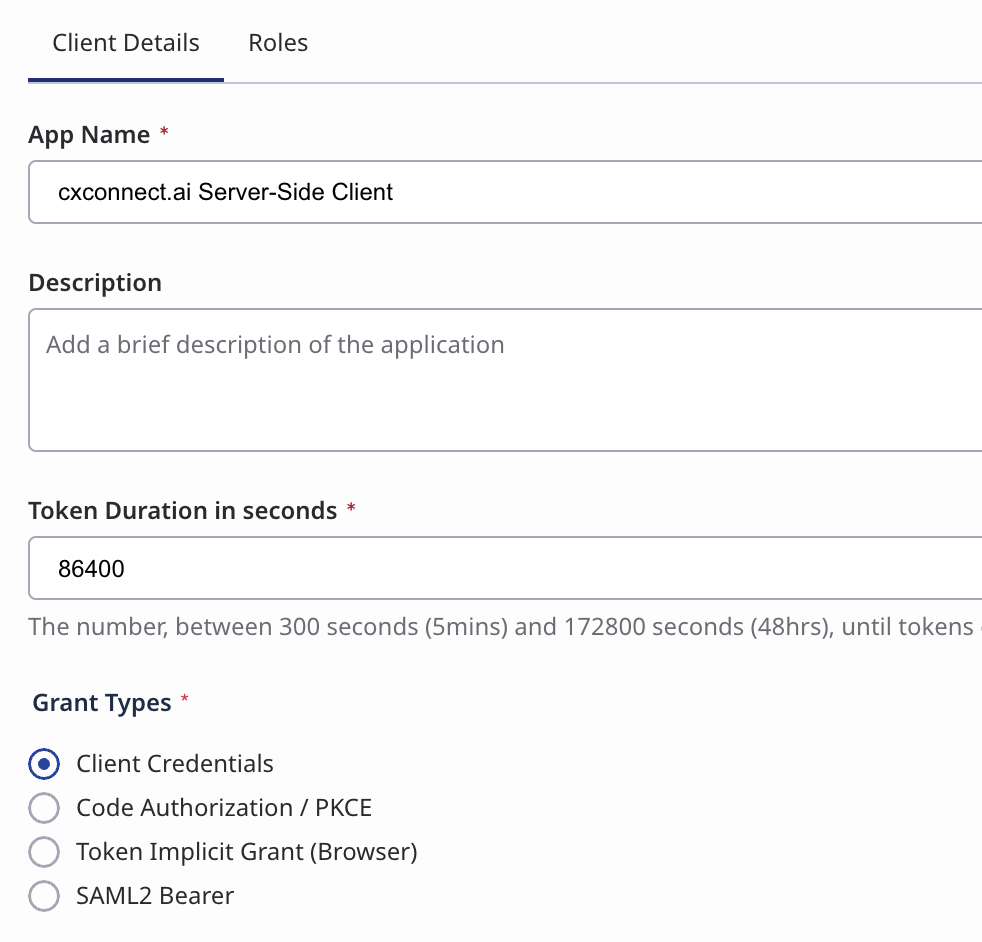 * The Client Credentials client will allow cxconnect.ai servers to communicate and manage the widget integration.
* Create a Client Credentials OAuth grant, similar to above.
* Copy the Client ID and Client Secret for sending to cxconnect.ai during activation.
* This allows cxconnect.ai to make necessary updates to the widget.
* Add a role with `integrations:integration:edit` to the created OAuth Client
* The Client Credentials client will allow cxconnect.ai servers to communicate and manage the widget integration.
* Create a Client Credentials OAuth grant, similar to above.
* Copy the Client ID and Client Secret for sending to cxconnect.ai during activation.
* This allows cxconnect.ai to make necessary updates to the widget.
* Add a role with `integrations:integration:edit` to the created OAuth Client
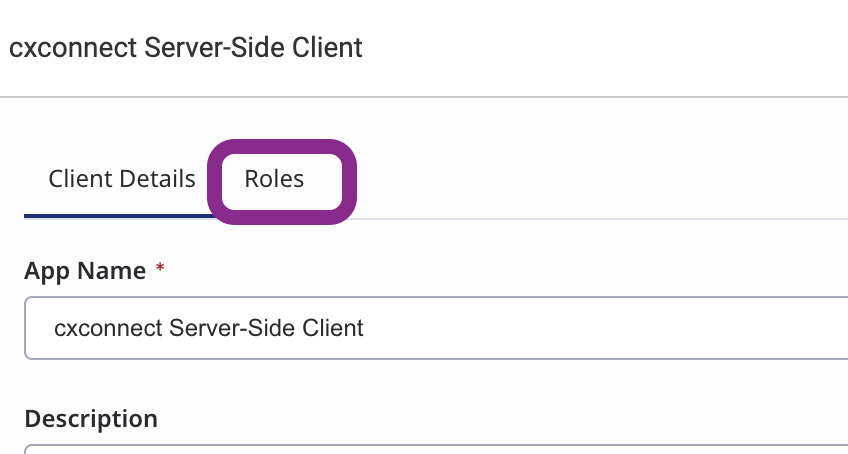 * You may use an existing Role or add a new one
### Adding a new Role
* Navigate to Admin > People & Permissions > Roles/Permissions
* You may use an existing Role or add a new one
### Adding a new Role
* Navigate to Admin > People & Permissions > Roles/Permissions
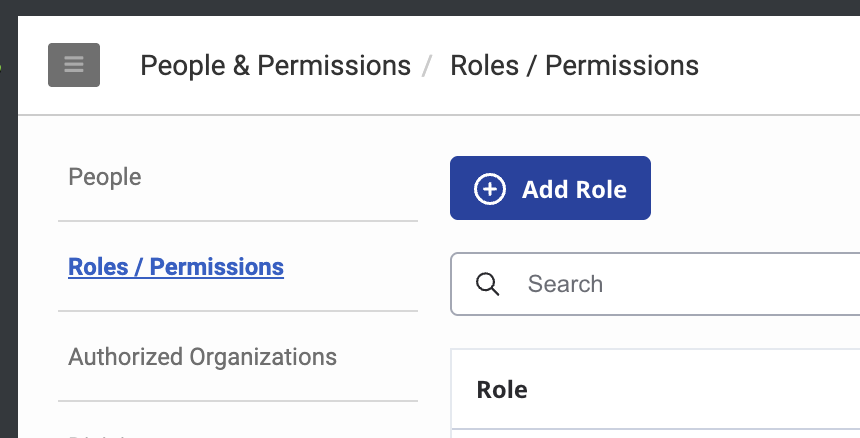 * Click "Add Role"
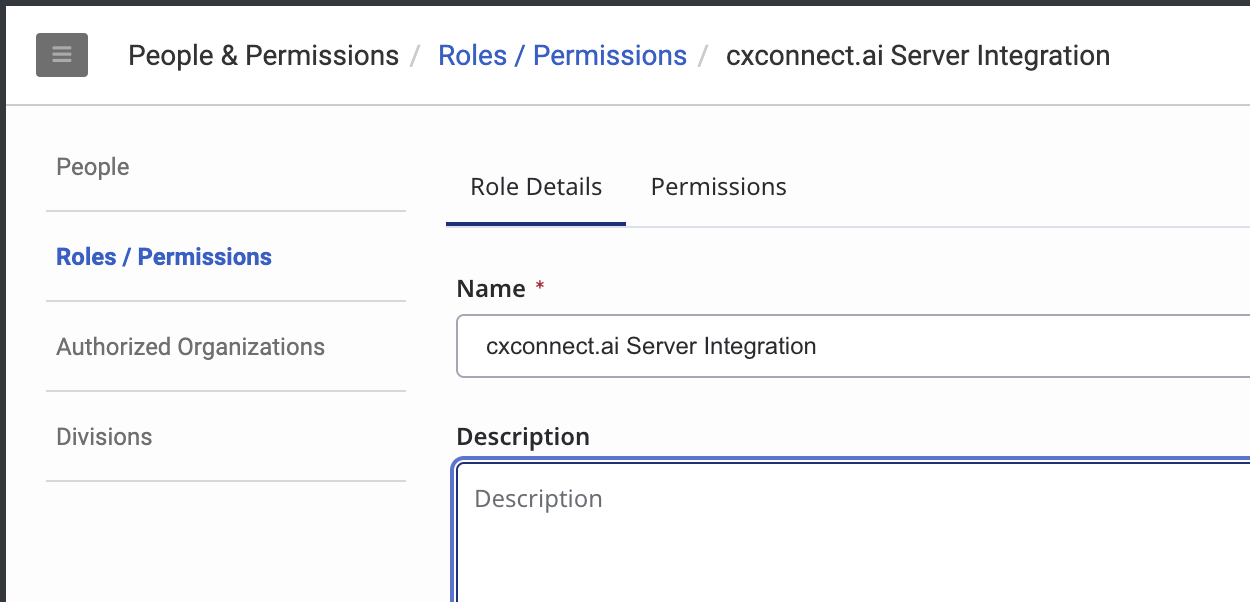 * Name the Role
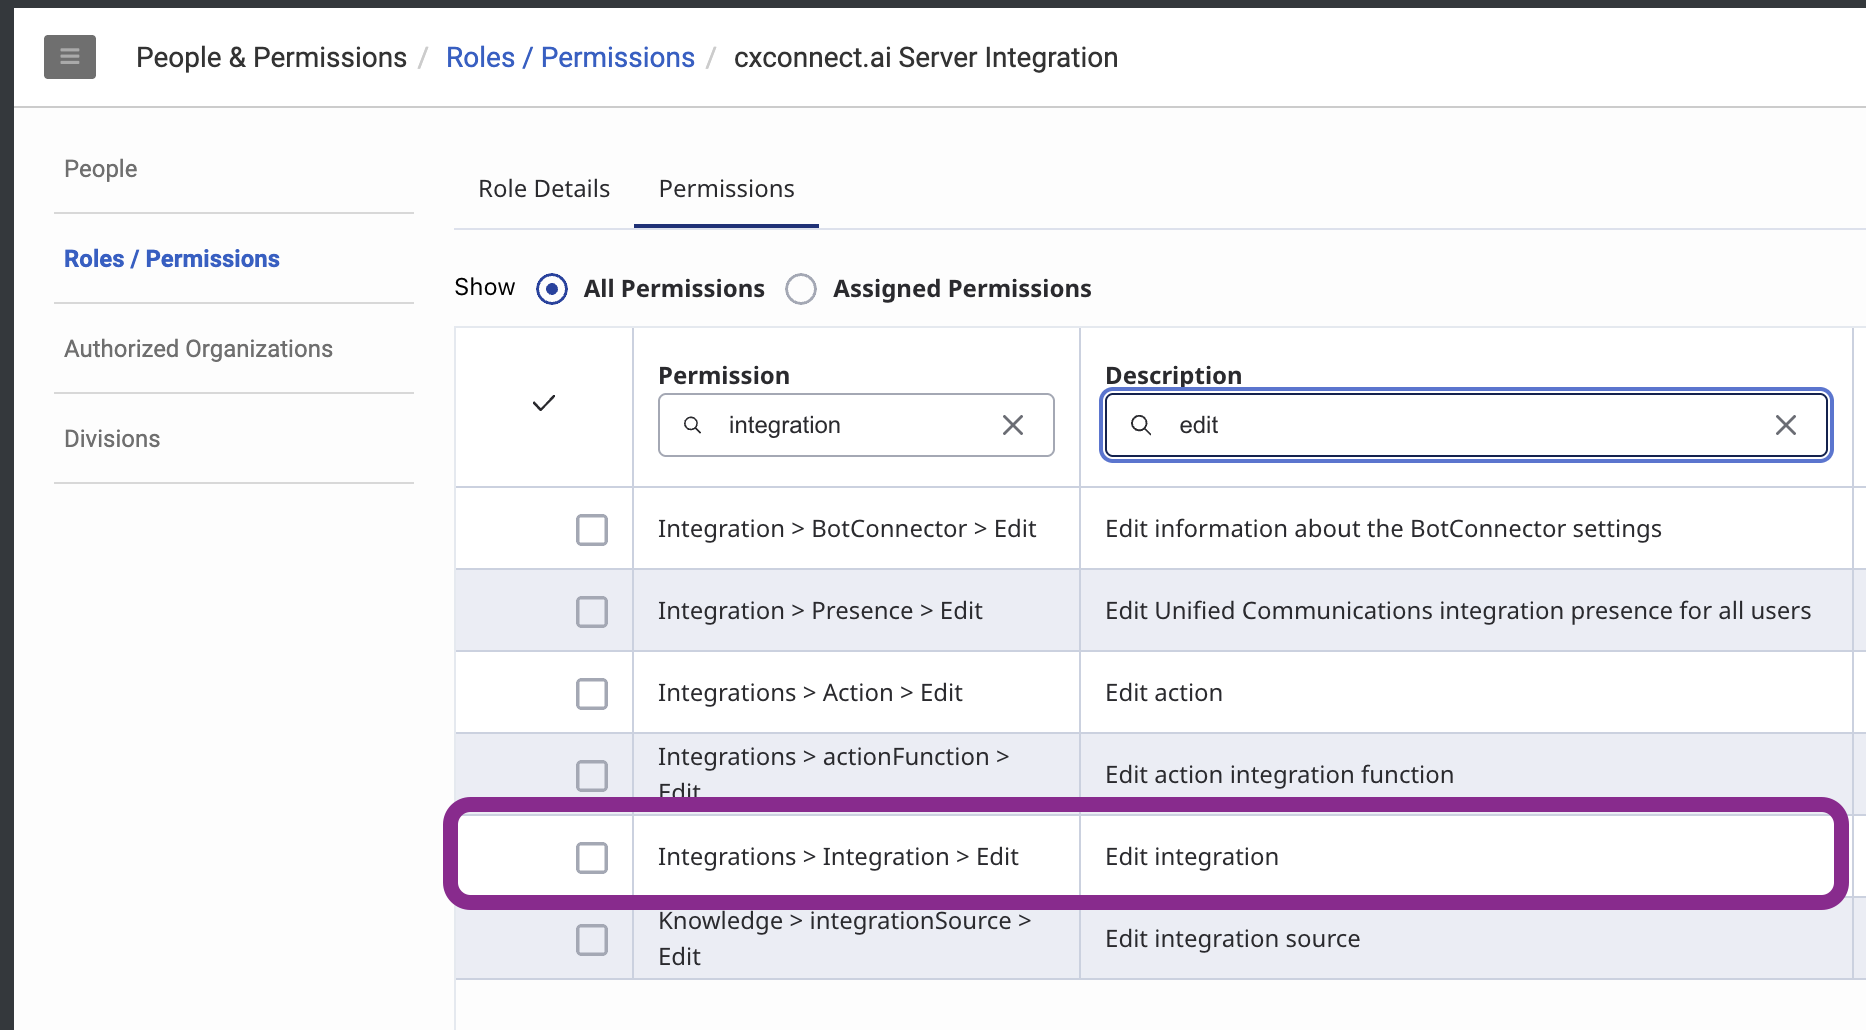 * On the Permissions tab search, find, and select the Integrations > Integration > Edit permission
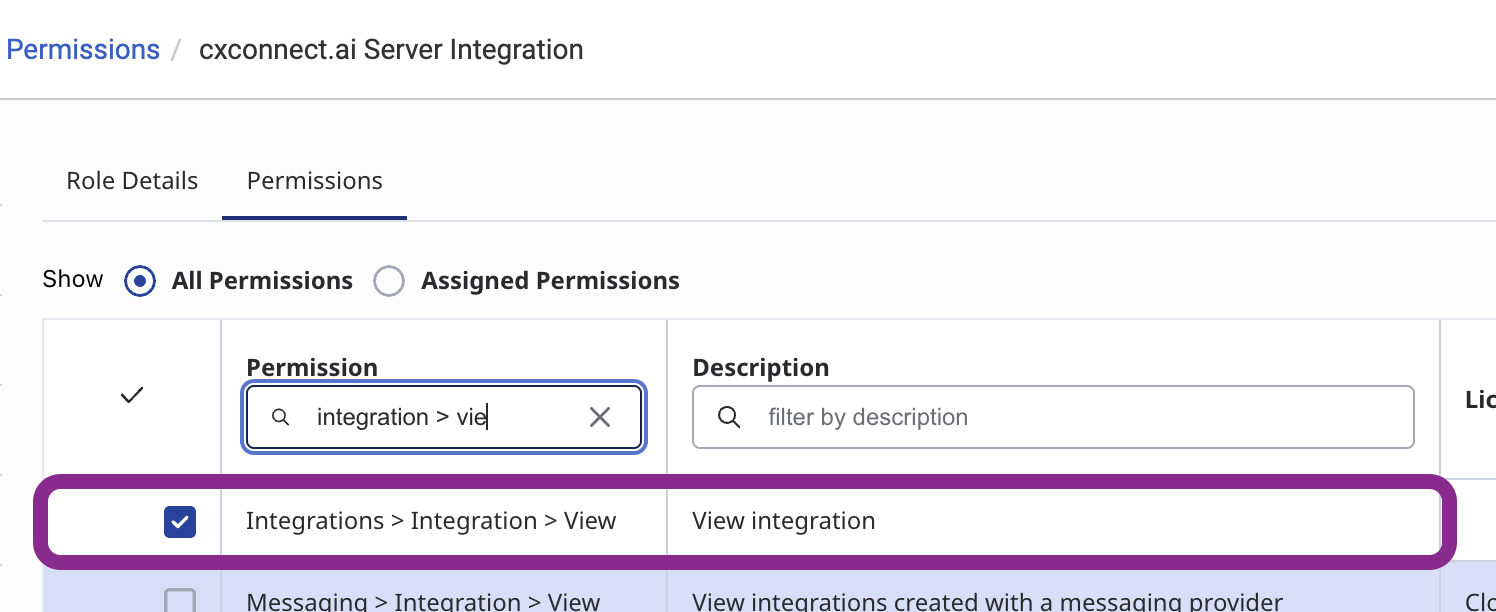 * On the Permissions tab search, find, and select the Integrations > Integration > View permission
# Install and activate the App in Genesys Cloud
## Add the Interaction Widget integration
* Log in to your Genesys Cloud organization and add an integration. For more information, see [Add an integration](https://help.mypurecloud.com/articles/add-an-integration/) in the Genesys Cloud Resource Center.
* On the Permissions tab search, find, and select the Integrations > Integration > View permission
# Install and activate the App in Genesys Cloud
## Add the Interaction Widget integration
* Log in to your Genesys Cloud organization and add an integration. For more information, see [Add an integration](https://help.mypurecloud.com/articles/add-an-integration/) in the Genesys Cloud Resource Center.
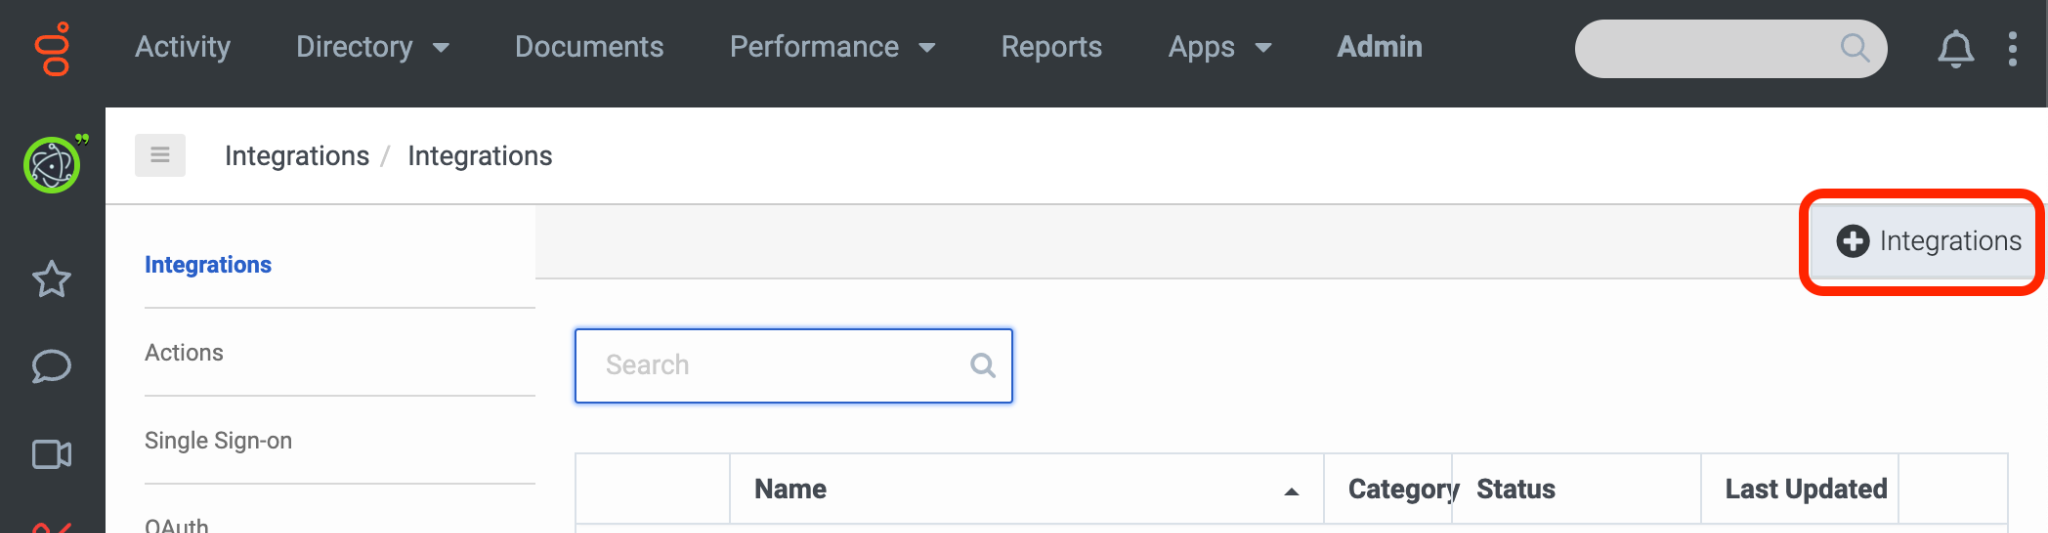 * Install the Interaction Widget integration.
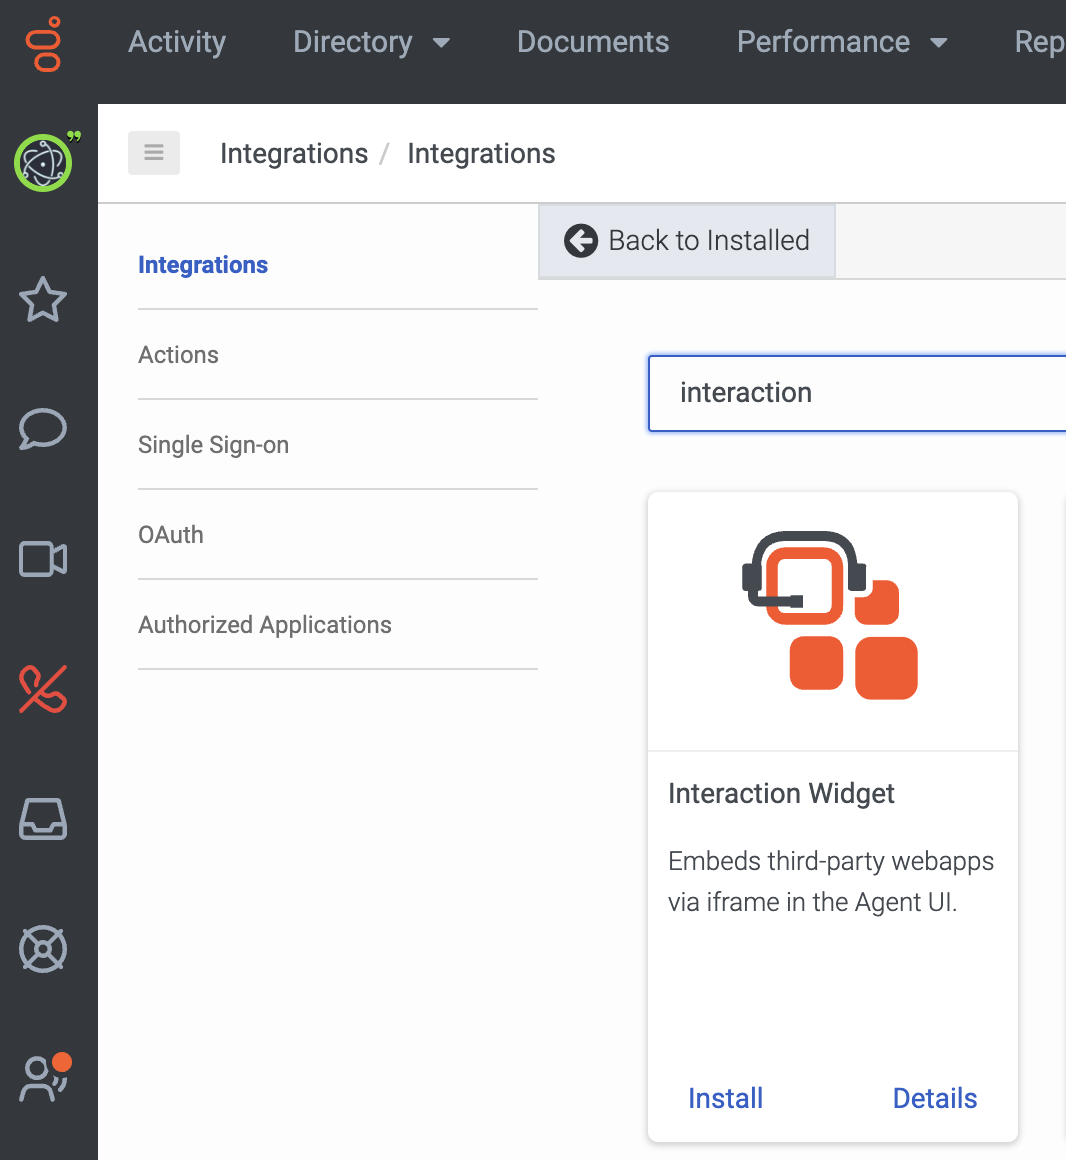 * Name the application.
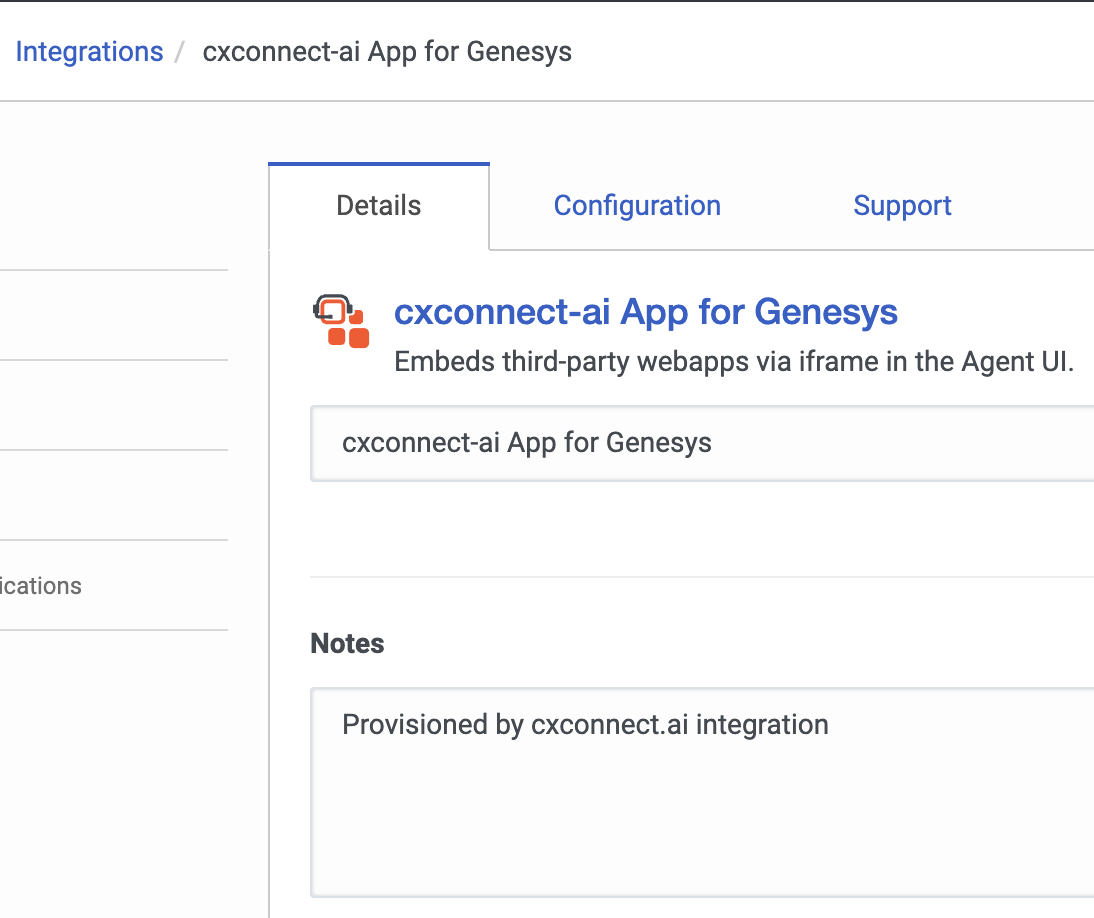 ## Configure the Application URL
* Click the **Configuration** tab.
## Configure the Application URL
* Click the **Configuration** tab.
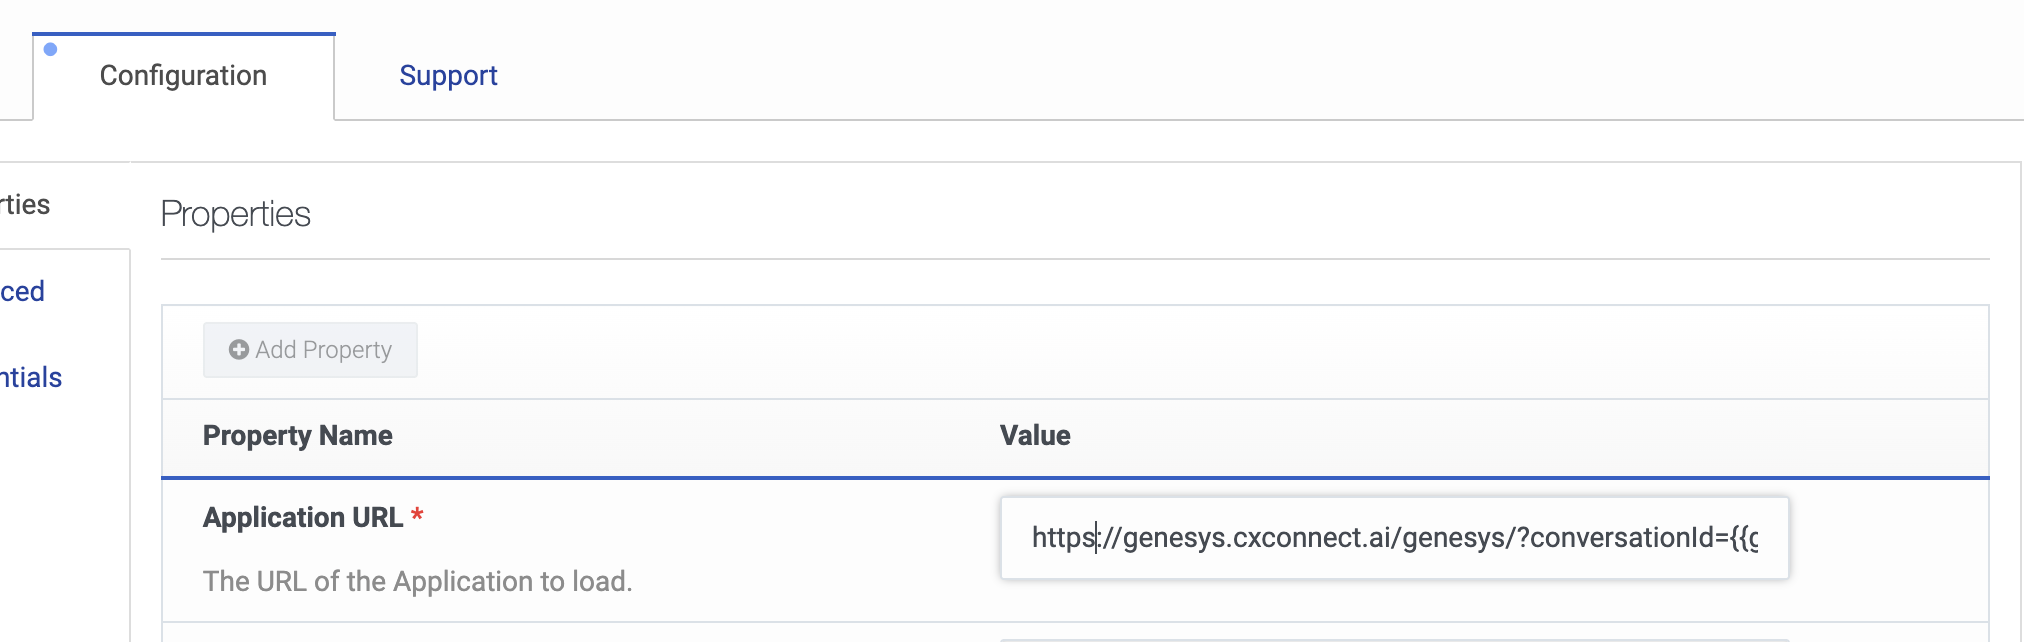
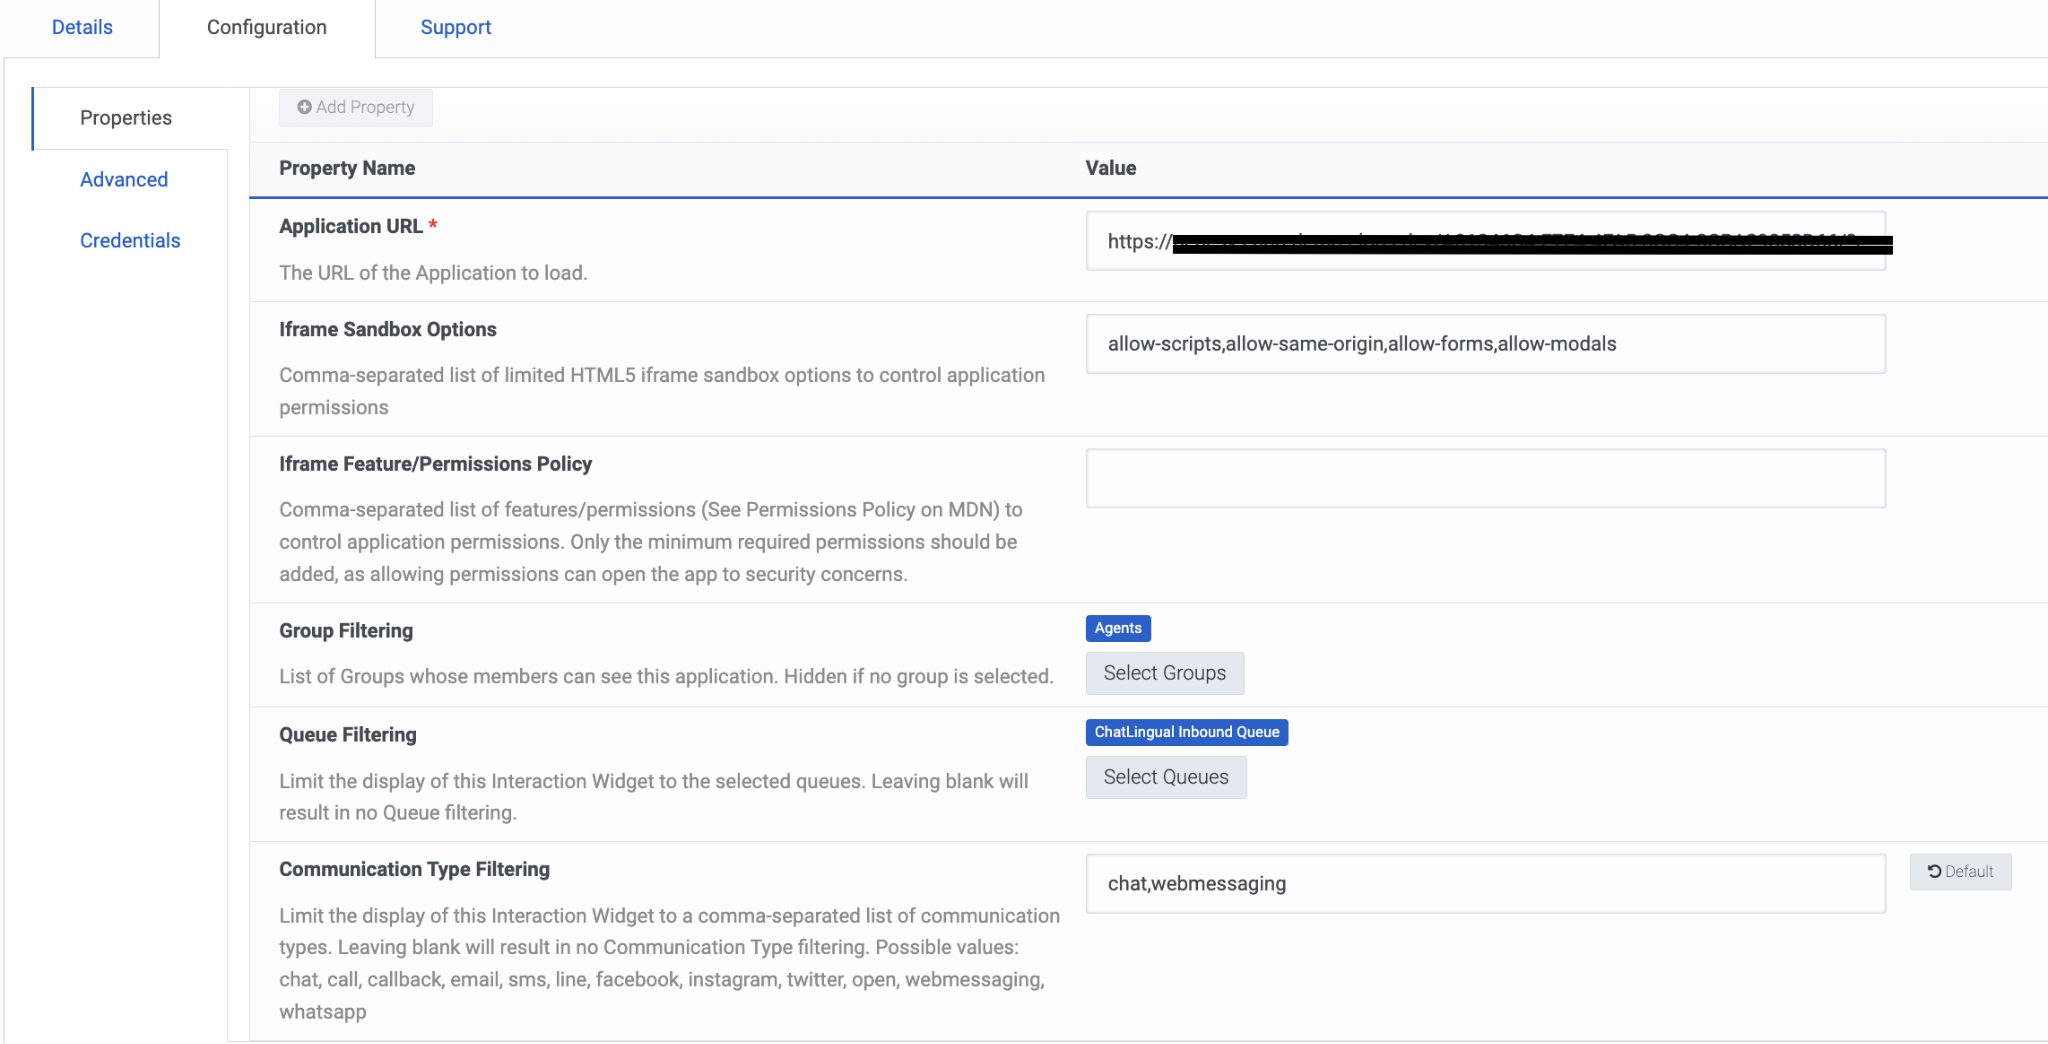
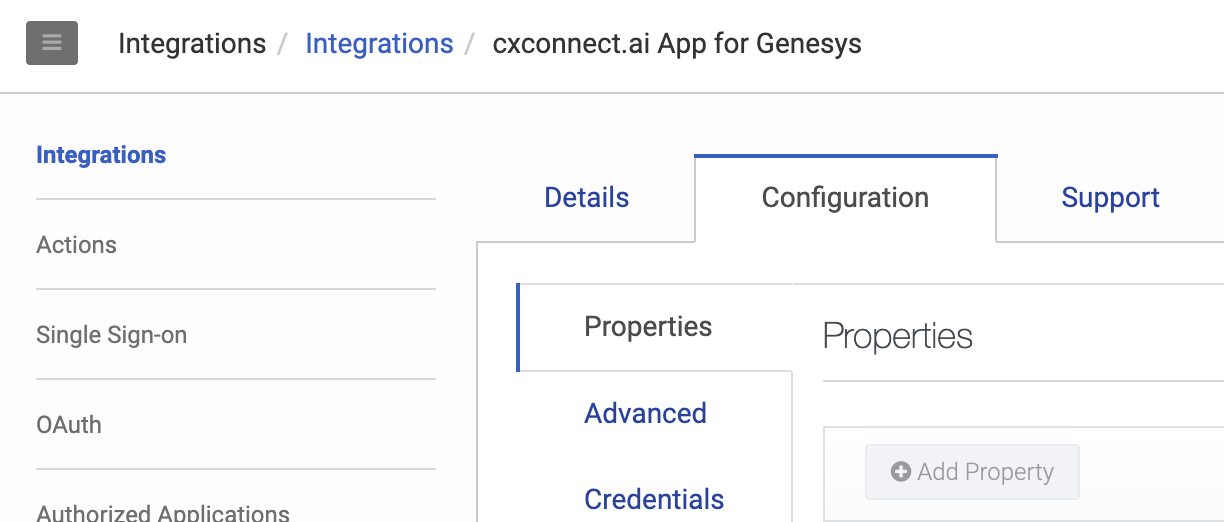 * In the **Application URL** box, type the URL of the web application. Be sure to specify the full URL, beginning with *https:*
For Production
```javascript theme={null}
https://genesys.cxconnect.ai/genesys/?conversationId={{gcConversationId}}&language={{gcLangTag}}&orgId=YOUR_ORG_ID&targetEnv={{gcTargetEnv}}&hostOrigin={{gcHostOrigin}}
```
For Test
```javascript theme={null}
https://test.genesys.cxconnect.ai/genesys/?conversationId={{gcConversationId}}&language={{gcLangTag}}&orgId=YOUR_ORG_ID&targetEnv={{gcTargetEnv}}&hostOrigin={{gcHostOrigin}}
```
These parameters allow the application to know which interaction and what language the agent prefers.
* In the **Application URL** box, type the URL of the web application. Be sure to specify the full URL, beginning with *https:*
For Production
```javascript theme={null}
https://genesys.cxconnect.ai/genesys/?conversationId={{gcConversationId}}&language={{gcLangTag}}&orgId=YOUR_ORG_ID&targetEnv={{gcTargetEnv}}&hostOrigin={{gcHostOrigin}}
```
For Test
```javascript theme={null}
https://test.genesys.cxconnect.ai/genesys/?conversationId={{gcConversationId}}&language={{gcLangTag}}&orgId=YOUR_ORG_ID&targetEnv={{gcTargetEnv}}&hostOrigin={{gcHostOrigin}}
```
These parameters allow the application to know which interaction and what language the agent prefers.
 ## Configure Iframe Sandbox Options
* In the **Iframe Sandbox Options** box, add the following:
```javascript theme={null}
allow-scripts,allow-same-origin,allow-forms,allow-modals
```
## Set Group and Queue Filtering
* To limit access to specific groups of agents, in **Group Filtering**, select the groups that can use the application. **Note:** if no groups are assigned, no one will be able to see the app.
## Configure Iframe Sandbox Options
* In the **Iframe Sandbox Options** box, add the following:
```javascript theme={null}
allow-scripts,allow-same-origin,allow-forms,allow-modals
```
## Set Group and Queue Filtering
* To limit access to specific groups of agents, in **Group Filtering**, select the groups that can use the application. **Note:** if no groups are assigned, no one will be able to see the app.
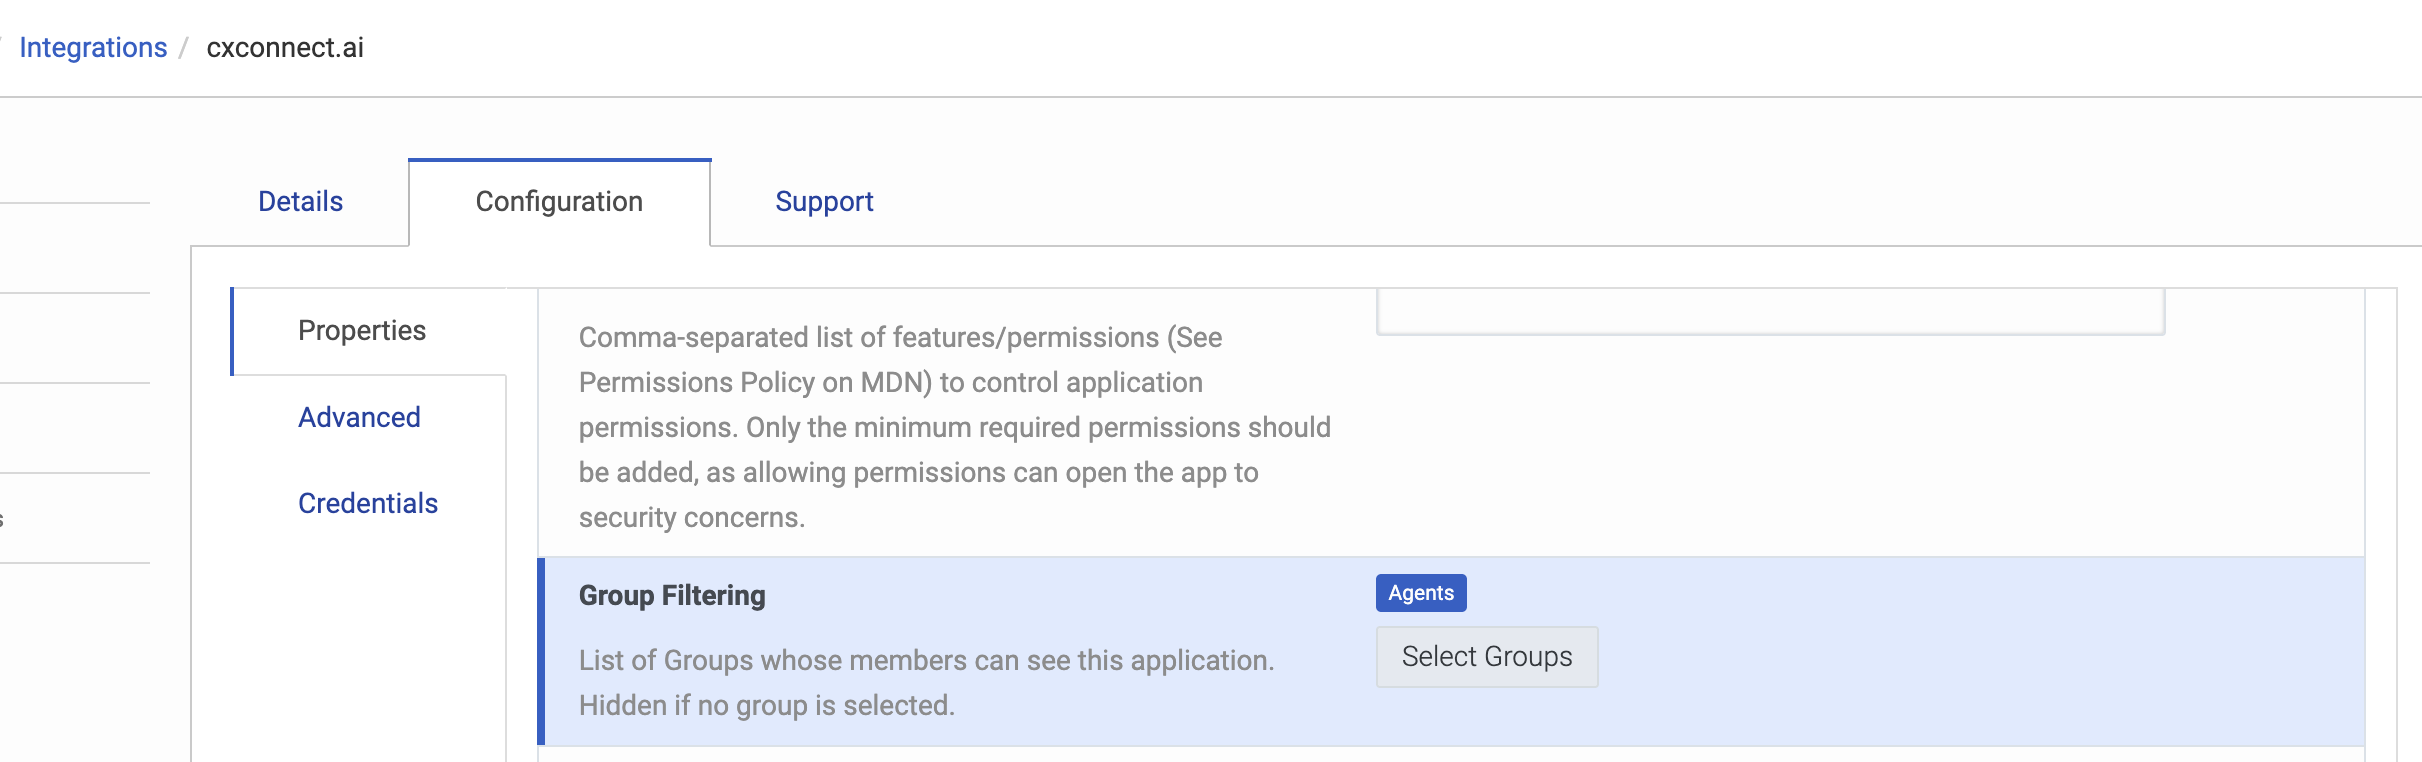 * To limit access to specific queues, click **Select Queues** and select the queues that can use the application.
* In the **Communication Type Filtering** box, type: *chat,webmessaging*
* To limit access to specific queues, click **Select Queues** and select the queues that can use the application.
* In the **Communication Type Filtering** box, type: *chat,webmessaging*
 ## Configure Advanced Settings
* Click **Advanced** and enter the following code in the text area. Then save and activate the integration.
```javascript theme={null}
{
"lifecycle": {
"ephemeral": false,
"hooks": {
"blur": true,
"focus": true,
"bootstrap": false,
"stop": true
}
},
"icon": {
"48x48": "https://www.chatlingual.com/wp-content/uploads/2022/05/cropped-favicon-192x192.png",
"36x36": "https://www.chatlingual.com/wp-content/uploads/2022/05/cropped-favicon-180x180.png",
"24x24": "https://www.chatlingual.com/wp-content/uploads/2022/05/cropped-favicon-32x32.png",
"72x72": "https://www.chatlingual.com/wp-content/uploads/2022/05/cropped-favicon-270x270.png"
}
}
```
# Activating your cxconnect.ai widget
* Once your integration widget is successfully created cxconnect.ai must have the following to activate the installation:
* The installed widget ID, usually found in the URL, example:
```
embedded-client-app-interaction-widget/aa0489-6283-4656-ac3d-9505aedee418
```
* Your [organization ID](https://help.mypurecloud.com/faqs/how-do-i-find-my-organization-id/)
* Your Genesys Cloud region (e.g., `us_east_1`, `eu_west_1`, etc.) [reference](https://help.mypurecloud.com/articles/aws-regions-for-genesys-cloud-deployment/#tab2)
* The frontend OAuth Code Authorization / PKCE client ID and client secret [created above](./off-market#create-an-oauth-code-authorization-%2F-pkce-client)
* The backend OAuth Credentials Client ID and Client Secret [created above](./off-market#create-an-oauth-client-credentials-client).
* You may email these contents directly to [help@cxconnect.ai](mailto:help@cxconnect.ai) or securely send in whichever way your organization typically sends similar information.
#
# Accessing the Application
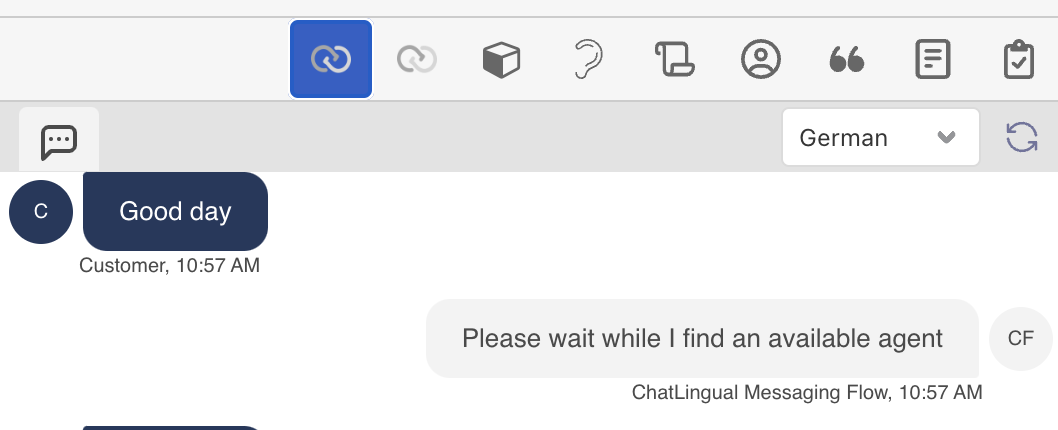
In your agent conversation view, if you have access, the cxconnect.ai application should now be discoverable!\\
## Configure Advanced Settings
* Click **Advanced** and enter the following code in the text area. Then save and activate the integration.
```javascript theme={null}
{
"lifecycle": {
"ephemeral": false,
"hooks": {
"blur": true,
"focus": true,
"bootstrap": false,
"stop": true
}
},
"icon": {
"48x48": "https://www.chatlingual.com/wp-content/uploads/2022/05/cropped-favicon-192x192.png",
"36x36": "https://www.chatlingual.com/wp-content/uploads/2022/05/cropped-favicon-180x180.png",
"24x24": "https://www.chatlingual.com/wp-content/uploads/2022/05/cropped-favicon-32x32.png",
"72x72": "https://www.chatlingual.com/wp-content/uploads/2022/05/cropped-favicon-270x270.png"
}
}
```
# Activating your cxconnect.ai widget
* Once your integration widget is successfully created cxconnect.ai must have the following to activate the installation:
* The installed widget ID, usually found in the URL, example:
```
embedded-client-app-interaction-widget/aa0489-6283-4656-ac3d-9505aedee418
```
* Your [organization ID](https://help.mypurecloud.com/faqs/how-do-i-find-my-organization-id/)
* Your Genesys Cloud region (e.g., `us_east_1`, `eu_west_1`, etc.) [reference](https://help.mypurecloud.com/articles/aws-regions-for-genesys-cloud-deployment/#tab2)
* The frontend OAuth Code Authorization / PKCE client ID and client secret [created above](./off-market#create-an-oauth-code-authorization-%2F-pkce-client)
* The backend OAuth Credentials Client ID and Client Secret [created above](./off-market#create-an-oauth-client-credentials-client).
* You may email these contents directly to [help@cxconnect.ai](mailto:help@cxconnect.ai) or securely send in whichever way your organization typically sends similar information.
#
# Accessing the Application
In your agent conversation view, if you have access, the cxconnect.ai application should now be discoverable!\\